Cracking the Code: My 2026 Practical AI Workflow for Students (AI Assistants, Prompts & Automation Made Easy)
Key Takeaways
- Module 1: Comprehensive Foundations & Concept Primer
- Why a 'Workflow' is Your Secret Weapon in 2026
- Demystifying the Jargon: AI Concepts as Simple Analogies
- The Ethical Compass: Using AI to Learn, Not to Cheat
- Module 2: Prerequisites & Complete Environment Setup

As the Principal Technology Research Editor at Shahrukh Khalid’s publication, I spend my days immersed in the future of technology. I get to see, test, and sometimes even break the tools that will redefine our world. But out of everything I’ve seen—from quantum computing concepts to bleeding-edge robotics—the single most transformative force I’ve encountered for personal productivity is the rise of practical, accessible Artificial Intelligence.
And I’m not talking about the sci-fi stuff. I’m talking about a tangible, achievable system that can fundamentally change how you approach your studies. For years, I’ve watched students juggle an impossible load of lectures, readings, assignments, and exams. The pressure is immense. But what if you had a team of brilliant, tireless assistants working for you 24/7? A research assistant who can summarize dense academic papers in seconds, a personal tutor who can explain complex concepts in simple terms, and an administrative assistant who can organize your notes and create study materials automatically.
That’s not a far-off dream for 2030. That’s what I want to help you build today.
This isn’t just another list of “Top 10 AI tools.” This is a masterclass. A complete, step-by-step guide to building your own Practical AI Workflow. We’re going to move beyond simply asking an AI to write an essay (which you should never do, and we’ll talk about why) and instead build a sophisticated, ethical, and incredibly powerful system that helps you learn faster, understand deeper, and reclaim your time. By the end of this guide, you won’t just be a user of AI; you’ll be an architect of your own enhanced learning environment.
Let’s get started.
Comprehensive Foundations & Concept Primer

Before we dive into the nuts and bolts, let’s build a solid foundation. I know the term “Artificial Intelligence” can feel intimidating, conjuring images of complex code and supercomputers. But I want you to forget all that. For our purposes, I want you to think of AI in a much simpler way.
Imagine you’re building a house. You wouldn’t just start throwing bricks on top of each other. You’d start with a blueprint. You’d understand the materials—what wood is for, what concrete is for, how electricity works. This module is our blueprint. We’re going to understand the core materials and principles before we start building your academic powerhouse.
Why a ‘Workflow’ is Your Secret Weapon in 2026
You’ve probably used an AI chatbot like ChatGPT or Google’s Gemini. You ask a question, you get an answer. It’s useful, like having a calculator for words. But a calculator is just one tool. A Practical AI Workflow, on the other hand, is an entire system.
Think of it this way:
- Using a single AI tool is like hiring a freelance researcher for one specific task. You have to find them, brief them, get the work, and then figure out what to do with it. It’s a manual, one-off transaction.
- Building a Practical AI Workflow is like having a full-time, in-house team of assistants. They know your projects, they talk to each other, and they work automatically in the background. Your research assistant (the AI) automatically sends its summaries to your archivist (your note-taking app), who then alerts your study coach (your flashcard app) to prepare for your next exam.
This interconnected system is what separates casual users from power users. By 2026, the students who thrive won’t be the ones who are best at Googling; they’ll be the ones who are best at designing systems to manage and process information. This workflow is that system. It’s designed to augment your intelligence, not replace it. It handles the tedious, repetitive tasks—summarizing, organizing, formatting—so you can focus on the things that truly matter: critical thinking, creativity, and deep understanding.
Demystifying the Jargon: AI Concepts as Simple Analogies
The world of AI is filled with acronyms and technical terms. Let’s translate the most important ones into plain English.
- Large Language Model (LLM): This is the “brain” of the AI assistant. Think of it as the most advanced autocorrect you’ve ever seen. It has been trained on a colossal amount of text and images from the internet, so it’s incredibly good at predicting the next word in a sequence. When you ask it to “explain photosynthesis,” it’s not thinking; it’s predicting the most probable and coherent sequence of words that form a good explanation of photosynthesis. That’s its superpower and its weakness (which we’ll cover in Module 6).
- API (Application Programming Interface): This is one of the most important concepts for our workflow. Don’t let the name scare you. An API is simply a waiter. Imagine you’re at a restaurant. You (your note-taking app) want a “summary of this article” (your order). You don’t go into the kitchen yourself. You give your order to the waiter (the API). The waiter takes it to the kitchen (the LLM, like Google’s Gemini), which prepares the dish (the summary). The waiter (API) then brings the finished dish back to your table. The API is the messenger that allows different software applications to talk to each other without needing to know the messy details of how the other works.
- Prompt Engineering: This is the art and science of talking to an AI. If an LLM is a brilliant but very literal intern, a prompt is the set of instructions you give it. A vague instruction like “write about history” will get you a vague, useless response. A specific, well-structured prompt like, “Acting as a university history professor, provide a bullet-point summary of the key economic, political, and social causes of the French Revolution, intended for a first-year undergraduate student,” will get you a much more valuable result. Prompt engineering for students is about learning how to ask the right questions to get the right answers for your academic needs.
- Automation: This is what ties our workflow together. Think of it as setting up a series of dominoes. You just have to push the first one, and the rest fall into place automatically. In our workflow, “tagging a note with
#summarize” is the first domino. Automation is the magic that sees that tag, sends the note to the AI via its API, gets the summary back, and puts it right where you need it, all while you’re grabbing a coffee. This is the key to unlocking true student AI productivity.
The Ethical Compass: Using AI to Learn, Not to Cheat
Let’s address the elephant in the room. Can AI be used to cheat? Absolutely. And doing so is not only academically dishonest but also a massive disservice to your own education. You’re here to learn, to grow your mind, and to become a capable expert in your field. Having an AI write your essay for you achieves none of those things.
Our Practical AI Workflow is built on a different philosophy. We use AI as a cognitive tool, an intellectual sparring partner.
- You don’t ask it to write your essay. You ask it to critique your essay outline, suggest counterarguments, or find supporting evidence for a point you’re trying to make.
- You don’t ask it to do your homework. You ask it to explain the complex formula from your physics homework so you can solve it yourself.
- You don’t ask it for the answer. You ask it to generate practice questions so you can test your own knowledge before the exam.
Think of it like a calculator in a math class. It’s a tool to speed up the tedious calculations, but you still need to understand the underlying mathematical principles to know which buttons to press and whether the answer makes sense. AI is your calculator for information and ideas. Always be the one in control, always verify the information, and always do your own thinking. This is how students can use AI for academic success ethically and effectively.
Prerequisites & Complete Environment Setup
Alright, theory is over. It’s time to get our hands dirty and set up your digital workshop. This module is all about laying the practical groundwork for your workflow. I’ll walk you through every single step, from creating accounts to configuring your tools. By the end of this section, you’ll have a fully prepared environment, ready to be automated.
For this masterclass, I’ve chosen a specific “stack” of tools that are powerful, flexible, and beginner-friendly.
- AI Assistant Core: Google Gemini (via API). We’re using Google’s models because of their powerful capabilities, generous free tiers for developers, and excellent documentation, which you can always reference at
ai.google.dev/docs. - Knowledge Hub: Obsidian. This is a free, powerful note-taking app that stores your notes as plain text files on your computer. This gives you ultimate control and makes it easy for scripts and other apps to interact with your knowledge base. (You can adapt these principles to Notion, but Obsidian’s local-first approach is fantastic for this kind of automation).
- Automation Engine: We’ll explore two paths:
- No-Code Path: Make.com (formerly Integromat). It has a more generous free tier than Zapier and a more visual interface that I find helps in understanding the flow of data.
- Low-Code Path: Python. For those who are a bit more adventurous, a simple Python script offers unparalleled power and flexibility. Don’t worry if you’ve never coded before; I’ll guide you through it.
Step 1: Setting Up Your Core Tools
First things first, let’s get our accounts and software in order.
- Google AI Studio (for Gemini API Key):
- Go to
aistudio.google.com. - Sign in with your Google account.
- You might be presented with some introductory pop-ups. Read and agree to the terms.
- In the top left, you’ll see a button that says “Get API key“. Click it.
- A new window will open. Click “Create API key in new project“.
- Your API key will be generated. It’s a long string of letters and numbers. TREAT THIS LIKE A PASSWORD. Do not share it publicly. Copy it and paste it into a temporary, secure text file for now. We’ll store it properly in a moment.
- Plain-English Explanation: The API Key is like a secret key to your apartment. You give a copy to trusted services (our automation tools) so they can enter and deliver things (data) on your behalf. You’d never post your apartment key on the internet, so don’t post your API key either.
- Obsidian (Your Knowledge Hub):
- Go to
obsidian.mdand download the installer for your operating system (Windows, Mac, Linux). - Install the application.
- When you first open Obsidian, it will ask you to open a “vault”. A vault is just a fancy name for a folder on your computer where all your notes will be stored.
- Click “Create new vault“. Give it a name like
My-AI-Workflow-Vaultand choose a location on your computer that’s easy to access (e.g., in yourDocumentsfolder). Click “Create”. - That’s it! You’re now inside your new, empty knowledge hub.
- Make.com (Our No-Code Automation Engine):
- Go to
make.com. - Sign up for a free account. The free plan is more than enough to get started and run several powerful workflows.
- Confirm your email and log in. You’ll be greeted by your dashboard. We’ll come back here in Module 4 to build our first automation.
Step 2: Structuring Your Project Directory
Organization is key. A clean folder structure prevents chaos later on. Inside the Obsidian vault folder you just created (My-AI-Workflow-Vault), let’s create a few sub-folders. You can do this directly in your computer’s file explorer or within Obsidian’s file panel on the left.
Your directory layout should look like this:
├── 00_Inbox/
├── 10_Processing/
│ ├── _templates/
│ └── _scripts/
├── 20_Library/
│ ├── Courses/
│ ├── Readings/
│ └── Projects/
└── 99_Archive/
00_Inbox/: This is where all new, unprocessed information goes. A web clip, a quick idea, a lecture note. Its job is to be messy.10_Processing/: A temporary holding area._templates/: We’ll store our prompt templates here later._scripts/: If you choose the Python path, this is where your script will live.20_Library/: Your organized, permanent knowledge base. This is where notes go after they’ve been processed and refined. You can structure this however you like (by class, topic, etc.).99_Archive/: For old or irrelevant notes.
This structure, inspired by productivity methods like Zettelkasten and Getting Things Done, creates a clear path for information to travel through your system.
Step 3: Environment Configuration (For the Low-Code Python Path)
If you’re going the no-code route with Make.com, you can skip to the next module! If you’re ready for a little code, let’s set up your Python environment.
- Plain-English Explanation: We’re about to use the Command-Line Interface (CLI), also known as the Terminal or Command Prompt. It looks scary, but it’s just a text-based way to give your computer direct commands, like a remote control. It’s often faster and more powerful than clicking on icons.
- Install Python: If you’re on a Mac or Linux, you likely already have Python installed. If you’re on Windows, or want the latest version, go to
python.org, download the installer, and run it. Crucially, on the first screen of the Windows installer, make sure to check the box that says “Add Python to PATH”. This makes it easy to run Python from the CLI. - Verify Installation: Open your CLI.
- On Windows: Press
Win + R, typecmd, and press Enter. - On Mac: Open the
Terminalapp (you can find it in Applications/Utilities). - Type
python --versionorpython3 --versionand press Enter. You should see a version number likePython 3.11.4. If you get an error, it means Python wasn’t installed correctly or added to your PATH. - Install the Google AI Library: In the same CLI window, we’ll use
pip, Python’s package manager (think of it as an app store for code libraries). Run the following command:
This downloads and installs the necessary code for our script to talk to the Gemini API.
- Secure Your API Key with Environment Variables: Remember that secret API key? We’re going to store it safely.
- Plain-English Explanation: Instead of pasting your secret key directly into your code (which is a big security risk), we’ll store it as an “environment variable.” Think of it like your computer having a secret pocket. You tell the computer, “Hey, remember this secret key and call it
GEMINI_API_KEY.” Then, your script can just ask the computer, “What’s the secret in yourGEMINI_API_KEYpocket?” without the secret ever being written in the script itself. - In your CLI, navigate to your script folder. Use the
cd(change directory) command. For example:
- Create a file named
.env. The dot at the beginning makes it a hidden file. Inside this file, add one line:
Replace YOUR_API_KEY_HERE with the actual key you copied from Google AI Studio. Save the file.
- To make our Python script read this file, we need one more library. In your CLI, run:
You are now fully set up! You have your AI key, your knowledge hub, your automation engine account, and a perfectly structured directory. Your digital workshop is clean, organized, and ready for the first piece of machinery.
Core Implementation Architecture

Now that our workshop is set up, let’s look at the blueprint for the machine we’re about to build. Understanding the architecture—the “how it all fits together”—is crucial. It transforms you from someone who just follows steps to someone who can design, debug, and adapt the system to their own unique needs.
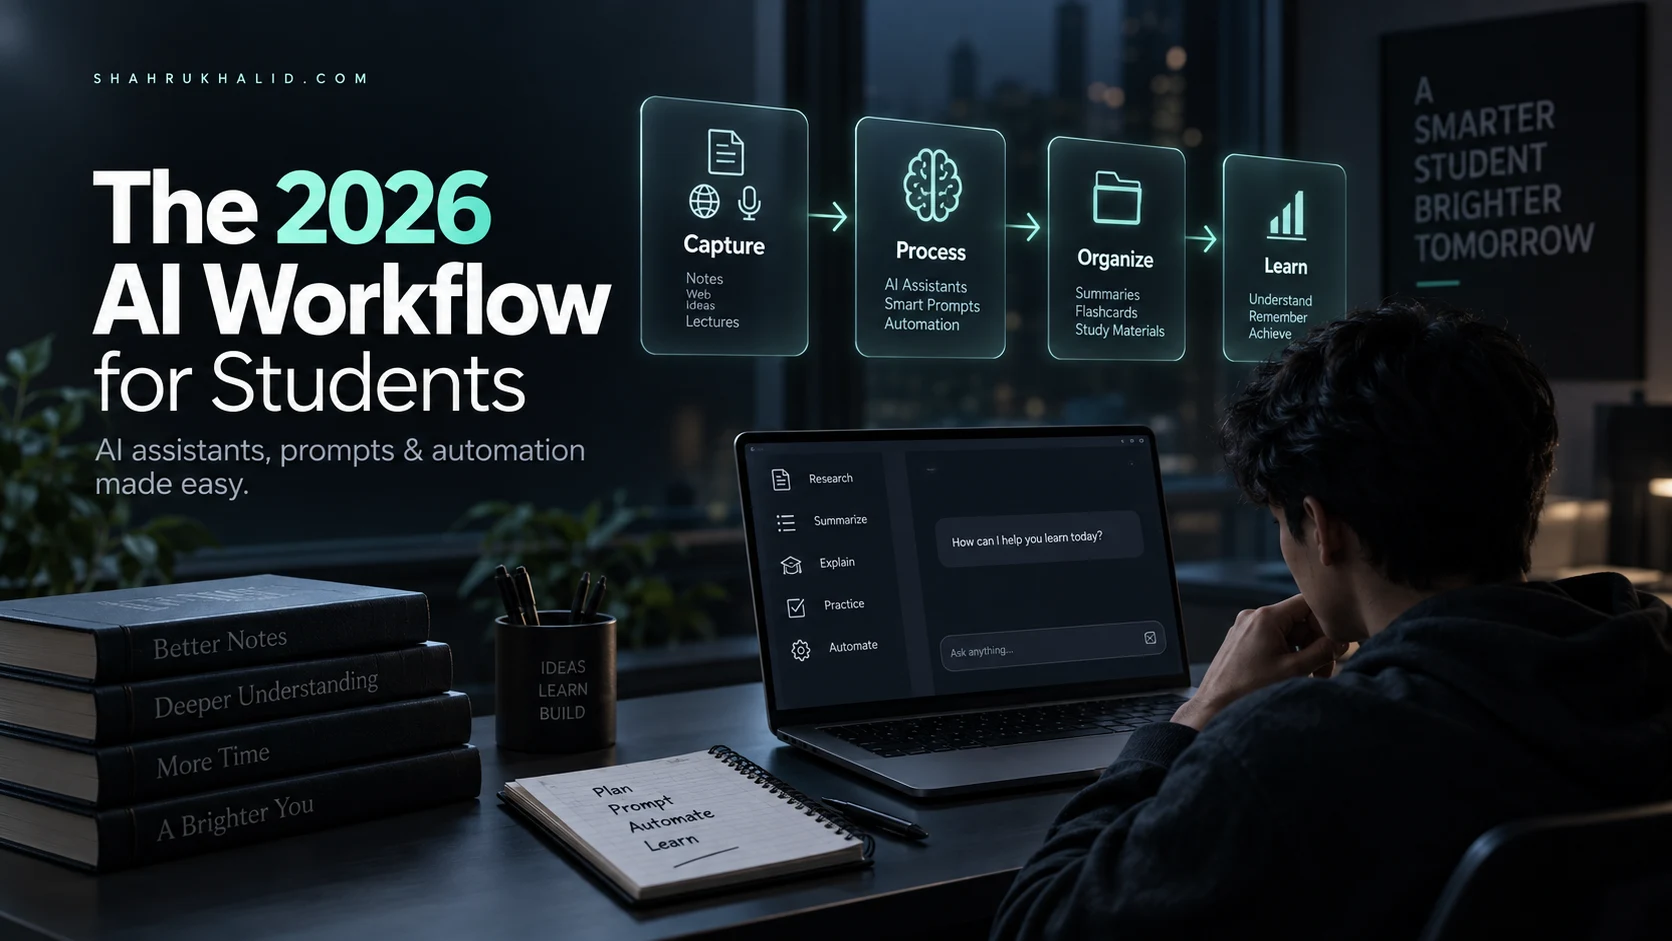
I want you to visualize your Practical AI Workflow as a four-stage assembly line. Information comes in at one end, gets processed and transformed at various stations, and comes out the other end as a valuable, finished product (a refined note, a set of flashcards, a research summary).
We’ll represent this with a “Visual Card Grid” concept. Imagine four large index cards laid out on a table, each describing one stage of the process.
[Visual Card 1] The Capture Hub: Your Gateway for Information
This is the start of your assembly line. The goal of the Capture Hub is to make it as frictionless as possible to get thoughts, ideas, and data into your system. If it’s hard to add something, you won’t do it.
- Function: Ingest raw information from various sources.
- Tools:
- Obsidian: For direct note-taking during a lecture or while reading.
- Web Clipper: A browser extension (like MarkDownload or Readwise) that saves articles or web pages as clean text files directly into your
00_Inboxfolder. - Voice-to-Text App: An app on your phone (like Google Recorder or Otter.ai) that can transcribe your spoken thoughts or lecture snippets. You can then easily share the text file to your Inbox.
- Email: You can even set up a special email address (using services like IFTTT) that automatically saves any email you send it as a text file in your Inbox.
- The Trigger Mechanism: This is the most important part of the Capture Hub. How do we tell the assembly line which machine to use? We use tags or specific syntax. When you create a note, you add a special instruction.
#summarize: Tells the workflow to generate a concise summary.#explainELi10: Tells the workflow to explain the concept in simple terms, as if you were 10 years old.#generateQuestions: Tells the workflow to create a list of potential exam questions based on the text.#createFlashcards: Tells the workflow to format the key information into a question/answer format suitable for flashcard apps.
This simple act of adding a tag is you pushing the first domino. It’s the signal that starts the entire automation.
[Visual Card 2] The Automation Engine: The Central Nervous System
This is the conveyor belt and the robotic arms of our assembly line. It’s the logic that connects all the other pieces. It constantly watches the Capture Hub for a trigger signal.
- Function: Detect a trigger, fetch the relevant data, and route it to the correct processing tool.
- Tools:
- Make.com (No-Code): We will build a “Scenario” that watches for new files in our
00_Inboxfolder. It will read the content of the file, check if it contains one of our special tags, and then proceed to the next step. - Python Script (Low-Code): We will write a script that can be run manually or on a schedule. The script will scan the
00_Inboxfolder, look for files containing our tags, and then execute the appropriate function. - The Data Flow:
- Detection: The engine sees a new file:
My-AI-Workflow-Vault/00_Inbox/photosynthesis-notes.md. - Inspection: It opens the file and reads the content. It finds the tag
#summarizeat the bottom. - Routing: Because it found the
#summarizetag, it knows it needs to send the entire text content of this file to the AI Processing Core with the instruction to “summarize.”
This stage is pure logistics. It doesn’t do any of the “thinking”; it just makes sure the right information gets to the right place at the right time.
[Visual Card 3] The AI Processing Core: The Brain of the Operation
This is the “kitchen” from our API analogy. It’s where the raw ingredients (your notes) are transformed into a gourmet meal (a summary, an explanation, etc.).
- Function: Receive text and a prompt, process it using a Large Language Model, and send back the result.
- Tool: Google Gemini API.
- The Transaction:
- Request (Inbound): The Automation Engine sends an API request. This request contains two key things:
- The Prompt: A carefully crafted instruction. It’s not just “summarize.” It’s a full set of instructions we will design in the next module. For example: “You are an expert academic assistant. Your task is to summarize the following text into three clear, concise bullet points. Focus on the core mechanism, the inputs, and the outputs of the process described. Here is the text: [Your note content is inserted here]”.
*