How to Build Your First Local AI Agent in 2026: A Complete Beginner’s Step-by-Step Guide
Key Takeaways
- Local AI agents run offline on your computer, ensuring privacy and data security.
- An AI agent uses an LLM/SLM 'brain' on your machine's hardware (CPU/GPU/NPU).
- Agents leverage your personal data (documents, notes) for highly custom, context-aware responses.
- AI has shifted from distant data centers to powerful, personal, offline computing.
- This guide enables beginners to build a working, custom local AI agent.
Editor’s Note: This Masterclass is a living document. As the landscape of local AI evolves at a breathtaking pace, we at Shahrukh Khalid | Technology News & Insights, are committed to keeping this guide updated with the latest tools, techniques, and best practices for 2026 and beyond. Bookmark this page as your definitive resource.
You’re here because you’ve felt that pull, too. That curiosity about what it would be like to have your own private AI assistant, one that respects your privacy, works without an internet connection, and is tailored specifically to your needs. Forget the hype and the jargon. Today, you and I are going to roll up our sleeves and do something amazing. We are going to build a local AI agent from the ground up. This isn’t a theoretical exercise; this is a practical, hands-on guide designed for absolute beginners. By the end of this masterclass, you will have a working, custom AI agent running on your own computer. Let’s get started.
Comprehensive Foundations & Concept Primer
Before we write a single line of code, it’s crucial we’re on the same page. The world of AI is filled with intimidating terms, but the core concepts are surprisingly intuitive. My goal in this module is to demystify it all, giving you a rock-solid foundation for everything that follows.
What Exactly Is a Local AI Agent? An Analogy
Let’s answer the big question first: What is a local AI agent?
Imagine you have a personal librarian. This isn’t just any librarian; this one lives inside a small, private office you’ve built right in your home. This librarian has read every book you’ve ever given them, remembers every conversation you’ve had, and works exclusively for you. They don’t need a phone line to the main library, they don’t report your reading habits to anyone, and they’re available 24/7, even when the internet is down. Their entire world is your office, and their entire purpose is to help you with your information needs.
That, in a nutshell, is a local AI agent.
- The “Librarian” is the AI model itself—a Large Language Model (LLM) or a smaller, more efficient Small Language Model (SLM). This is the “brain” that can understand language, reason, and generate text.
- The “Private Office” is your computer—your laptop or desktop. The agent runs directly on your machine’s hardware (its CPU, GPU, or a specialized NPU).
- The “Books You’ve Given Them” are your personal data—your documents, notes, emails, or code. The agent can use this information to provide highly personalized and context-aware answers.
- The “No Phone Line” part is the key: it’s “local.” It runs completely offline, meaning your data never leaves your machine. This is a monumental shift in how we think about privacy and data security.
So, a local AI agent is a software program on your computer that uses an AI model to perform tasks, answer questions, and assist you, all without needing to connect to the internet or send your data to a third-party company. This is the heart of offline AI development and the foundation of creating a truly personal AI agent.
Why 2026 is the Year of the Local AI Agent
You might be wondering, “Why now?” For years, the best AI models were the exclusive domain of tech giants with city-sized data centers. That’s changed. Three key trends have converged to make 2026 the perfect time for our DIY AI agent guide.
- Hardware Got Personal and Powerful: The laptop you buy in 2026 is a miniature supercomputer. CPUs and GPUs are more powerful than ever, but the real game-changer is the rise of the NPU (Neural Processing Unit). This is a specialized chip designed specifically to run AI models locally with incredible efficiency. It’s like having a dedicated “AI engine” in your car, making the whole system run faster and use less power.
- Models Got Smaller and Smarter: The research community has made incredible strides in creating smaller, highly capable AI models. We’ve moved from behemoth models with hundreds of billions of parameters to lean, powerful “Small Language Models” (SLMs) that can run on consumer hardware while still providing amazing performance. Think of it as the difference between needing a whole library building (GPT-3 era) and having a brilliant, concise encyclopedia (the 2026 SLM era).
- Privacy Became a Priority: As we’ve integrated cloud-based AI into our lives, we’ve also become more aware of the trade-offs. Every query we send to a cloud AI is data that’s being collected, stored, and potentially used for training or advertising. The desire for digital sovereignty and data privacy is at an all-time high. Local AI is the definitive answer to this, putting you back in control.
This convergence means that building a powerful, private, and personal AI assistant is no longer a futuristic dream. It’s a tangible, achievable, and incredibly rewarding project for any curious beginner.
Prerequisites & Complete Environment Setup
Alright, theory session is over. It’s time to get our hands dirty and set up our digital workshop. This module is all about preparing your computer for the exciting journey ahead. I’ll walk you through every single click and command. No steps skipped. The goal here is to create a clean, stable, and ready-to-build environment. This is the most critical phase; a solid foundation here prevents headaches later.
Your Digital Toolkit: What We’ll Be Installing
We need a few key pieces of software to make this happen. Don’t worry if these names are new to you; I’ll explain each one as we go.
- Visual Studio Code (VS Code): This will be our code editor. Think of it as a super-powered version of Notepad. It helps us write, organize, and debug our code with helpful color-coding and suggestions. It’s free and the industry standard.
- Python (Version 3.10+): This is the programming language we’ll use. Python is famous for its clean, readable syntax, making it perfect for beginners. It’s also the dominant language in the AI world, with a massive ecosystem of libraries and tools.
- Ollama: This is the magic piece of software that lets us run AI models on my computer. It’s a lightweight, easy-to-use tool that downloads, manages, and serves powerful open-source language models like Llama 3, Gemma, and Mistral, right on your machine. It’s the “private office” for our AI librarian.
Step 1: Installing Visual Studio Code (Your Code Editor)
- Navigate to the official VS Code website: https://code.visualstudio.com/.
- The website will automatically detect your operating system (Windows, macOS, or Linux) and show a big blue “Download” button. Click it.
- Once the download is complete, run the installer. Accept the default settings—they are perfectly fine for our needs. On Windows, make sure to check the boxes for “Add to PATH” and “Open with Code” context menu options during installation. This will make your life easier later.
- Verification: Open VS Code. You should be greeted with a welcome screen. That’s it! You’ve set up your digital workbench.
Step 2: Installing Python (The Language of AI)
Many systems, especially macOS and Linux, come with Python pre-installed. However, we want to ensure we have a modern version. Let’s check.
- Open your computer’s terminal.
- On Windows: Press the Windows key, type
cmdorpowershell, and hit Enter. - On macOS: Go to Applications > Utilities > Terminal.
- On Linux: Usually Ctrl+Alt+T or search for “Terminal”.
- In the terminal, type the following command and press Enter:
Or, on some systems, you might need:
- If you see a version number like
Python 3.10.xor higher, you’re good to go! If not, or if you get an error, let’s install it. - Installation: Go to the official Python website: https://www.python.org/downloads/. Download the latest stable version for your OS.
- Crucial Step for Windows Users: During the installation, you will see a screen with an option that says “Add Python to PATH”. You MUST check this box. This allows you to run Python from the terminal easily.
- Verification: Close and reopen your terminal. Type
python --versionorpython3 --versionagain. You should now see the version you just installed. Success!
Step 3: Installing Ollama (Your Local AI Engine)
This is where the real AI power comes from. Ollama simplifies the incredibly complex process of running a large language model into a few simple commands.
- Navigate to the Ollama website: https://ollama.com/.
- Click the “Download” button. It supports macOS, Linux, and Windows.
- Run the installer. It’s a very straightforward process. On Windows and macOS, it will install a background service. This means Ollama will be running quietly, ready to serve AI models whenever you need it.
- Verification: Once installed, open a new terminal window. The Ollama service should start automatically. To test it, we’ll download our first AI model. We’ll use Google’s
gemma:2bmodel. It’s a fantastic, lightweight model that’s perfect for getting started. In your terminal, run:
- The first time you run this, it will download the model file (it’s a few gigabytes, so it might take a few minutes depending on your internet speed). Once it’s done, you’ll see a prompt like
>>> Send a message.... You are now chatting directly with an AI running 100% on your machine! Type “Hello! Why is the sky blue?” and see it respond. To exit, type/bye. - This simple command is the core of our local AI assistant setup. You’ve just proven you can run AI models locally!
Step 4: Setting Up Your Project Directory
Good organization is key. Let’s create a dedicated folder for our project.
- Create a folder somewhere you’ll remember. I like to have a
projectsfolder in my home directory. Let’s call our projectlocal-ai-agent. - Open VS Code. Go to
File > Open Folder...and select thelocal-ai-agentfolder you just created. - Your VS Code window is now “scoped” to this project. In the left-hand sidebar (the Explorer), you can create new files and folders.
- Let’s create our main Python file. Right-click in the empty space in the Explorer sidebar and select
New File. Name itagent.py. - Let’s also create a file for our agent to read. Right-click again, select
New File, and name itmy_notes.txt. Inside this file, write a few sentences. For example:
Your environment is now fully configured. We have our editor, our programming language, our AI engine, and our project structure. Take a moment to appreciate this – you’ve just completed the foundational work that trips up so many beginners.
Core Implementation Architecture
Now that our workshop is set up, let’s look at the blueprint. Before we start connecting wires and writing code, a good engineer always understands the architecture. How do all these pieces we just installed actually talk to each other to create a functioning agent? This is where many tutorials lose beginners, but we’re going to make it crystal clear.

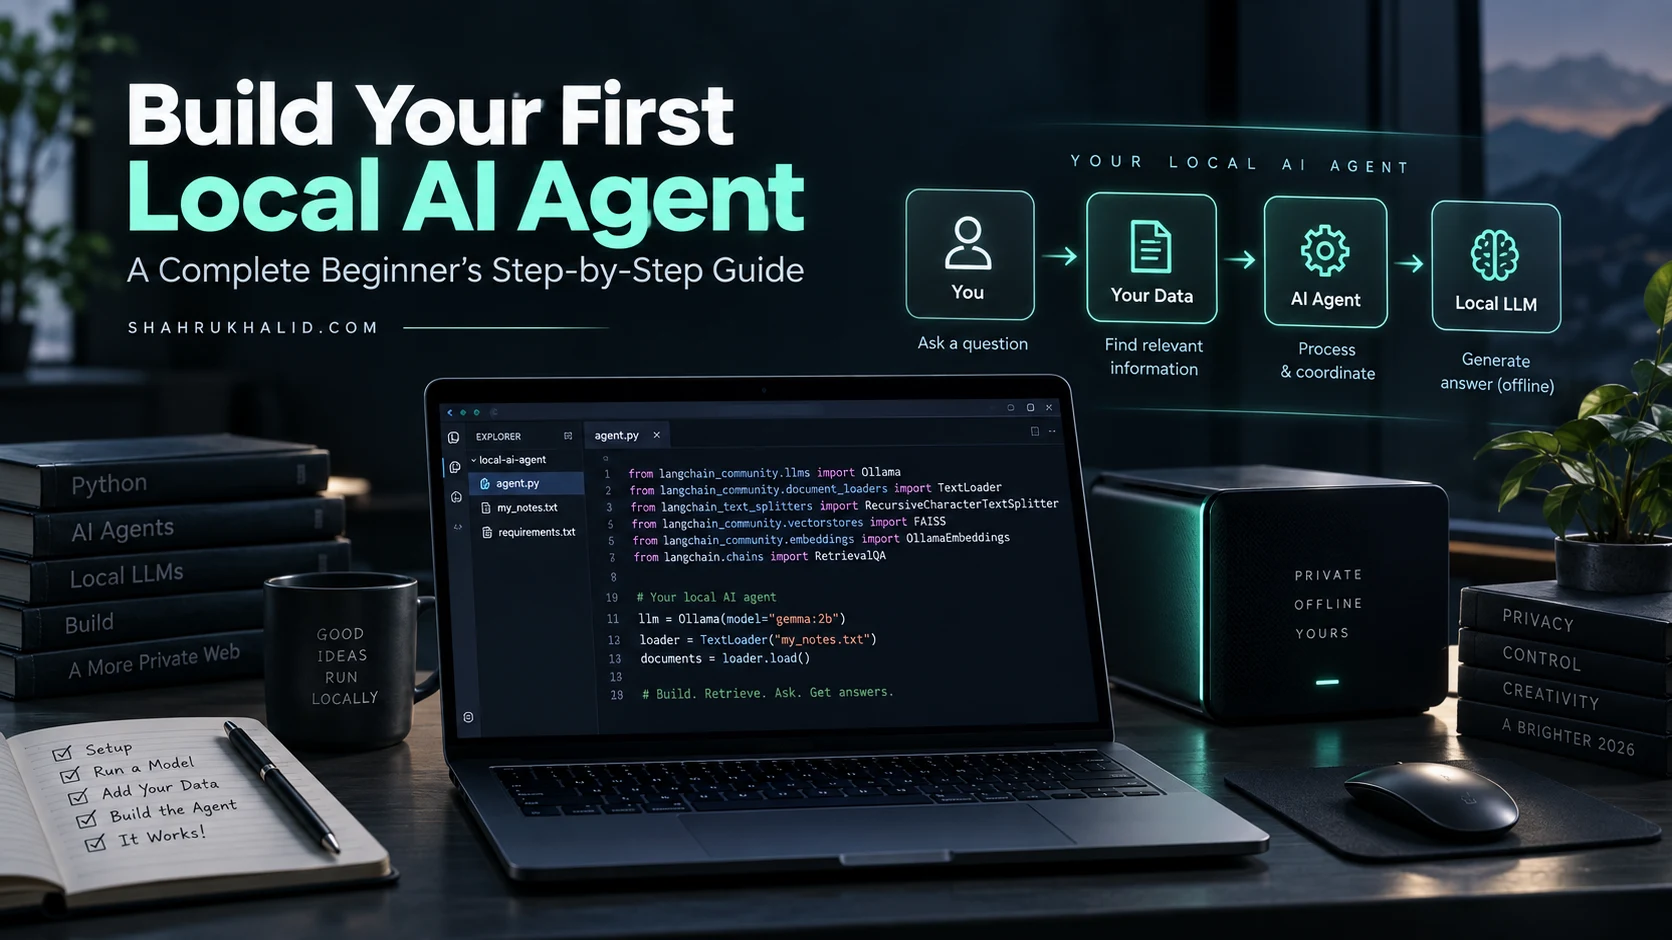
I want you to visualize our system as a set of four interconnected “cards” or “modules” sitting on a table. A request starts at the first card and flows through the system to get an answer.
Visual Card Grid: The Flow of a Query
Imagine this flow from left to right:
[Card 1: User Interface] ==> [Card 2: Agent Brain] ==> [Card 3: Model Engine] ==> [Card 4: The AI Model]
Let’s break down each card in detail.
Card 1: The User Interface (Your Terminal)
What it is: This is how you interact with the agent. For our first project, this will be the simplest interface possible: the command-line terminal you used in the previous module.
Its Job:
- To accept your typed question (e.g., “What is my favorite programming language?”).
- To display the final answer generated by the AI.
Analogy: This is the microphone you speak into to ask our personal librarian a question.
Card 2: The Agent Brain (Our agent.py Script)
What it is: This is the code we are about to write. It’s the central coordinator, the “brains” of the operation. We’ll be using the Python language and a powerful framework called LangChain to build this logic.
Its Job:
- Receive the Query: It takes the question from the User Interface (Card 1).
- Retrieve Context: This is the crucial step for a personal AI. Before asking the AI model, our script will first look inside our local files (like
my_notes.txt). It finds the most relevant snippets of text related to your question. This process is called Retrieval-Augmented Generation (RAG). - Formulate the Prompt: It doesn’t just send your raw question to the AI. It intelligently combines your original question with the relevant text it just found. It puts it all into a carefully crafted “prompt template.” For example: “Based on the following information: [snippets from my_notes.txt], answer this question: [your original question].”
- Send to the Engine: It packages this complete prompt and sends it over to the Model Engine (Card 3).
- Receive and Display: It waits for the answer from the engine, then passes it back to the User Interface (Card 1) to be displayed to you.
Analogy: This is the librarian’s assistant. It hears your question, quickly finds the most relevant books and pages (retrieval), puts them on the librarian’s desk with a sticky note summarizing your request (prompting), and then brings the librarian’s answer back to you.
Card 3: The Model Engine (Ollama)
What it is: This is the Ollama software running in the background on your computer. It’s a server that “hosts” the AI model.
Its Job:
- Listen for Requests: It’s constantly listening for incoming requests from applications like our
agent.pyscript. - Manage the Model: It’s responsible for loading the AI model (Card 4) into your computer’s memory (or VRAM if you have a good GPU) and keeping it ready.
- Process the Prompt: It takes the full prompt from the Agent Brain, feeds it into the AI Model, and manages the complex computation required to generate a response.
- Send Back the Answer: It streams the generated text back to the Agent Brain as it’s created.
Analogy: This is the librarian’s office itself—the infrastructure. It keeps the lights on, ensures the librarian (the model) is comfortable and has everything they need, and manages the flow of requests in and out of the office.
Card 4: The AI Model (gemma:2b)
What it is: This is the actual downloaded model file. It’s a massive network of interconnected numbers (parameters) that has been trained on a vast amount of text data. It’s the core intelligence.
Its Job:
- The “Thinking”: This is where the magic happens. It takes the prompt (the context and the question) from the Model Engine and, based on its training, predicts the most probable sequence of words to form a coherent answer. It’s a highly sophisticated pattern-matching and generation machine.
Analogy: This is the brilliant, knowledgeable librarian. They take the documents and the question provided to them and synthesize a new, well-written answer based on their vast knowledge.
Understanding this flow is half the battle. When you ask your agent a question, you’re not just talking to an AI; you’re kicking off a beautiful, orchestrated process that flows from your terminal, through your custom Python logic, into the Ollama engine, is processed by the AI model, and then flows all the way back. This architecture is the foundation of countless Edge AI solutions and is the key to building robust and scalable personal AI agents.
Hands-on Code & Practical Implementation
This is the moment we’ve been building towards. We’ve got our foundation, we’ve got our blueprint, and now it’s time to build. In this module, I will guide you, line by line, through the creation of our agent.py script. Don’t just copy and paste; try to read the comments and understand what each piece of code is doing. This is how you truly learn.
Step 1: Installing Required Python Libraries
Our agent.py script needs some special tools from the Python ecosystem. We’ll use pip, Python’s package installer, to get them. Open your terminal (make sure you’re not inside the Ollama chat, type /bye if you are) and run the following command:
Let’s quickly break down what we’re installing, with no jargon:
langchain,langchain_community,langchain_core: This is the main LangChain framework. It provides all the building blocks we need to connect the different “cards” of our architecture (the model, our documents, and our prompt). Think of it as a master toolkit for building AI applications.langchain-text-splitters: When we give our agent a document, we need to break it into smaller, manageable chunks. This library does exactly that.faiss-cpu: This is a super-fast library for searching. After we turn our text chunks into numbers (a process called embedding), FAISS helps us find the most relevant chunks for a given question almost instantly. The-cpupart means it’s optimized to run on your computer’s main processor.
Step 2: Writing the agent.py Script
Open your local-ai-agent folder in VS Code. Open the agent.py file. Now, carefully type or paste the following code into the file. I have added extensive comments (the lines starting with #) to explain every single step. This is the core of our personal AI agent creation process.
# We're bringing in the building blocks for our agent from the LangChain library.
print(“Step 1: Importing necessary tools…”)
from langchain_community.llms import Ollama # The tool to talk to our local Ollama model
from langchain_community.document_loaders import TextLoader # The tool to load our .txt file
from langchain_text_splitters import RecursiveCharacterTextSplitter # The tool to split our text into smaller chunks
from langchain_community.vectorstores import FAISS # The tool to create our searchable knowledge base (vector store)
from langchain_community.embeddings import OllamaEmbeddings # The tool to convert text into numerical vectors for searching
from langchain.prompts import PromptTemplate # The tool to create a template for our prompts
from langchain.chains import RetrievalQA # The tool that chains everything together
# Here we set up the main pieces: the AI model, the document loader, and the text splitter.
print(“Step 2: Defining core components…”)
# The 'model' parameter tells Ollama which brain to use.
llm = Ollama(model=”gemma:2b”)
# This is the 'book' we're giving to our librarian.
loader = TextLoader(“my_notes.txt”)
documents = loader.load()
# This helps the AI find specific, relevant information more easily.
# Think of it as breaking a long book into individual paragraphs.
text_splitter = RecursiveCharacterTextSplitter(chunk_size=1000, chunk_overlap=200)
texts = text_splitter.split_documents(documents)
# This is where we build the 'memory' of our agent. We convert the text chunks
# into a searchable format using a process called 'embedding'.
print(“Step 3: Creating the agent’s knowledge base (this may take a moment)…”)
# This ensures the way we 'understand' text for searching is the same as how the AI model 'understands' it.
embeddings = OllamaEmbeddings(model=”gemma:2b”)
# We feed it our text chunks and the embedding tool. It creates a special index
# that allows for super-fast similarity searches.
# This is the RAG (Retrieval-Augmented Generation) part in action!
vectorstore = FAISS.from_documents(