The Ultimate Beginner’s Guide to Modern AI Prompt Patterns and Workflows in 2026
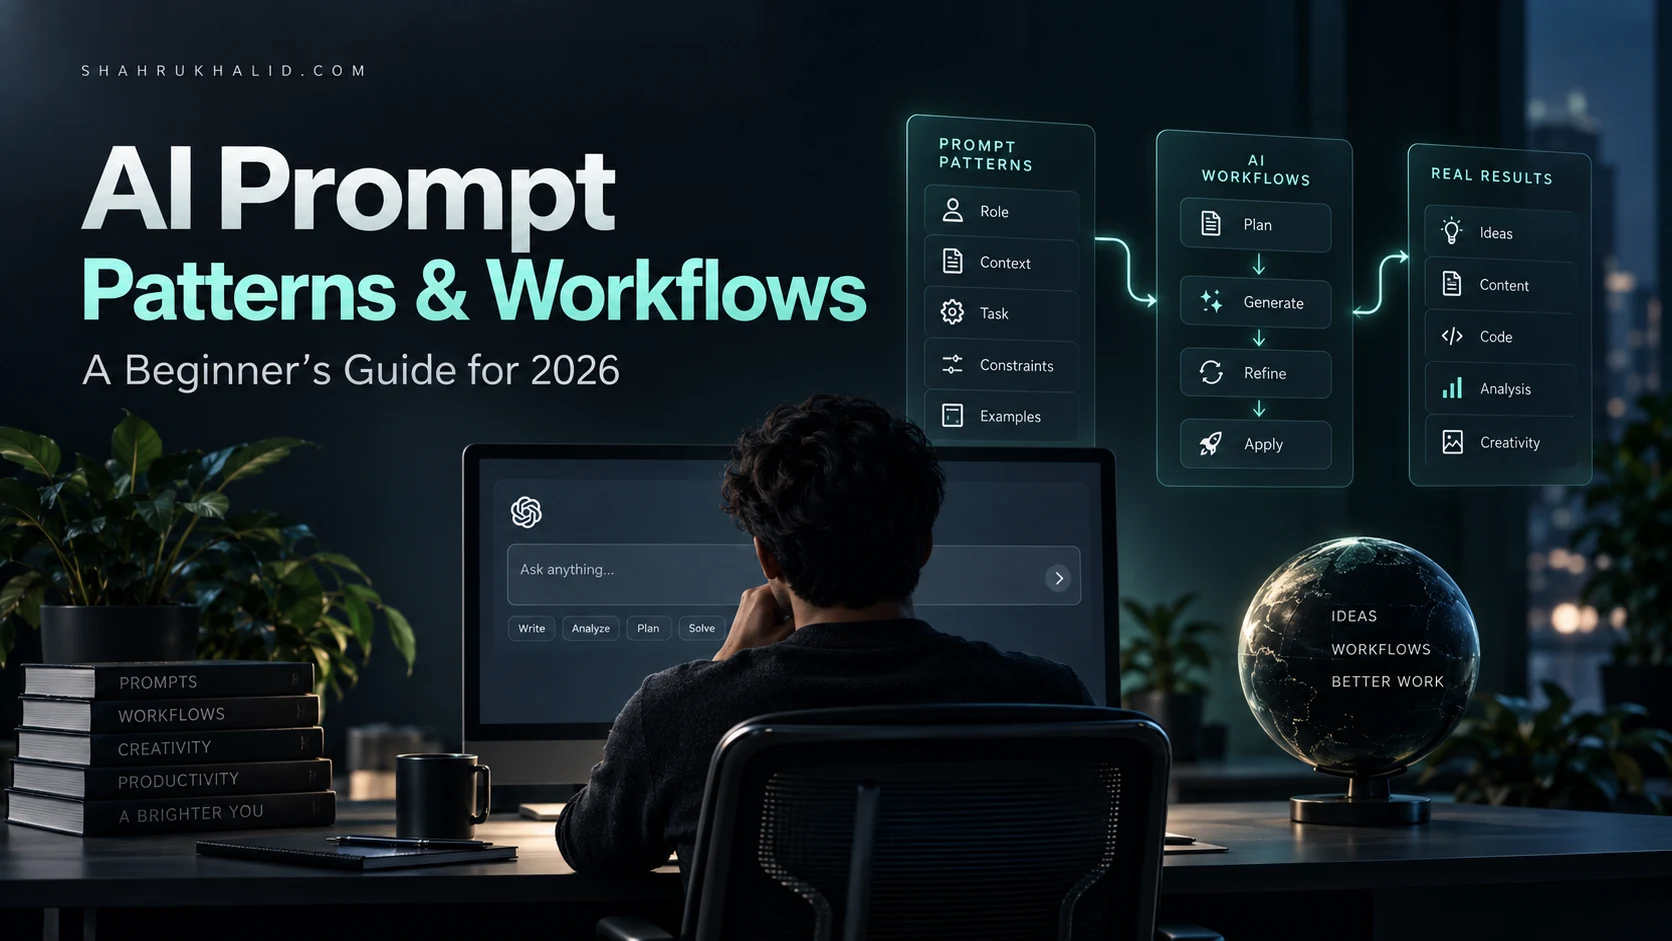
Key Takeaways
- Prompting is the new fundamental digital literacy for 2026, essential for all users.
- Effective prompting requires instructing AI with specific roles, context, and clear constraints.
- Understand LLMs as literal, knowledgeable 'interns'; vague prompts yield generic output.
- Detailed, sensory-rich prompts transform basic requests into extraordinary, high-quality AI output.
- The guide aims to build sophisticated Generative AI workflows, demystifying AI communication for productivity.
This isn’t just another list of “top 10 prompts.” This is a foundational masterclass. We’re going to demystify the art and science of communicating with AI. By the end of this guide, you’ll not only understand the core AI prompt patterns that power modern generative AI, but you’ll be able to build sophisticated Generative AI workflows that can supercharge your creativity, productivity, and problem-solving skills. Forget the hype and the jargon. Let’s build your skills from the ground up, together.

Comprehensive Foundations & Concept Primer
Welcome to 2026: Why Prompting is the New Literacy
Let’s get one thing straight: in 2026, knowing how to communicate effectively with an AI is no longer a niche skill for techies. It’s becoming a fundamental form of digital literacy, as important as knowing how to use a search engine or a spreadsheet. Why? Because Large Language Models (LLMs) are now integrated into everything from our code editors and marketing tools to our operating systems and creative suites. The ability to elicit precise, high-quality, and creative output from these models is what separates a casual user from a power user.
Think of a modern LLM like a genius-level intern who has read the entire internet but has zero real-world experience and takes everything you say with extreme literalness. If you vaguely say, “Hey, write a blog post about cars,” you’ll get a generic, uninspired article that sounds like a Wikipedia summary. But if you say, “Act as a seasoned automotive journalist for ‘Top Gear’ magazine. Write a 1,200-word blog post that captures the visceral, heart-pounding experience of driving the 2026 Porsche 911 GT3 on the Nürburgring for the first time. Focus on sensory details—the roar of the engine, the G-forces in the corners, the smell of the tires. The tone should be exhilarating, passionate, and slightly irreverent,” you’re going to get something extraordinary. That’s the difference. That’s prompt engineering.
Eliminating the Jargon: Core Concepts in Plain English
The world of AI is filled with intimidating terms. Let’s break down the most important ones with simple analogies. This is our shared vocabulary for the rest of this masterclass.
- Prompt: This is simply the instruction you give to an AI. It can be a question, a command, or a piece of text to complete. It’s your side of the conversation.
- LLM (Large Language Model): This is the AI brain you’re talking to (like Google’s Gemini, OpenAI’s GPT series, etc.). Think of it as a massive, complex text-prediction engine. It takes your prompt and predicts the most plausible sequence of words to come next, based on the patterns it learned from trillions of words of text.
- AI Prompt Patterns: These are reusable, structured templates for your prompts. Instead of starting from scratch every time, you use a pattern designed to get a specific type of result. It’s like using a recipe to bake a cake instead of just throwing ingredients in a bowl and hoping for the best. We’ll be diving deep into these.
- Generative AI Workflows: This is where things get really powerful. A workflow is a multi-step process where you use a series of prompts, often chaining the output of one prompt as the input for the next, to accomplish a complex task. For example: Prompt 1 generates a blog post outline, Prompt 2 writes the introduction based on that outline, and Prompt 3 generates social media posts to promote the finished article.
- Tokens: This is how an LLM “sees” text. A word is typically broken down into one or more tokens. “Hello” is one token, but “prompting” might be two (“prompt” and “ing”). It’s a technical detail, but it’s good to know because most AI models have limits on how many tokens they can process in a single prompt and response. Think of it like a word count limit for the AI’s brain.
The core principle here is clarity and context. As the foundational web documentation from Mozilla (MDN) often emphasizes for web accessibility, clear and structured information is key for machines to understand human intent. The same principle applies tenfold to modern AI prompting. Your job as a prompter is to provide such overwhelmingly clear context that the AI has no choice but to give you the exact output you’re looking for. This is the essence of LLM prompt design.
Prerequisites & Complete Environment Setup
Your Digital Workbench: Choosing the Right Tools
Before we can start crafting prompts, we need a place to work. In the past, this meant complex local installations, command-line wizardry, and managing Python environments. It was a huge barrier for beginners. Thankfully, by 2026, things are much, much simpler.

For this masterclass, we’ll use a combination of two fantastic, free, and browser-based tools from Google. This means no installation required! All you need is a web browser and a Google account.
- Google AI Studio: This is our “prompt playground.” It’s a web-based interface where you can easily chat with Google’s latest models (like Gemini), experiment with different prompts, and tweak settings without writing a single line of code. It’s perfect for rapid prototyping and getting a feel for how the AI responds.
- Google Colab: This is our “code laboratory.” Colab is a free, cloud-based Jupyter notebook environment that lets you write and execute Python code. We’ll use this in later modules to build more advanced Generative AI workflows using the AI’s API (Application Programming Interface), which is a way for our code to talk directly to the AI model.
Why these tools? Because they represent the best of both worlds: an easy, no-code starting point and a clear, powerful path to more advanced, code-based implementation. This approach mirrors the pedagogical clarity we champion here at Shahrukh Khalid’s blog—start simple, then build powerful capabilities on a solid foundation.
Step-by-Step Setup: From Zero to “Hello, AI” in 5 Minutes
Let’s get you set up. Follow these steps exactly, and you’ll be ready to go.
Part 1: Setting up Google AI Studio & Getting Your API Key
Your API key is like a secret password that allows your code to access the AI model. Keep it safe!
- Navigate to Google AI Studio: Open your web browser and go to ai.google.dev. Click on “Google AI Studio” (you might see it as “Gemini in AI Studio”). You’ll be prompted to sign in with your Google account.
- Agree to the Terms: Read and agree to the terms of service.
- Create a New Prompt: Once you’re in the studio, you’ll see an interface. On the left, you might see options like “Create new.” Click on “Freeform prompt.”
- Get Your API Key: This is the most important step. Look for a button or link that says “Get API key” (it’s often on the left-hand navigation pane or in the top-right). Click it.
- Create API Key in New Project: A new window will open. Click the button that says “Create API key in new project.”
- Copy and Save Your Key: Your new API key will appear. It’s a long string of random characters. This is your secret key. Copy it immediately and paste it into a secure note-taking app or password manager. Do not share it publicly or commit it to a public code repository like GitHub. Treat it like a password.
- Test the Interface: Go back to the AI Studio tab. In the main prompt window, type
Hello! Can you tell me what you are?and press Enter or click the “Run” button. You should see the AI introduce itself. Congratulations, you’ve just had your first conversation!
Part 2: Setting up Your Google Colab Environment
We won’t use this right away, but let’s get it ready for when we start coding our workflows.
- Navigate to Google Colab: Open a new browser tab and go to colab.research.google.com.
- Create a New Notebook: A popup will appear. Click on “New notebook” in the bottom right. This will create a new file, which is your interactive coding environment.
- Verify the Environment: You’ll see a “cell,” which is a block where you can type code. In the first cell, type
!python --versionand click the play button (▶️) to the left of the cell. The!tells Colab to run this as a command-line command. It should output the version of Python running on the cloud server, something likePython 3.10.12. This confirms your environment is active.
That’s it! Your entire development and experimentation environment is now set up. You have a playground (AI Studio) for testing ideas and a laboratory (Colab) for building real applications. No complex installations, no command-line errors. Just a clean, verified, and ready-to-use setup.
Core Implementation Architecture of AI Prompt Patterns
Beyond the Blank Box: The Anatomy of a Perfect Prompt
So, what are basic AI prompt patterns? The biggest mistake beginners make is treating the prompt box like a simple search bar. An effective prompt isn’t a question; it’s a detailed specification, a blueprint for the response you want. To build this blueprint, we can use a simple but incredibly powerful framework. I call it the R.C.T.C.E. Framework. It stands for Role, Context, Task, Constraints, and Examples.

Let’s visualize these as building blocks or “cards” that you can assemble to construct your prompt.
Visual Card: The R.C.T.C.E. Prompt Framework
- [R]ole: Who should the AI be? Assigning a persona is the fastest way to shape the tone, vocabulary, and style of the response. (e.g., “Act as a compassionate senior software engineer mentoring a junior developer.”)
- [C]ontext: What background information does the AI need? This is the “story so far.” It provides the necessary details to avoid generic answers. (e.g., “I’m trying to understand a piece of legacy Python code that uses a ‘decorator’, but I don’t know what that is.”)
- [T]ask: What is the specific, actionable thing you want the AI to do? Be explicit. Use strong verbs. (e.g., “Explain the concept of a Python decorator using a simple, real-world analogy. Then, refactor the provided code snippet to be more readable for a beginner.”)
- [C]onstraints: What are the rules or boundaries for the output? This is how you control the format, length, style, and what not to do. (e.g., “The explanation should be under 200 words. The code should follow PEP 8 standards. Do not use overly technical jargon.”)
- [E]xamples: Can you provide a small sample of the desired output? This is called “few-shot prompting” and is one of the most effective techniques for guiding the AI. (e.g., “For example, for the analogy, you could say something like: ‘A decorator is like a gift-wrapper for your function…'”)
From Simple to Structured: A Diagrammatic Walkthrough
Let’s see how these components change the game. We’ll compare a simple, ineffective prompt with a structured, effective one using our R.C.T.C.E. framework.
Scenario: You want an explanation of a programming concept.
Ineffective Prompt (The “Search Bar” Approach)
"Explain decorators in Python."
Analysis:
- Role: None given. (Defaults to generic “AI assistant”).
- Context: None given. (Assumes expert-level understanding).
- Task: Vague. (“Explain” can mean many things).
- Constraints: None given. (Output could be long, complex, or short and useless).
- Examples: None.
Expected Outcome: A dry, technical, and probably confusing definition copied from a textbook, which isn’t helpful for a beginner.
Effective Prompt (The R.C.T.C.E. Approach)
"You are a friendly and patient programming tutor who excels at creating simple analogies. I am a complete beginner in Python, and I've encountered the term 'decorator' in some code and I'm lost. Your task is to explain what a Python decorator is in a way a 15-year-old could understand. Please structure your response in three parts: 1. A simple, non-technical analogy for what a decorator does. 2. A simple hello_world style code example showing a function before and after a decorator is applied. 3. A one-sentence summary of why a developer would use one. Keep the entire response under 300 words and avoid terms like 'metaprogramming' or 'first-class functions'."
Analysis:
- Role: “Friendly and patient programming tutor.”
- Context: “I am a complete beginner… I’m lost.”
- Task: “Explain… in three parts: analogy, code example, summary.”
- Constraints: “Under 300 words,” “avoid jargon,” “for a 15-year-old.”
- Examples: None needed here, as the constraints are so specific.
Expected Outcome: A clear, concise, and perfectly targeted explanation that actually helps the beginner learn. This is the core of effective LLM prompt design.
This side-by-side comparison shows that prompting isn’t about magic words. It’s about structured communication. By providing these five elements, you transform your role from a passive asker to an active director of the AI’s output. This is the single most important concept you will learn in this masterclass.
Hands-on Code & Practical Implementation
Bringing Patterns to Life with Python and the Gemini API
Theory is great, but nothing beats seeing it work in practice. Now we’re going to move from the AI Studio playground to our Google Colab laboratory. We’ll use the Python programming language to send our structured prompts to the Gemini model via its API. This is how you start building real applications and automating tasks.
Don’t worry if you’re not a Python expert. I’ll provide every line of code, and I’ll comment it heavily to explain what each part does. You’ll be able to copy, paste, and run this directly in the Colab notebook you created in Module 2.
Step-by-Step: Your First API-Powered Prompt
Let’s start by setting up our Colab notebook to talk to the Google AI API.
Step 1: Install the necessary library
In the first cell of your Google Colab notebook, type or paste the following code and run it. This command uses pip, Python’s package installer, to install Google’s library for its generative AI models.
# 'pip' is the package installer for Python.
# 'install google-generativeai' downloads and installs the official Google AI library.
# The '-q' flag means 'quiet', so it doesn't print a huge wall of text during installation.
!pip install -q google-generativeai
Step 2: Configure your API Key
Now, we need to give our code that secret API key you saved earlier. Colab has a secure way to do this using a “secret” store, so you don’t have to paste your key directly into the code (which is a bad practice!).
- In your Colab notebook, click on the key icon (🔑) in the left-hand sidebar. This opens the “Secrets” manager.
- Click “Add a new secret.”
- For the “Name,” enter
GOOGLE_API_KEY. It must be exactly this name. - For the “Value,” paste your API key that you copied from AI Studio.
- Toggle the button to make this secret available to the notebook.
Now, add a new code cell and paste the following Python code. This code imports the libraries we need, gets your secret key, and configures the model.
import google.generativeai as genai
from google.colab import userdata # This is how we access the secrets we just stored
# Get the API key from the Colab secrets manager
# This is a secure way to handle your key without exposing it in the code
api_key = userdata.get('GOOGLE_API_KEY')
# Configure the generative AI library with your API key
genai.configure(api_key=api_key)
# Create an instance of the model. We'll use 'gemini-pro', which is great for text-based tasks.
model = genai.GenerativeModel('gemini-pro')
print("✅ AI Model configured successfully!")
Run this cell. If you see the “✅ AI Model configured successfully!” message, you’re ready to go! Your code can now talk to the AI.
Step 3: Implementing the R.C.T.C.E. Pattern in Code
Let’s use our “Python decorator” example from Module 3 and turn it into a real, working script. This is a perfect example of a beginner-friendly AI prompt pattern.
In a new code cell, paste the following. Read the comments carefully to see how we’re constructing the prompt using our framework.
# We'll store it in a multi-line string variable called 'prompt'.
prompt = """
You are a friendly and patient programming tutor who excels at creating simple analogies.
I am a complete beginner in Python, and I've encountered the term 'decorator' in some code and I'm lost.
Your task is to explain what a Python decorator is in a way a 15-year-old could understand.
Please structure your response in three parts:
- A simple, non-technical analogy for what a decorator does.
- A simple `hello_world` style code example showing a function before and after a decorator is applied.
- A one-sentence summary of why a developer would use one.
Keep the entire response under 300 words and avoid terms like 'metaprogramming' or 'first-class functions'.
"""
# Now, let's send this prompt to the model
# The 'generate_content' method is the main function we'll use.
response = model.generate_content(prompt)
# The response object contains a lot of information. The actual text is in 'response.text'.
# Let's print it out!
print("— AI Response —")
print(response.text)
print("——————-")
Run this cell. In a few seconds, you will see a beautifully formatted, easy-to-understand explanation of Python decorators, generated by the AI according to your exact specifications. You’ve just executed your first programmatic, structured prompt! This is the foundational skill for building any kind of Generative AI workflow. You can now swap out the text inside the prompt variable to ask the AI to do anything you want, using the R.C.T.C.E. pattern as your guide.
Real-World Use Cases & Practical Applications
From Prompts to Products: Building Simple AI Workflows
Now that you understand the theory and have run your first coded prompt, let’s answer the question: “What are common AI prompt workflows?” A workflow is about using AI to solve a multi-step problem. It’s about chaining prompts together to create something more valuable than a single response. Let’s explore three detailed case studies that show how you can apply these AI prompt patterns to real-world scenarios.
Case Study 1: The Content Creator’s Assistant
User Journey: A blogger wants to write a high-quality article about the benefits of remote work but is facing writer’s block.
The Workflow: A three-prompt chain to go from idea to a promotion-ready content package.
-
Prompt 1: The Ideation Engine
Goal: Generate a structured outline for the blog post.
R.C.T.C.E. Prompt: “Act as an expert content strategist and SEO specialist. I need to write a blog post titled ‘The Top 5 Unexpected Benefits of a Fully Remote Workforce in 2026’. Generate a detailed, SEO-friendly outline for this post. The outline should include an introduction hook, 5 main benefit sections with 3 supporting bullet points each, and a concluding call-to-action. The target audience is HR managers and tech company CEOs.”
Output: A clean, structured outline.
-
Prompt 2: The Ghostwriter
Goal: Write a full section of the blog post based on the outline.
R.C.T.C.E. Prompt: “You are a professional blog writer with a clear, engaging, and authoritative tone. Using the following outline point, write a 300-word section for my blog post
Frequently Asked Questions