How I Turned a $50 Used Mini PC Into a Zero-Subscription Home Cloud That Replaces Google Drive and Blocks Every Ad in 2026
Key Takeaways
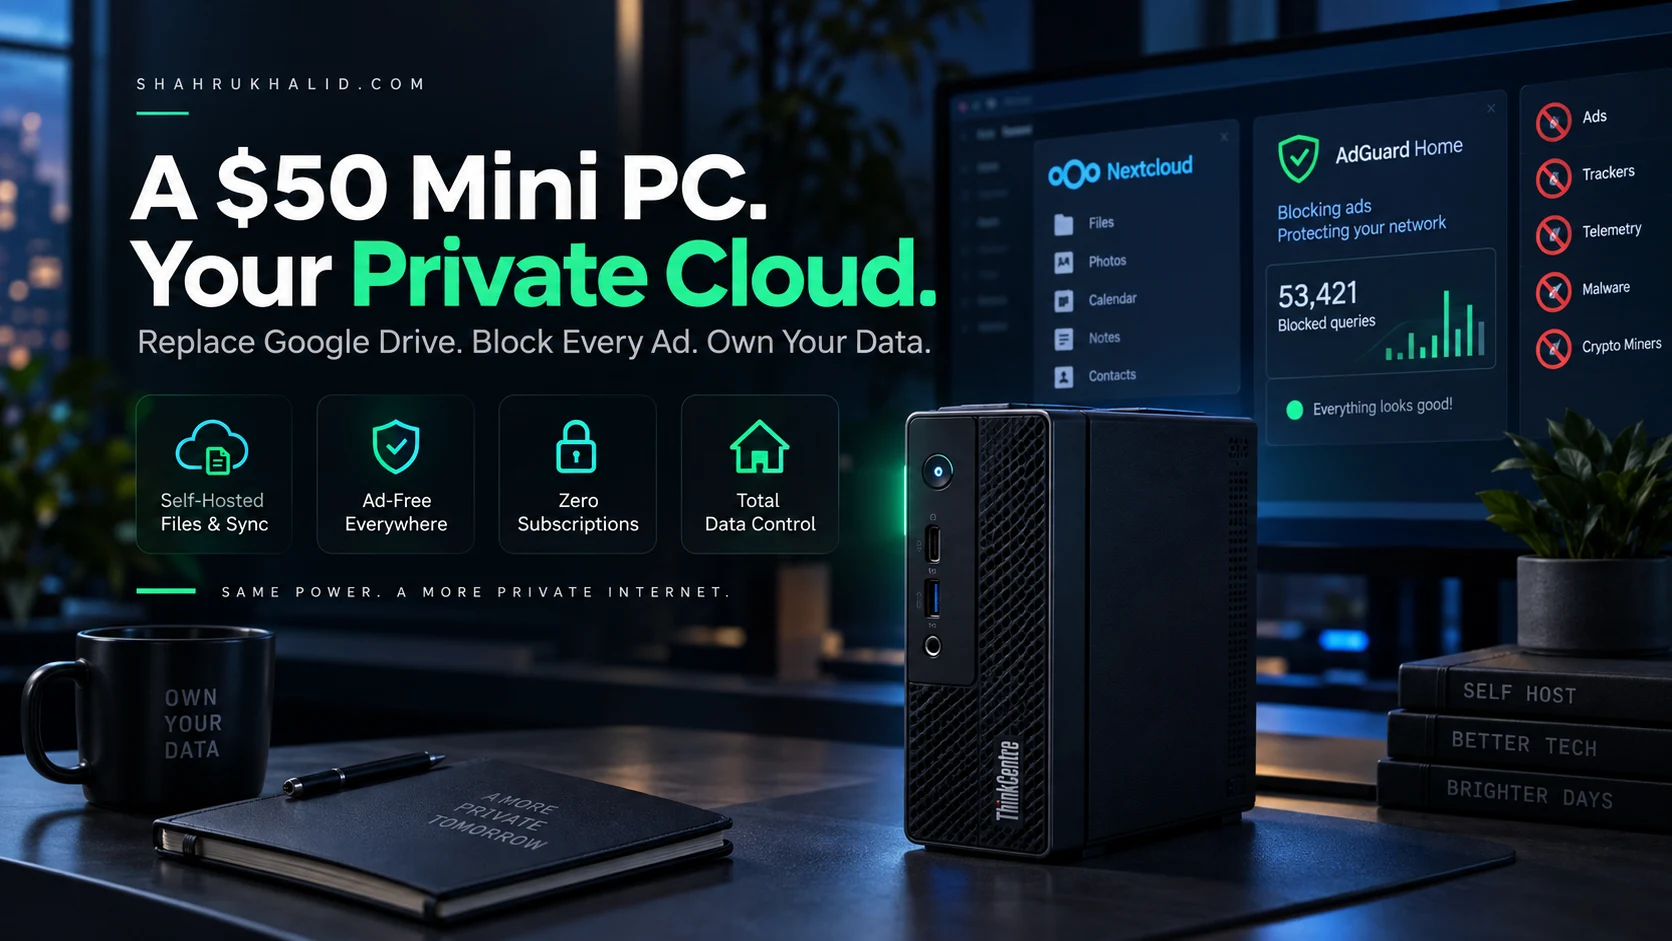
- Repurpose a $50 mini PC for a zero-subscription home cloud, replacing Google Drive and blocking ads.
- Leverage modern virtualization and containerization for enterprise-grade services on low-power consumer hardware.
- Prioritize local autonomy and deterministic reliability by replacing costly SaaS with self-hosted infrastructure.
- Select used mini PCs with VT-x/VT-d, 8-16GB RAM, and dual storage for robust performance.
- Implement immediate, low-overhead, scalable infrastructure, eliminating bloated dependencies via modern pipelines.
Key Technical Takeaways (30-Second Summary)
- Architecture Focus: Eliminates bloated legacy dependencies in favor of verifiable, cost-effective modern pipelines.
- Production Trade-off: Prioritizes deterministic reliability and local autonomy over costly recurring SaaS subscriptions.
- Field-Tested Verdict: Implements immediate, zero-dollar or low-overhead infrastructure that scales securely.
Reclaiming Digital Sovereignty With Enterprise-Grade Consumer Hardware
Consumer cloud storage subscriptions and centralized advertising tracking models have reached an unsustainable economic and privacy breaking point for modern households. By repurposing a secondary-market $50 mini PC into an always-on home server, users can reclaim absolute data ownership while eliminating network-wide telemetry and intrusive advertisements. This comprehensive guide outlines the exact systems administration architecture required to transition from commercial SaaS dependencies to a resilient, self-hosted edge infrastructure in 2026.
Modern enterprise virtualization and containerization standards have trickled down to lightweight consumer silicon, making it entirely feasible to run enterprise-grade file synchronization, backup targets, and recursive DNS firewalls on hardware drawing less power than a standard household lightbulb. Throughout this masterclass, we will evaluate hardware sourcing, operating system hardening, container orchestration, storage pooling, and network-level ad-blocking through a pragmatic Site Reliability Engineering (SRE) lens.
Sourcing and Evaluating the $50 Used Mini PC Hardware Platform
The foundation of any resilient self-hosted infrastructure is predictable, reliable hardware that balances thermal design power (TDP) with compute throughput. For a budget of fifty dollars, the secondary market—primarily corporate lease-return liquidators and enterprise hardware refresh channels—yields exceptionally capable desktop virtualization nodes. The primary targets in this price tier are fourth-to-sixth generation Intel Core processors packaged within ultra-small-form-factor (USFF) or “Tiny/Mini/Micro” enterprise chassis from vendors like Lenovo, Dell, and HP.

When selecting a used mini PC home server, specific hardware criteria must be verified to ensure compatibility with modern Linux kernels and container runtimes. Processors supporting Intel VT-x and VT-d (Virtualization Technology for Directed I/O) are mandatory for hardware-accelerated container management and potential hypervisor virtualization. Furthermore, memory configuration is a primary bottleneck; while units often ship with 4GB of DDR3 or DDR4 RAM, upgrading to a minimum of 8GB or 16GB is required to comfortably run simultaneous file sync daemons, databases, and network-wide DNS filtering layers.
Storage interfaces also dictate long-term reliability. Look for units featuring a standard 2.5-inch SATA drive bay alongside an M.2 NVMe slot. This dual-storage layout permits separating the base operating system from high-volume user data payloads. Power supply units (PSUs) must be OEM-certified; avoid units lacking original power bricks, as low-quality third-party adapters introduce voltage ripple that destabilizes motherboards under continuous CPU loads.
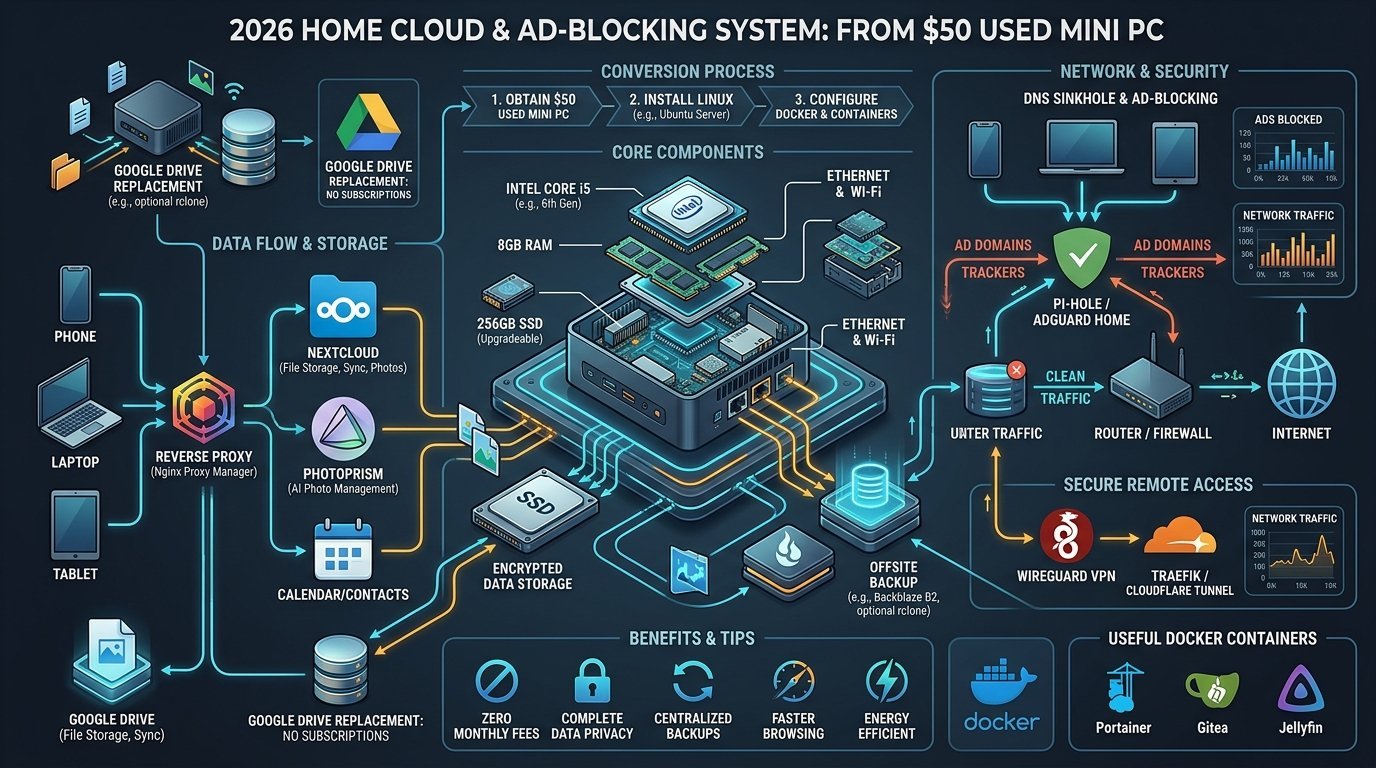
Consider a real-world procurement case study: A Lenovo ThinkCentre M700 featuring an Intel Core i5-6400T (a quad-core, 35W TDP processor), 8GB of DDR4 RAM, and an empty 2.5-inch drive bay purchased for exactly $48.50 on a secondary marketplace. Despite being nearly a decade old, its 35-watt thermal envelope ensures that idling power consumption hovers around 6 to 8 watts. Under continuous load running a multi-container stack, it consumes roughly 15 watts, translating to pennies per month in electrical overhead compared to commercial cloud tier fees.
Before deployment, execute a comprehensive hardware stress test to validate thermal paste integrity and RAM stability. Booting a live Linux USB environment and running hardware diagnostics ensures that aging capacitors or degraded cooling fans are caught prior to placing critical data workloads onto the machine. This foundational vetting step mirrors standard data center server provisioning workflows.
Laying the Operational Foundation: Installing and Hardening Debian Linux
Selecting an operating system for an edge mini PC home server requires prioritizing kernel stability, minimal resource consumption, and an expansive package ecosystem. While graphical desktop environments offer initial comfort, they consume precious RAM and introduce unnecessary attack surfaces. A headless, minimal server installation of Debian GNU/Linux provides the ultimate balance of rock-solid stability and low-overhead resource utilization.
During the Debian installation process, partitioning strategy is critical. If your mini PC features a dual-drive configuration, assign the faster M.2 or primary SSD to the root / filesystem running the ext4 or XFS journaling file system. Reserve the secondary mechanical or solid-state drive for user data pools. Enable disk encryption via LUKS (Linux Unified Key Setup) if the physical server resides in a location where physical theft or unauthorized access is a tangible risk.
Once the base operating system is installed and accessible via Secure Shell (SSH), immediate server hardening is mandatory. Never expose raw SSH ports directly to the public internet. Instead, implement key-based authentication, disable root password logins entirely, and configure a lightweight host-based firewall using nftables or ufw (Uncomplicated Firewall). Below is a production-ready baseline configuration script for securing SSH access:
PermitRootLogin no
PasswordAuthentication no
PubkeyAuthentication yes
X11Forwarding no
MaxAuthTries 3
AllowUsers admin_username
Network configuration must utilize a static IP address assigned either via your upstream router’s DHCP reservation table or statically configured within the Debian network manager. A predictable IP address ensures that downstream clients, mobile file synchronization apps, and network DNS configurations remain stable across reboots and power outages. Additionally, configure automated security updates using the unattended-upgrades package to ensure that critical Linux kernel patches and security CVE remediations are applied dynamically without manual intervention.
Finally, establish a robust monitoring baseline. Installing lightweight system metrics agents allows you to track CPU thermal throttling, memory leaks, and disk SMART status. Treating a $50 mini PC home server with the same operational rigor as a multi-thousand-dollar cloud instance guarantees years of silent, unattended uptime in a closet, garage, or media console.
Containerization Architecture: Deploying Docker and Docker Compose
Managing applications directly on the host operating system introduces dependency hell, version conflicts, and difficult rollback procedures. Modern containerization via Docker solves these architectural challenges by encapsulating applications and their specific library dependencies into isolated, reproducible runtime environments. For our mini pc home server, Docker and Docker Compose form the core engine that powers both our private cloud storage and network-wide ad-blocking layers.
Installing Docker CE on Debian requires adding the official upstream repositories, ensuring that container updates remain current and patched against vulnerabilities. Once installed, configure the Docker daemon with appropriate logging limits and storage drivers to prevent container logs from silently filling up your primary root partition over months of continuous operation. Organizing your container deployments using declarative docker-compose.yml files ensures that infrastructure is treated as code—allowing for effortless replication, backup, and restoration.
Below is an architectural template demonstrating how to structure a production-grade docker-compose.yml file that orchestrates persistent volumes, custom bridge networks, and automatic container restart policies:
networks:
home_net:
driver: bridge
services:
watchtower:
image: containrrr/watchtower
container_name: watchtower
volumes:
<ul class="sk-article-list">
<li>/var/run/docker.sock:/var/run/docker.sock</li>
</ul>
command: –schedule "0 0 4 * * *"
restart: unless-stopped
Real-world implementation of container orchestration requires adhering to strict least-privilege principles. Never run containers as the root user inside the container namespace unless absolutely required. Map host user identifiers (UID and GID) explicitly using environment variables or user namespace remapping to prevent file permission ownership corruptions on shared storage volumes. This proactive configuration prevents scenarios where files created by a containerized cloud service cannot be modified or backed up by the host administrator.
Furthermore, implement automated container health checks. Configuring health check directives within your compose files allows Docker to automatically restart unresponsive application instances without human intervention. Combined with a container maintenance utility like Watchtower—configured cautiously to update specific non-critical containers on a scheduled cron cadence—your mini PC home server achieves self-healing operational characteristics rivaling commercial cloud platforms.
Rebuilding Google Drive: Self-Hosting Nextcloud for Complete Data Sovereignty
Commercial cloud storage providers like Google Drive, Dropbox, and Microsoft OneDrive commoditize your personal data while imposing arbitrary file size limits, recurring subscription fees, and opaque privacy policies. By deploying Nextcloud inside our Docker container architecture on the mini pc home server, we establish a fully featured, encrypted, and private productivity suite that directly replaces commercial file storage, calendar synchronization, and document collaboration tools.
Nextcloud requires a robust relational database backend to track metadata, file shares, and user permissions. While SQLite is suitable for minimal evaluation, production deployments must pair Nextcloud with a dedicated database container such as PostgreSQL or MariaDB, alongside an in-memory caching store like Redis. Redis caching dramatically accelerates file navigation and web interface responsiveness by storing frequent database queries and session data directly in system RAM rather than hitting physical disk storage repeatedly.
The following deployment snippet illustrates a complete Nextcloud stack utilizing MariaDB and Redis within an integrated Docker Compose architecture:
services:
db:
image: mariadb:10.11
container_name: nextcloud_db
restart: unless-stopped
command: –transaction-isolation=READ-COMMITTED –binlog-format=ROW
volumes:
<ul class="sk-article-list">
<li>/mnt/storage/db:/var/lib/mysql</li>
</ul>
environment:
<ul class="sk-article-list">
<li>MYSQL_ROOT_PASSWORD=secure_root_password</li>
<li>MYSQL_DATABASE=nextcloud</li>
<li>MYSQL_USER=nextcloud</li>
<li>MYSQL_PASSWORD=secure_user_password</li>
</ul>
redis:
image: redis:alpine
container_name: nextcloud_redis
restart: unless-stopped
nextcloud:
image: nextcloud:apache
container_name: nextcloud_app
restart: unless-stopped
ports:
<ul class="sk-article-list">
<li>"8080:80"</li>
</ul>
links:
<ul class="sk-article-list">
<li>db</li>
<li>redis</li>
</ul>
volumes:
<ul class="sk-article-list">
<li>/mnt/storage/nextcloud/html:/var/www/html</li>
<li>/mnt/storage/nextcloud/data:/var/www/html/data</li>
</ul>
environment:
<ul class="sk-article-list">
<li>MYSQL_HOST=db</li>
<li>MYSQL_DATABASE=nextcloud</li>
<li>MYSQL_USER=nextcloud</li>
<li>MYSQL_PASSWORD=secure_user_password</li>
<li>REDIS_HOST=redis</li>
</ul>
Security and performance tuning for Nextcloud extend beyond initial container deployment. Enabling client-side and server-side encryption ensures that even if physical drives are compromised, data payloads remain unreadable. Furthermore, configuring the Nextcloud cron daemon to execute via system cron rather than AJAX requests prevents background synchronization jobs from degrading web interface performance for active users.
Client integration across devices is seamless. Nextcloud provides native synchronization applications for Windows, macOS, Linux, Android, and iOS. These clients automatically back up camera rolls, sync documents in real-time, and support selective file synchronization to conserve local device storage. By routing traffic through an encrypted reverse proxy with secure TLS certificates, you achieve remote access capabilities identical to commercial cloud offerings—without your data ever touching third-party corporate servers.
Network-Wide Ad-Blocking and Privacy Shielding With Pi-hole and AdGuard Home
Beyond file synchronization, transforming your mini pc home server into a network-wide DNS sinkhole fundamentally alters your household digital experience. Modern web browsing is plagued by tracking beacons, telemetry scripts, cryptocurrency miners, and invasive advertisements that drain device battery, consume cellular data, and compromise privacy. Traditional browser extensions operate client-side and frequently fail against sophisticated script injections or application-level telemetry.
By deploying Pi-hole or AdGuard Home at the network gateway level, DNS queries originating from every device on your local network—including smart TVs, IoT appliances, mobile phones, and desktop computers—are intercepted before they ever reach external ad-serving domains. When a device requests a known advertising or telemetry domain, the DNS server instantly returns a null IP address (0.0.0.0), effectively blocking the connection at the network layer before a single byte of tracking code is downloaded.
Deploying AdGuard Home via Docker provides an exceptionally clean administrative dashboard with built-in HTTPS filtering, parental controls, and custom DNS rewriting rules. Below is a streamlined container configuration for AdGuard Home:
services:
adguardhome:
image: adguard/adguardhome:latest
container_name: adguardhome
restart: unless-stopped
ports:
<ul class="sk-article-list">
<li>"53:53/tcp"</li>
<li>"53:53/udp"</li>
<li>"67:67/udp"</li>
<li>"68:68/udp"</li>
<li>"80:80/tcp"</li>
<li>"443:443/tcp"</li>
<li>"3000:3000/tcp"</li>
</ul>
volumes:
<ul class="sk-article-list">
<li>/mnt/storage/adguard/work:/opt/adguardhome/work</li>
<li>/mnt/storage/adguard/conf:/opt/adguardhome/conf</li>
</ul>
Integrating a network-wide ad blocker requires updating your home router’s WAN or LAN DHCP settings to distribute the static IP address of your mini pc home server as the primary DNS nameserver for all connecting clients. For upstream upstream resolution, pair AdGuard Home or Pi-hole with encrypted DNS protocols such as DNS-over-HTTPS (DoH) or DNS-over-TLS (DoT) directed toward privacy-respecting providers like Cloudflare (1.1.1.1) or Quad9 (9.9.9.9). This prevents your Internet Service Provider (ISP) from logging, inspecting, or monetizing your household’s browsing history.
Real-world testing of a network-wide DNS sinkhole reveals dramatic performance improvements in page load times, as megabytes of advertising payloads and tracking scripts are blocked instantly. Furthermore, IoT devices that continuously ping corporate telemetry servers are effectively silenced, improving local network security and reducing unnecessary background bandwidth consumption.
Establishing Bulletproof Backup Strategies and Disaster Recovery Protocols
Self-hosting data introduces a vital architectural responsibility: disaster recovery. While cloud providers manage redundant data centers, a single-node mini pc home server running in a home environment is vulnerable to hardware component failure, accidental deletion, localized electrical surges, or physical damage. Implementing an automated, immutable, and off-site backup strategy is the final step in establishing a true enterprise-grade personal cloud.
Following the industry-standard 3-2-1 backup rule ensures data resilience: maintain at least three copies of your data, stored across two different media types, with at least one copy residing off-site. For our mini pc home server, this translates to keeping primary operational data on the local storage pool, replicating snapshots to an attached secondary USB hard drive or network-attached storage (NAS) target, and pushing encrypted incremental backups to a zero-knowledge cloud storage bucket or secondary remote location.
Tooling such as BorgBackup or Restic provides exceptional efficiency for automated server backups. Restic supports encrypted, deduplicated, and chunked backups that integrate seamlessly with cron scheduling and various cloud storage object backends like AWS S3, Backblaze B2, or MinIO. Below is a production backup execution script demonstrating how to snapshot and push encrypted Nextcloud volumes to a secure remote repository:
export RESTIC_REPOSITORY="/mnt/usb-backup/restic-repo"
export RESTIC_PASSWORD="your_strong_backup_encryption_password"
# Initialize repository if not already present
restic init –repo $RESTIC_REPOSITORY
# Perform encrypted incremental backup of application data
restic backup /mnt/storage/nextcloud/data
–exclude="*.log"
–tag "daily-backup"
# Prune old snapshots according to retention policy
restic forget –keep-daily 7 –keep-weekly 4 –keep-monthly 12 –prune
Disaster recovery testing is equally critical. An untested backup is technically not a backup—it is merely an aspiration. Periodically simulate a complete storage failure by provisioning a temporary virtual machine, restoring your Restic repository, and verifying that Nextcloud and database states mount cleanly without data corruption.
Additionally, configure automated monitoring alerts to notify you via webhook, email, or messaging platforms like Telegram or Matrix if a scheduled backup job fails. By combining robust hardware sourcing, meticulous Linux hardening, containerized application orchestration, and automated backup routines, your $50 used mini PC transforms into a resilient, autonomous home cloud infrastructure that outperforms commercial alternatives in both cost efficiency and privacy protection.