K-12 Students 2026 Zoom Masterclass: Engaging Hybrid Classrooms, Secure Virtual Learning & Global Collaboration Demystified

Key Takeaways
- Masterclass focuses on hybrid engagement, digital security, and global collaboration as essential life skills.
- The program demystifies complex digital education terms, providing a 'secret decoder ring'.
- Offers a practical, hands-on playbook to empower students in their digital learning environment.
- Aims to transform students into masters of learning, confident collaborators, and future leaders.
- Defines hybrid classrooms as blending in-person and interactive virtual learning experiences.
I’m not here today as a distant academic. I’m here as your guide. Think of me as a fellow traveler who has spent a bit more time exploring the digital landscape of education and wants to share the map with you. We’re about to embark on a journey together, a masterclass designed specifically for you, the K-12 student of 2026.
The world you’re preparing for isn’t confined to the four walls of a single classroom or even a single country. It’s a hybrid world, a blend of physical and digital experiences. The skills you’ll build here—learning how to engage deeply in a hybrid class, how to protect your digital self, and how to collaborate with peers across the globe—are not just “school skills.” They are life skills. They are the keys to your future success in university, your career, and as a citizen of an interconnected world.
This guide is not a boring textbook. It’s a conversation. It’s a practical, hands-on playbook. We’re going to demystify everything, from the simplest button in Zoom to the most complex strategies for global teamwork. By the end of this masterclass, you won’t just be a passive participant in your online classes; you’ll be a master of your own learning environment, a confident collaborator, and a leader in the classroom of the future.
So, grab a comfortable seat, open your mind, and let’s begin. Your journey to mastering the future of learning starts now.
Comprehensive Foundations & Concept Primer

Alright, let’s start at the very beginning. I know you’ve heard terms like “hybrid,” “virtual,” and “synchronous” thrown around a lot, especially over the last few years. Sometimes, it feels like adults have created a whole new secret language. My goal in this first module is to give you the secret decoder ring. We’re going to break down these big ideas into simple, clear concepts so that you’re not just following instructions, but you truly understand the “why” behind your digital classroom.
What on Earth is a Hybrid Classroom? (And Why It’s Not Just “Online School”)
Let’s start with a simple analogy. Imagine your favorite band is playing a massive, sold-out concert. Some of your friends have tickets and are right there in the front row, feeling the bass drum in their chests and singing along with thousands of others. That’s the “in-person” experience.
Now, imagine the band is also live-streaming the concert. You’re at home, watching on a big screen with amazing headphones. You can’t feel the floor shake, but you have a perfect view, you can use an app to vote on the next song, and you can chat live with other fans from all over the world who are also watching from home. You can even rewind a few seconds if you missed an amazing guitar solo. That’s the “virtual” experience.
A hybrid classroom is like that concert. It’s a single, live learning experience where some students (and the teacher) are physically in the classroom, while other students are joining live, at the same time, from their homes via a tool like Zoom.
This is the key difference: it’s not just “online school” where you watch pre-recorded videos. It’s a live, dynamic environment. The goal of a well-designed hybrid classroom is to make you feel just as present, just as involved, and just as able to participate as the students who are physically in the room. It’s about bridging the distance so that everyone, no matter their location, is part of one cohesive class. Answering the question, What is hybrid learning for K-12 students?, is simple: it’s learning without walls, where your physical location doesn’t limit your ability to participate and learn with your peers and teachers in real-time.
The Core Principles: The DNA of Great K-12 Virtual Learning
By 2026, we’ve learned that effective K-12 virtual learning isn’t about having the fanciest camera or the fastest internet (though those help!). It’s built on three foundational pillars. Think of these as the legs of a tripod—if one is weak, the whole thing wobbles.
- Active Engagement: This is the absolute opposite of passively watching a video. Active engagement means you are doing things. You’re answering polls, typing ideas in the chat, moving to a digital breakout room to solve a problem with a small group, using annotation tools to circle a key part of a diagram, or raising a virtual hand to ask a question. An engaging virtual classroom is one where you feel seen, heard, and constantly invited to participate. It’s about turning your screen into a window for interaction, not a wall that separates you.
- Ironclad Security: Your digital classroom should be one of the safest places on the internet. This is non-negotiable. Secure online learning K-12 means more than just having a password. It means your school has set up systems to ensure that only you, your classmates, and your teachers can enter the virtual room. It means your personal information is protected. We’ll talk more later about how things like Single Sign-On (SSO) and waiting rooms work, but for now, understand this: security is the foundation of trust. You can’t learn effectively if you don’t feel safe.
- Meaningful Collaboration: This is where the magic really happens. The internet doesn’t just connect you to your own classroom; it connects you to the entire world. Global collaboration K-12 education is no longer a futuristic dream; it’s a practical reality. It means you might work on a climate change project with students in Brazil, practice your Spanish with a class in Madrid, or build a robot with a team that has members in both your physical classroom and joining virtually from another city. This principle is deeply rooted in philosophies like the International Baccalaureate (IB), which emphasizes becoming a global citizen. As noted on `ibo.org`, being a communicator and open-minded are key traits of an IB learner, and virtual tools are the modern-day vehicle for developing these traits on a global scale.
Eliminating the Jargon: Your Secret Decoder Ring
Let’s quickly translate some of those other words you hear so you’re never left wondering.
- Synchronous Learning: This is the “live concert” we talked about. It means “happening at the same time.” Your live Zoom class, where everyone is present and interacting at once, is synchronous.
- Asynchronous Learning: This means “not happening at the same time.” This is your homework, the pre-recorded video your teacher asks you to watch before class, or the discussion forum you can post to anytime. A great hybrid model uses a blend of both. The live (synchronous) session is for discussion and collaboration, while the asynchronous work is for absorbing information at your own pace.
- LMS (Learning Management System): This is your school’s digital hub. It might be called Canvas, Schoology, Google Classroom, or something else. It’s the website where you find your assignments, grades, announcements, and, crucially, the links to your Zoom classes. It’s your digital school planner and locker all in one.
- SIS (Student Information System): This is the master brain of the school’s data. A system like `Rediker`, which you can see at `rediker.com`, is a perfect example. It securely holds the official records: your name, your classes, your attendance. When you log into your Zoom class with your school account, the SIS is often working in the background to verify that you are who you say you are and that you’re supposed to be in that class. It’s a key part of the security puzzle.
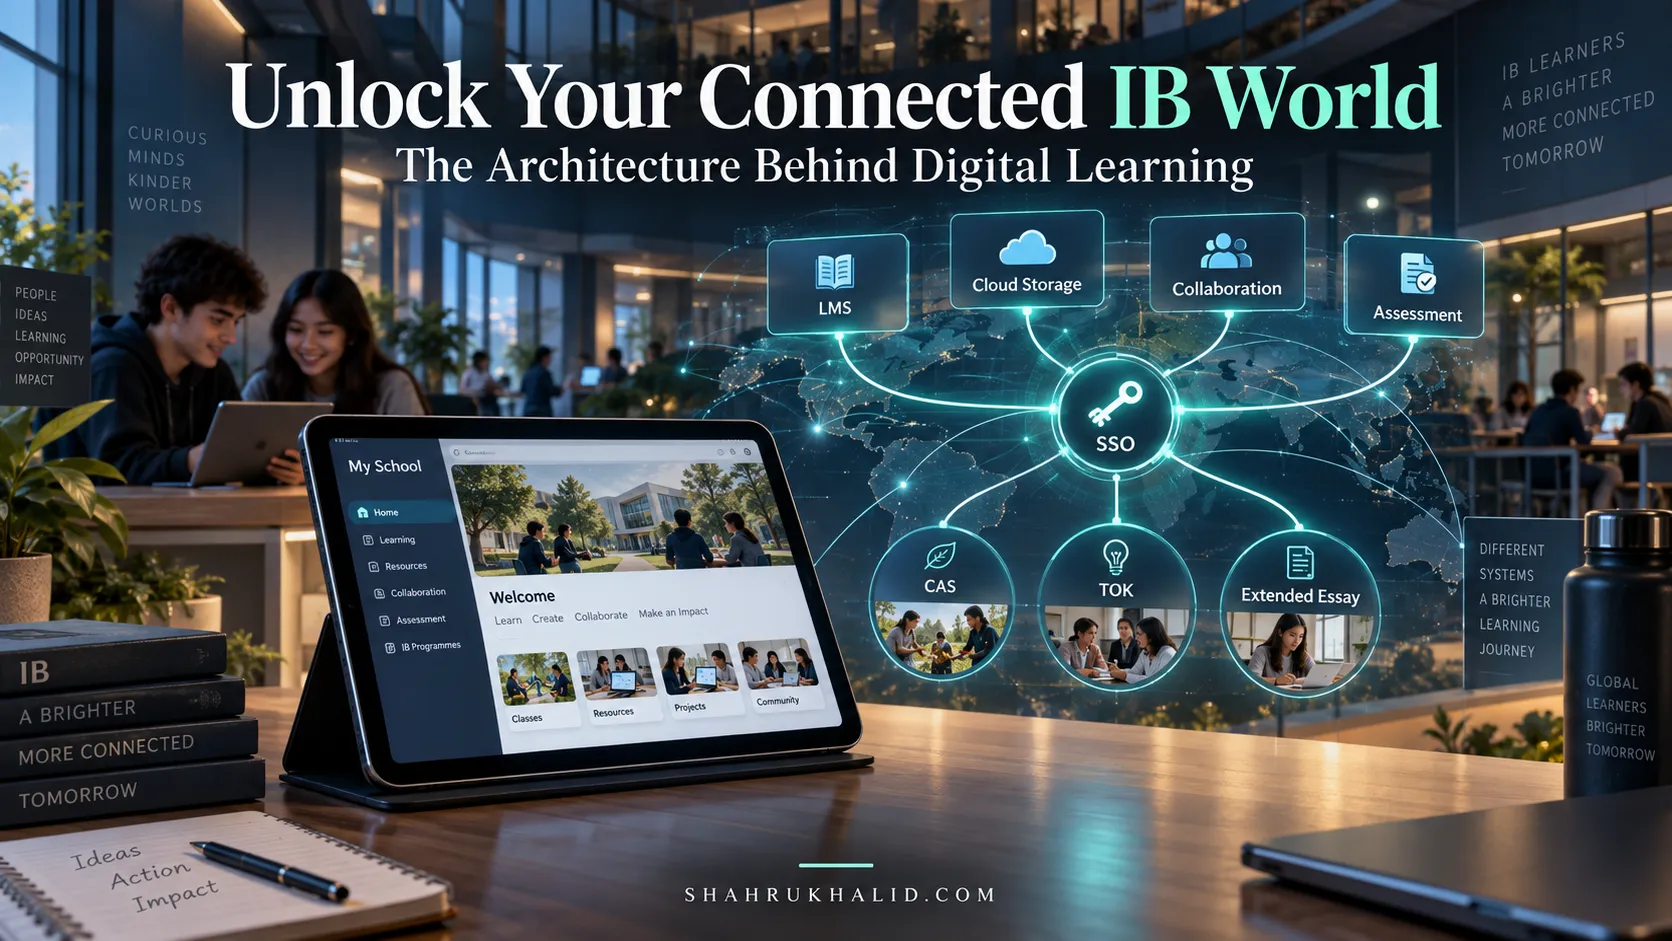
- SSO (Single Sign-On): You use this all the time, maybe without knowing the name! It’s when you use one username and password (like your school Google or Microsoft account) to log into many different apps, including your LMS and Zoom. It’s like having a single master key that opens all the right doors for you, which is both convenient and much more secure.
By understanding these fundamental ideas, you’re no longer just a passenger in your education. You’re a co-pilot. You understand the map, you know the destination, and you’re ready to learn how to operate the controls. In the next module, we’ll do just that—we’ll get your environment set up perfectly for success.
Prerequisites & Complete Environment Setup
Welcome to Module 2! Think of this as building your mission control. Before an astronaut can explore space, they need to know their capsule inside and out, with every switch and button perfectly configured. Your learning space—both physical and digital—is your capsule. Getting it set up correctly from the start will make your entire journey into K-12 virtual learning smoother, less stressful, and far more effective. We’ll go through this step-by-step, so don’t worry if you feel like a beginner. By the end of this, you’ll be ready for launch.
Your Digital Toolkit: Hardware & Software Essentials
You don’t need a Hollywood studio to succeed, but a few key pieces of gear make a world of difference.
- The Machine: A reliable laptop or desktop computer is your best friend. While you can join a Zoom class from a tablet or phone, a computer gives you a larger screen and better multitasking capabilities (like having your Zoom window and a Google Doc open side-by-side).
- Seeing is Believing (Your Webcam): Most modern laptops have a built-in webcam that is perfectly fine. The most important thing is to make sure it’s at eye level. If you’re on a laptop, this might mean propping it up on a stack of books. Looking directly into the camera is the digital equivalent of making eye contact, and it makes you appear much more engaged.
- Sounding Clear (Your Microphone): This is arguably more important than your video. If your classmates and teacher can’t hear you clearly, it’s hard to participate. The built-in mic on your laptop can work, but it often picks up a lot of background noise and typing sounds.
- Pro-Tip: The simple wired earbuds that came with your phone are a massive upgrade. The microphone is closer to your mouth and isolates your voice. A dedicated headset with a boom mic is even better, but not essential to get started.
- The Zoom Desktop Client (This is a non-negotiable!): Many people first use Zoom by clicking a link and having it open in their web browser. This is okay in a pinch, but it’s like using a bicycle to get on the highway. The Zoom Desktop Client is the free, downloadable application for your computer. It’s a high-performance race car. It’s more stable, uses your computer’s resources more efficiently, and gives you access to all the advanced features (like better virtual backgrounds and audio controls) that we’ll discuss in Module 4. Go to the official Zoom website (zoom.us/download) and install it now. Seriously, it’s the single best thing you can do to improve your experience.
Configuring Your Digital Identity: The Secure & Professional Setup
Now that the software is installed, let’s configure it. This is where we lay the groundwork for secure online learning K-12. Your school has likely done the heavy lifting on the backend, often with guidance from educational technology experts like those at `shahrukhalid.com` who specialize in integrating these systems. Your job is to connect to that secure framework properly.
- Sign In with SSO (Your Master Key): When you open the Zoom client for the first time, you’ll see a few sign-in options. Do not just create a new account with your personal email. Look for the button that says “Sign in with SSO” or “Login with SSO.”
- What is SSO? As we touched on in Module 1, SSO stands for Single Sign-On. It’s the secure bridge between Zoom and your school’s official records.
- How it works: When you click it, Zoom will ask for a “company domain.” Your school will provide this (it might be something like `yourschool-org.zoom.us`). You’ll type that in, and it will then redirect you to your familiar school login page (like your Google or Microsoft 365 login). You sign in there, and it securely tells Zoom, “Yep, this is [Your Name], a verified Grade 10 student who is allowed to be here.”
- Why it’s critical for security: This process, often linked to a Student Information System like `Rediker`, ensures that only authenticated users from your school can join classes under their real identity. It’s the first and most important line of defense against uninvited guests.
- Perfect Your Profile: Once you’re logged in, take two minutes to check your profile.
- Your Name: It should be your real, full name as the school has it on file. No nicknames, no gamer tags. This is how your teacher takes attendance and calls on you. If it’s not correct, you can usually edit it in your profile settings.
- Your Profile Picture: Please, upload a clear, school-appropriate headshot. It should just be you, smiling, against a plain background. When your video is off, this picture is what your teacher and classmates see. A good photo makes the classroom feel more human and personal. An avatar of a cartoon character or a blank silhouette feels distant and disengaged.
Creating Your “Launchpad”: Your Physical Learning Environment
Your physical space has a huge impact on your mental state and ability to focus. You don’t need a private office, but you can be intentional about creating a “learning nest.”
- Location, Location, Location: If you can, set up at a desk or table. Learning from your bed is a terrible idea—your brain associates your bed with sleep, and it will make you feel either sluggish during class or anxious when you’re trying to sleep at night. Try to find a spot with minimal foot traffic and distractions.
- Let There Be Light: Good lighting is a game-changer. The best source of light is a window in front of you. This illuminates your face evenly. The worst lighting is a window or bright light behind you, which turns you into a mysterious silhouette. If you don’t have a window, a simple desk lamp placed in front of you works wonders.
- The Background Check: Your teacher and classmates can see what’s behind you. A messy room, a distracting poster, or family members walking by can pull focus from the lesson.
- Good: A plain wall, a bookshelf.
- Better: A curated background that shows a bit of your personality in a positive way (e.g., a musical instrument, a piece of your own art).
- Best (for focus): A virtual background, which we’ll set up in Module 4. But for now, just be mindful of your real background.
- Clear the Decks: Before class, close unnecessary tabs on your computer. Put your phone on silent and place it out of arm’s reach. Have a notepad, a pen, and a glass of water ready. Treat the start of class like a pilot’s pre-flight checklist.
Final Systems Check: The Pre-Flight Verification
Before your first class, let’s make sure everything is working. You can do this by starting a “New Meeting” in your Zoom client, which will launch a private meeting with just you in it.
- Video Check: Can you see yourself? Is the camera angle good?
- Audio Check: Click the arrow next to the Mute/Unmute icon and select “Test Speaker & Microphone.” Zoom will play a ringtone (can you hear it?) and then ask you to speak and play it back (can you hear yourself?). This 60-second test can save you from the dreaded “Can you hear me now?” dance at the start of class.
- Name Check: Look at your name in the participants’ list. Is it correct?
You’ve done it. Your mission control is set up. Your digital identity is secure and professional. Your physical space is optimized for focus. You’ve run the diagnostics and everything is green. You are now fully prepared to move beyond the setup phase and into the core mechanics of a live virtual session. In the next module, we’ll map out the entire workflow of a class, from the moment you join to the moment you leave.
Core Implementation Architecture & Workflow Blueprint
Welcome to Module 3. If Module 2 was about building your spaceship, this module is about learning the flight plan. A successful journey in K-12 virtual learning isn’t a series of random events; it’s a structured process with a clear beginning, middle, and end. Understanding this workflow will transform you from a passive passenger into a confident navigator of your own education.
To make this easy to visualize, I want you to think of a typical lesson as a set of three “Workflow Cards”: Pre-Flight, In-Flight, and Post-Flight. We’re going to break down exactly what you need to do at each stage.
Pre-Flight Card: The 10 Minutes Before Liftoff
What you do in the 10 minutes before class begins can determine your success for the entire period. Rushing in at the last second is like trying to board a plane as it’s pulling away from the gate—it’s stressful and you’ll probably forget something important. A calm, prepared entry sets the tone for learning.
[VISUAL CARD: PRE-FLIGHT]
- Title: Pre-Flight Checklist
- Objective: Enter the virtual classroom calm, prepared, and ready to learn.
- Step 1: Consult the Flight Plan (Your LMS).
- Open your school’s Learning Management System (LMS) – Canvas, Google Classroom, etc.
- Find today’s class page. Your teacher has likely posted the agenda, links to any documents you’ll need (like a Google Doc or a PDF), and the Zoom link.
- Why this matters: The best hybrid classroom strategies K-12 involve this “flipped classroom” element. Your teacher expects you to be prepared. Knowing the plan reduces anxiety and helps you focus. Many schools, following integration models designed by firms like `shahrukhalid.com`, have this so streamlined that the Zoom link appears directly in your school calendar, making it even easier.
- Step 2: Prepare Your Digital Cockpit.
- Click to open any necessary tabs before class starts. If you know you’ll be working on a collaborative document, have it open. If you need to refer to a specific chapter in your online textbook, get it loaded.
- Why this matters: This prevents the frantic “Uh, wait, I need to find that link” moment during class, which distracts you and your classmates.
- Step 3: Launch the Zoom Client.
- Don’t wait for the last second. Open the Zoom application on your desktop 5 minutes before class starts.
- Check your name and profile picture one last time.
- Step 4: Board the Vessel (Join the Meeting).
- Click the link from your LMS or calendar.
- You will likely be placed in a Waiting Room. This is a key security feature. Think of it as the gate area at the airport. It’s a secure holding space where the teacher (the pilot) can verify everyone’s identity before letting them onto the plane. This is a cornerstone of secure online learning K-12 and prevents unwanted visitors.
- When you are admitted, Zoom will ask if you want to “Join with Computer Audio.” The answer is always yes.
- CRITICAL HABIT: As soon as you enter, mute your microphone. This is the universal sign of respect in a virtual space. It prevents your background noise from disrupting the class as it begins.
In-Flight Card: Navigating the Live Session
You’re in! The class is live. This is the core of the synchronous learning experience. Your goal is to be an active and present crew member, not just a passenger. Let’s take a tour of your main control panel: the Zoom interface.
[VISUAL DIAGRAM GRID: ZOOM INTERFACE]
| Control Icon | Name | Function & Pro-Tips for Students |
| :— | :— | :— |
| 🎙️ | Mute / Unmute | Function: Toggles your microphone on and off. Pro-Tip: Stay muted unless you are speaking. Learn the keyboard shortcut (Alt+A on Windows, Cmd+Shift+A on Mac) to quickly mute/unmute. You can also hold the spacebar to temporarily unmute yourself to speak (Push-to-Talk). |
| 📹 | Start / Stop Video | Function: Toggles your camera on and off. Pro-Tip: Keep your video on as much as possible. It shows your teacher you are present and engaged. It also helps build a sense of community. If you have a legitimate reason to turn it off (like a poor internet connection), send your teacher a private message in the chat. |
| 👤 | Participants | Function: Opens a list of everyone in the meeting. Pro-Tip: This is where you can find the “Raise Hand” feature. Use this to signal to your teacher that you have a question or comment, just like raising your hand in a real classroom. It’s much more polite than just unmuting and interrupting. |
| 💬 | Chat | Function: Opens the text chat window. Pro-Tip: Pay attention to your teacher’s instructions. Can you chat with “Everyone” or are you supposed to use it for questions only? You can also send a private message to a specific person (like the teacher or a group member). Use this power responsibly! |
| 😊 | Reactions | Function: Allows you to post a temporary emoji (like 👍 or 👏) over your video feed. Pro-Tip: This is a fantastic, non-disruptive way to participate. Use the “thumbs up” to show you understand, the “clap” emoji to show appreciation for a classmate’s presentation, or the “wow” face when you learn something cool. |
| 🖥️ | Share Screen | Function: Broadcasts your screen (or a specific window) to everyone in the meeting. Pro-Tip: We’ll dive deep into this in Module 4, but the key is to practice sharing just one application at a time, not your entire desktop. |
| ⚫️ | Breakout Rooms | Function: The teacher can split the main meeting into multiple smaller, private sessions. Pro-Tip: This is the virtual equivalent of “Okay, get into groups of four.” When you’re sent to a breakout room, it’s your chance for focused global collaboration K-12 education. Don’t just sit there in silence! Introduce yourself, figure out the task, and work together. The teacher can pop in and out of rooms to check on you. |
Post-Flight Card: Securing the Learnings
The