The 2026 Students Secret Weapon: Your Step-by-Step Guide to Mastering Digital Note-Taking (No More Scraps!)
If that sounds even remotely familiar, I want you to take a deep breath. You’ve found the right place. This isn’t just another blog post with a list of apps. This is your definitive masterclass, your secret weapon for 2026 and beyond. We’re going to systematically dismantle the old, chaotic way of learning and build you a powerful, streamlined, and stress-free system for digital note-taking. Forget the scraps. It’s time to build your second brain.
Comprehensive Foundations & Concept Primer
Why This Is Your Academic Superpower in 2026
Let’s be real. Being a student today is a different game. You’re juggling online lectures, in-person seminars, digital textbooks, research articles from a dozen databases, and group projects on Slack or Discord. The sheer volume and variety of information coming at you is staggering. The old method—a separate spiral notebook for each class—is like trying to fight a flood with a teacup. It just doesn’t scale.
The future of academic success hinges on your ability to not just consume information, but to connect it. This is where mastering digital note-taking for students becomes a non-negotiable skill. Imagine having every note you’ve ever taken—from a first-year biology lecture to a final-year seminar—instantly searchable. Imagine being able to link a concept from your sociology class to a theory from your economics class with a single click. Imagine your notes automatically generating flashcards for you. This isn’t science fiction; it’s the reality of an effective digital note-taking system, and it’s one of the most significant paperless note-taking benefits.
The “Personal Knowledge API” Analogy
Forget the term “note-taking.” It’s too passive. I want you to think of what we’re building as your personal “Knowledge API.” In my world as a developer, an API (Application Programming Interface) is a structured way for different software components to talk to each other and exchange data. Your brain is one component. Your notes are another. A good system is the API that connects them seamlessly.
- The `GET` Request: When you need to recall information for an exam, you’re making a `GET` request. A powerful search function is your endpoint. Instead of manually scanning hundreds of pages, you type a keyword and get an instant, comprehensive response.
- The `POST` Request: When you’re in a lecture, capturing new information, you’re making a `POST` request. You’re adding new data to your knowledge base.
- The `CONNECT` Function: The real magic happens when you link notes together. You’re creating relationships in your data, building a web of knowledge that mimics how your brain actually works. This is far more powerful than the linear, isolated information stored in a paper notebook.
So, is digital note-taking more effective than traditional notes? For pure recall and building complex connections across subjects, the answer is a resounding yes. While the physical act of writing on paper has cognitive benefits, modern tools allow you to replicate this with a stylus on a tablet, giving you the best of both worlds. The goal isn’t to replace your brain; it’s to build an external, searchable, and infinitely expandable version of your memory.
Prerequisites & Complete Environment Setup
The Holy Trinity: Your Essential Tools for Digital Note-Taking
Before we build our system, we need to gather our tools. A world-class digital note-taking setup consists of three core components. Don’t feel pressured to buy the most expensive gear; the best tool is the one you have and will use consistently.
- Hardware (The Vessel): This is the physical device where your notes live.
- The Tablet + Stylus Combo (The Artist’s Canvas): An iPad with an Apple Pencil or a Samsung Galaxy Tab with an S Pen is the gold standard for students who need to draw diagrams, annotate PDFs, or simply prefer the feel of handwriting. This setup beautifully bridges the gap between traditional and digital methods.
- The Laptop (The Workhorse): If your courses are less visual and more text-heavy (like law, history, or literature), a reliable laptop is perfect. Typing is fast, and the larger screen is great for organizing information side-by-side.
- The 2-in-1 Convertible (The Hybrid): Devices like the Microsoft Surface Pro offer the best of both worlds—a full-powered laptop that can fold into a tablet for handwritten notes.
- Software (The Brain): This is the application that will house your entire academic life. We’ll dive deep into this in Module 7, but for now, understand they fall into a few categories:
- Structured Editors (Digital Binders): Apps like Microsoft OneNote and Evernote are like digital three-ring binders. They are intuitive and great for beginners.
- Handwriting Specialists (Digital Notepads): Apps like GoodNotes and Notability are designed to perfectly replicate the pen-on-paper experience on a tablet.
- Connected Thought Tools (Personal Wikis): Apps like Notion, Obsidian, and Logseq are the power tools. They allow you to build a true “second brain” by creating links between notes, turning your knowledge base into a personal Wikipedia.
- Connectivity (The Lifeline): This is the cloud sync that makes your notes available on your phone, tablet, and laptop simultaneously. It’s your insurance policy against a lost device or a crashed hard drive. Every modern note-taking app has this built-in. Just make sure it’s turned on.
Step-by-Step Setup: Building Your Academic Headquarters in Notion
To make this practical, let’s walk through setting up a foundational workspace. We’ll use Notion because it’s free for students and incredibly versatile. Think of this as laying the foundation for your new academic home.
- Sign Up & Go Pro (for free!): Navigate to Notion’s website and sign up using your university email address. This will automatically grant you a free Personal Pro plan, which gives you unlimited file uploads and version history.
- Install Everywhere: Download the desktop app for your Mac or Windows computer and the mobile app for your phone. The goal is to make capturing and accessing information frictionless, wherever you are.
- Create Your “University Hub”: When you first open Notion, you’ll see a blank slate. Don’t be intimidated.
- Click `+ Add a page` in your sidebar.
- Title this new page “🎓 University Hub”. Give it a nice icon and a cover photo to make it feel like your own. This page will be the main dashboard for your entire academic life.
- Establish Your Directory Layout: Inside your “University Hub,” we’ll create the basic structure. This is your initial folder system.
- Create a new page inside the Hub and call it `Fall 2026`.
- Inside the `Fall 2026` page, create a new page for each of your courses. For example:
- `ENGL 101: Introduction to Literature`
- `PHYS 212: Electromagnetism`
- `CS 150: Data Structures`
- Verification: Your sidebar should now look something like this. It’s clean, logical, and ready to be filled.
- 🎓 University Hub
  - ➡️ Fall 2026
    - 📄 ENGL 101: Introduction to Literature
    - 📄 PHYS 212: Electromagnetism
    - 📄 CS 150: Data Structures
This simple, nested structure is the first step in organizing digital notes effectively. You now have a dedicated, digital “notebook” for each class, all housed within a central hub. We’ll supercharge this simple layout in the next module.
Core Implementation Architecture & Workflow Blueprint
From Passive Note-Taker to Active Knowledge-Builder
Having a place to put your notes is one thing; having a system to process them is another. This is where most students fail. They create a “digital landfill”—a chaotic mess of lecture notes, web clippings, and PDFs that’s just as unusable as their old paper system. We’re going to build a workflow, an assembly line for knowledge.
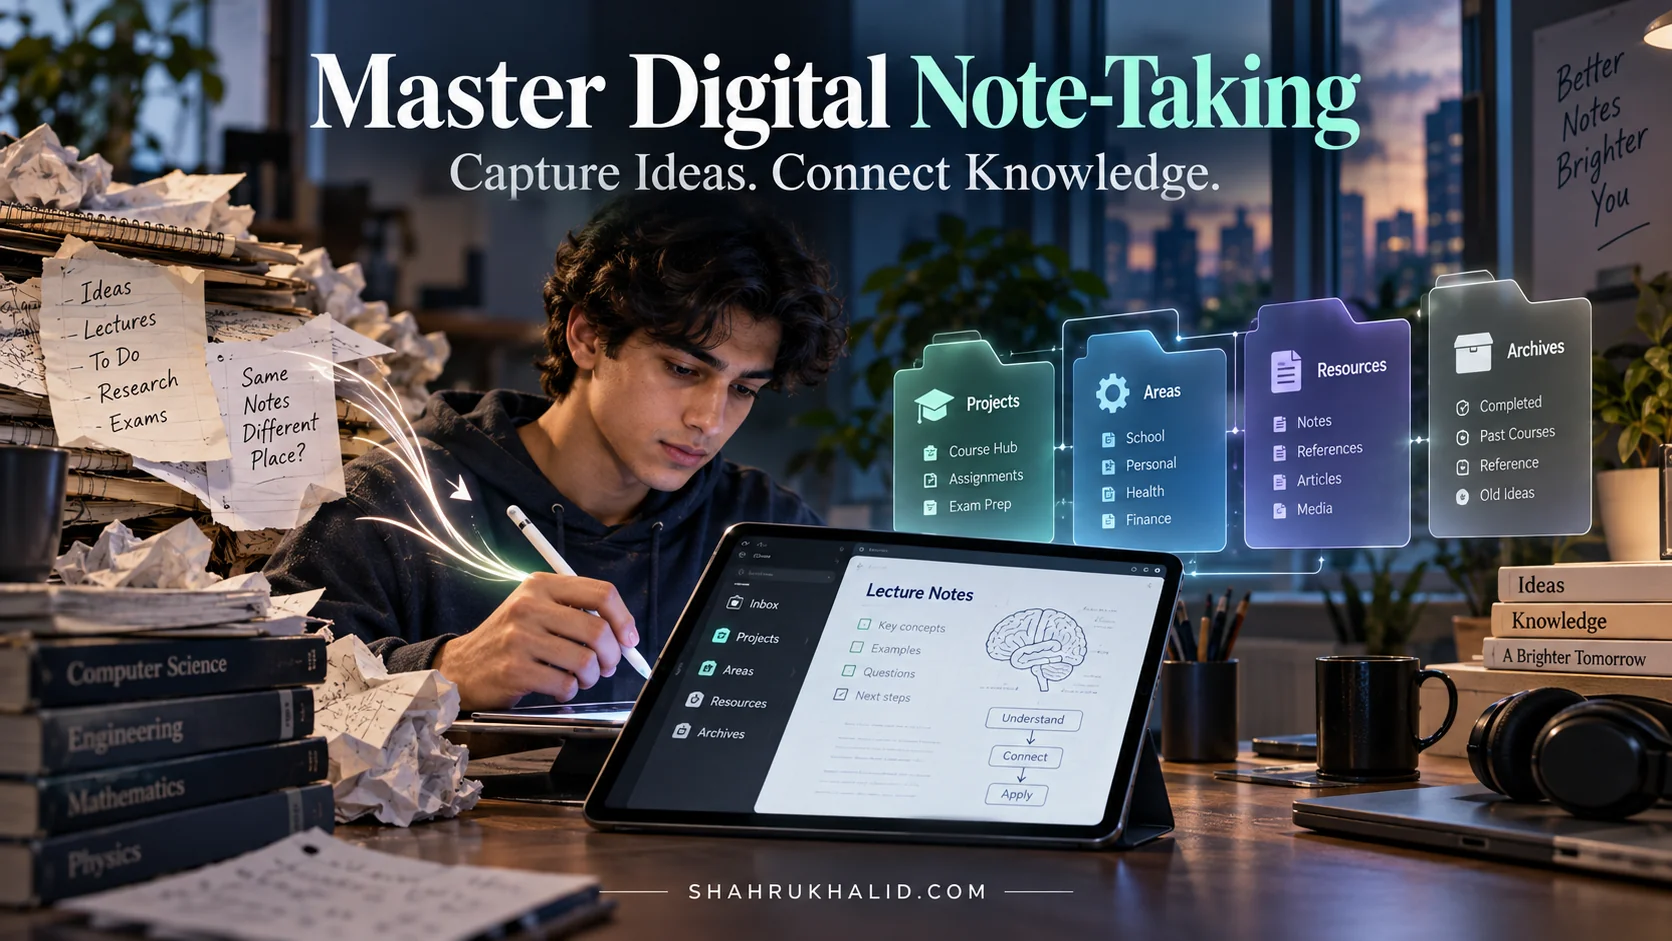
A popular and highly effective framework for this is Tiago Forte’s P.A.R.A. method. It stands for Projects, Areas, Resources, and Archives. It’s a simple, action-oriented way to organize any kind of digital information. Let’s adapt it for academic life.
Your Academic P.A.R.A. System: A Visual Grid
Think of your digital workspace not as a filing cabinet, but as a workshop with four distinct zones.
P: Projects
Definition: A series of tasks linked to a goal with a deadline.
Student Examples: “History 205 Research Paper,” “Lab Report for CHEM 101,” “Prepare for Midterm Exam,” “Group Presentation for BUS 340.”
Key Trait: They have a clear finish line. Once the paper is submitted or the exam is over, the project is done.
A: Areas
Definition: A sphere of activity with a standard to be maintained over time.
Student Examples: “Academics” (your overall GPA), “Health & Wellness,” “Finances,” “Job Applications,” “PHYS 212” (the course itself as an ongoing responsibility).
Key Trait: They don’t have an end date. You’re always a “student” (an area) until you graduate.
R: Resources
Definition: A topic or theme of ongoing interest.
Student Examples: “Quantum Computing Concepts,” “Interesting Marketing Case Studies,” “Favorite Python Code Snippets,” “Book Summaries,” “Stoic Philosophy.”
Key Trait: This is your personal library. It’s material you want to refer back to but isn’t tied to a specific project or area right now.
A: Archives
Definition: Inactive items from the other three categories.
Student Examples: “Completed Projects from Fall 2025,” “Notes from courses I’ve finished,” “Old Job Applications.”
Key Trait: It’s cold storage. You keep it just in case, but it’s out of your way so you can focus on what’s active.
The Student’s Knowledge Workflow Blueprint
So, how does this P.A.R.A. structure create an effective digital note-taking workflow for university students? Here’s the flow of information:
- Capture (The Inbox): All new information goes into one place first—an “Inbox” page in your digital system. This could be quick thoughts typed on your phone, a photo of a whiteboard, a web article clipped from your browser, or a PDF of a research paper. Don’t worry about organizing it yet. Just get it in the system.
- Organize (The Weekly Triage): Once a week (e.g., every Sunday evening), process your Inbox. For each item, ask: “Where does this belong?”
- Is this for a specific, deadline-driven assignment? Move it to the relevant Project folder (e.g., move research links into the “History 205 Research Paper” folder).
- Does this support one of my ongoing responsibilities? Move it to an Area (e.g., move your lecture notes for a course into that course’s folder, which is an Area of responsibility).
- Is this just something interesting I might want later? Move it to a Resource folder (e.g., an interesting article on AI goes into your “AI Concepts” resource folder).
- Is this project or course finished? Move the entire folder to the Archive.
- Distill (The Study Phase): This is the most crucial step for learning and one of the best study techniques digital notes enable. As you review your notes for a project or exam, don’t just re-read them. Create a new, summary note. Pull out the most important concepts, definitions, and formulas. Re-write them in your own words. This act of “progressive summarization” is a powerful form of active recall.
- Express (The Output): Use your distilled notes to write your essay, solve the problem set, or ace the exam. Your knowledge is now organized, refined, and ready to be used.
Hands-on Practical Implementation & Real-World Configuration
Building a Dynamic Course Hub in Notion
Let’s turn the theory from Module 3 into a fully functional, production-ready system. We’ll upgrade our simple folder structure into a powerful, interconnected database system. This is the core of how to master digital note-taking for academic success.
Follow these steps carefully. This will take about 30 minutes, but it will save you hundreds of hours over your academic career.
Step 1: Create Your Master Databases
Instead of simple pages, we’ll use Notion’s databases. Think of a database as a spreadsheet on steroids. On your “University Hub” page, we’re going to create two core databases.
- The Courses Database:
- On your Hub page, type `/database – inline` and press Enter.
- Name it “My Courses”.
- Configure the properties (the columns):
- `Course Name` (The default Title property)
- `Course Code` (Text property)
- `Professor` (Text property)
- `Semester` (Select property, with options like “Fall 2026”, “Spring 2027”)
- `Status` (Select property, with options “Active”, “Completed”)
- Fill this out for your current classes.
- The Master Notes & Tasks Database:
- Below the Courses database, create another one: `/database – inline`.
- Name it “Academic Inbox”. This will hold EVERYTHING—lecture notes, assignments, readings, ideas.
- Configure its properties:
- `Name` (Title property)
- `Type` (Select property: “Lecture Note”, “Assignment”, “Reading”, “Idea”)
- `Due Date` (Date property)
- `Status` (Select property: “To Do”, “In Progress”, “Done”)
- `Course` (Relation property): This is the magic key. Click `+`, select `Relation`, choose the “My Courses” database, and click “Add Relation”. This allows you to link every single note or task back to a specific course.
Step 2: Create the Ultimate Lecture Note Template
This is a game-changer. We’ll create a template that structures your notes for you, saving you time and promoting effective learning habits.
- In your “Academic Inbox” database, click the down-arrow next to the blue `New` button, and then click `+ New template`.
- Name the template “📝 New Lecture Note”.
- Set the `Type` property within the template to “Lecture Note” by default.
- In the body of the template page, create the following structure. This is a heavily commented, ready-to-use configuration:
    ### 🎯 Key Concepts & Definitions


    ### 🤔 Questions & Curiosities


    ### 🔗 Connections to Other Topics


    ### 📝 Raw Lecture Notes


    ---
    ### 🔥 5-Minute Summary
Now, click out of the template editor. The next time you need to take notes for a lecture, just click the `New` button in your “Academic Inbox,” select the “📝 New Lecture Note” template, and everything is pre-structured for you.
Step 3: The Full Workflow in Action
Let’s walk through a scenario:
- It’s Monday morning, time for your PHYS 212 lecture on Gauss’s Law.
- You go to your “Academic Inbox” database, click `New`, and select your “📝 New Lecture Note” template.
- You title the note “2026-10-26 – Gauss’s Law”. Using the `YYYY-MM-DD` format makes sorting by date automatic.
- In the `Course` property, you select `PHYS 212` from the dropdown.
- During the lecture, you type or write your messy notes under the `Raw Lecture Notes` section.
- After class, you take 5 minutes to write the `🔥 5-Minute Summary`.
- That evening, you review the raw notes and pull out the important definitions into `🎯 Key Concepts` and add any lingering questions to `🤔 Questions & Curiosities`.
You’ve just captured, organized, and distilled information in a structured, repeatable way. Now, when you go to your “My Courses” database and click on `PHYS 212`, you can see every note, assignment, and reading related to that course, perfectly organized.
Real-World Enterprise Use Cases & Case Studies
A robust system proves its worth when tested against diverse, real-world challenges. While “enterprise” might sound corporate, for a student, your “enterprise” is your degree program. Let’s explore how different types of students can adapt this core system for their specific needs, moving from a basic setup to a specialized, high-performance one.

Case Study 1: The STEM Student (Engineering, Computer Science)
- The Challenge: Juggling complex mathematical equations, snippets of code, and intricate diagrams. Notes need to be precise and computationally friendly.
- The Specialized Workflow:
- Tool of Choice: Obsidian. It’s a markdown-based editor, which is perfect for technical students.
- The Setup: The student uses the P.A.R.A. folder structure on their local machine, synced via a service like Dropbox or Git.
- Equations with LaTeX: Instead of fumbling with clunky equation editors, they type LaTeX directly into their notes (e.g., `$$ oint_S vec{E} cdot dvec{A} = frac{Q_{enc}}{epsilon_0} $$`). Obsidian renders this beautifully.
- Code Integration: They embed code blocks directly in their lecture notes, complete with syntax highlighting for Python, C++, or Java. This keeps the theoretical concept right next to the practical implementation. As developers, we rely on clear documentation, and this approach mirrors the high-quality resources found on platforms like Google’s own developer documentation, where code and explanation are tightly integrated.
- Diagrams with Excalidraw: Using a plugin, they can create and embed editable diagrams (like circuit diagrams or data structure visualizations) directly within a note file.
- The Power of Backlinks
Frequently Asked Questions