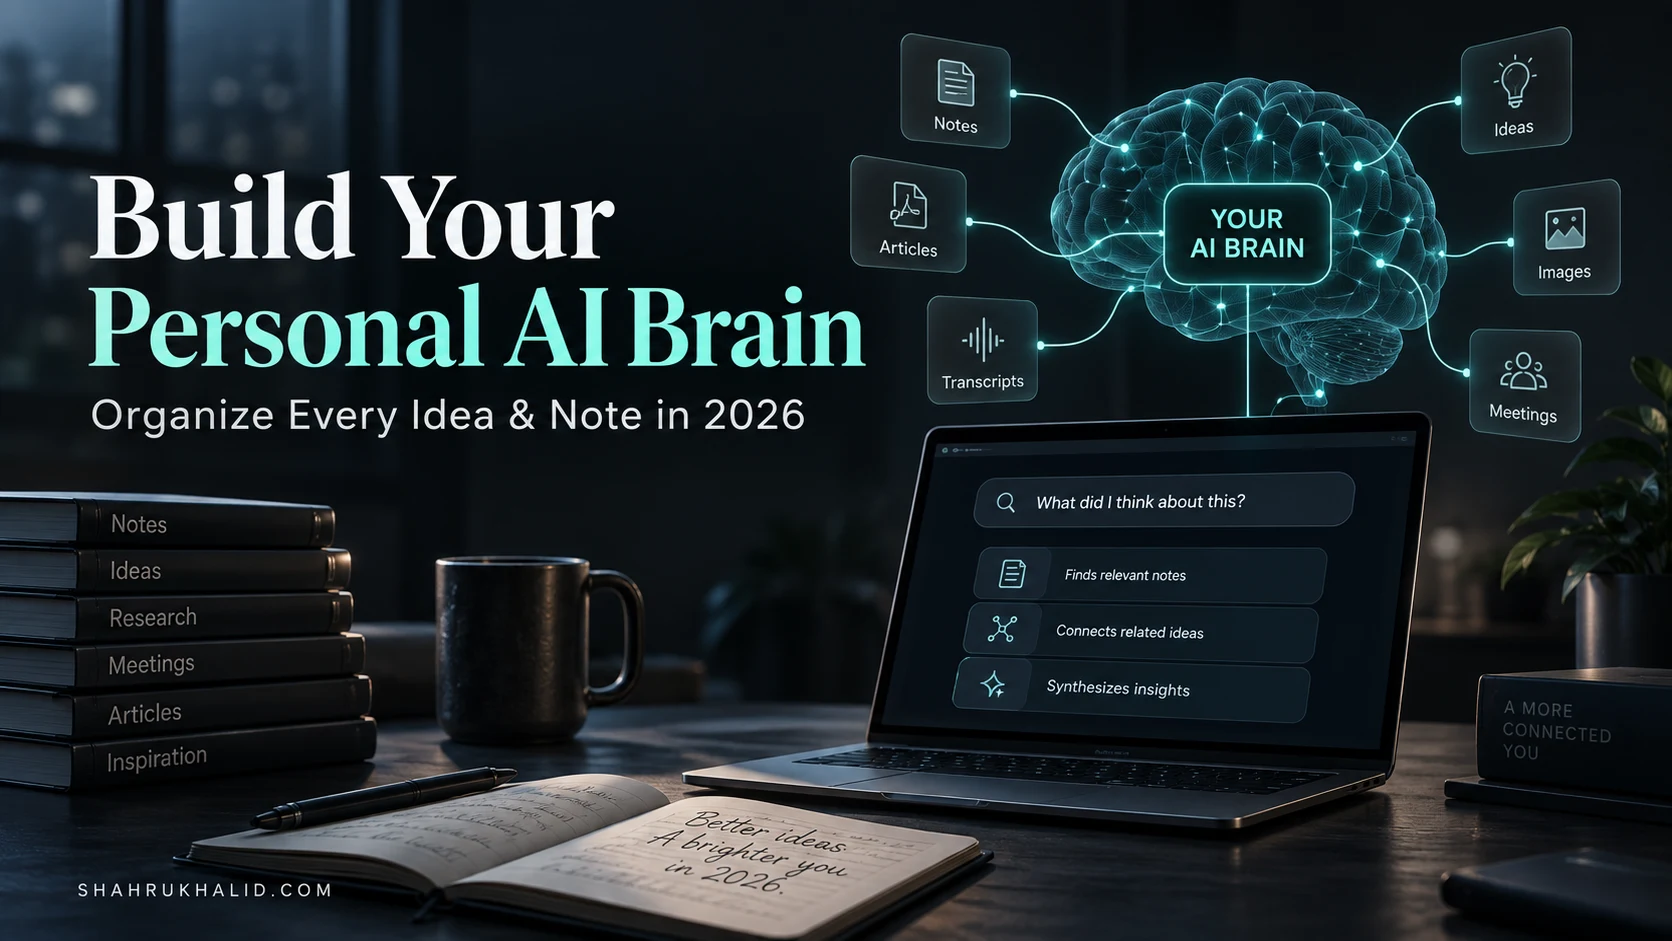
Build Your Personal AI Brain: Organize Every Idea & Note in 2026 (Step-by-Step Guide)
Key Takeaways
- A Personal AI Brain is a cognitive partner that understands, connects, and synthesizes all your ideas.
- By 2026, tools for building a personal AI knowledge system are universally accessible.
- It functions as a synthesis engine, not just a search engine, for your entire personal knowledge.
- The AI brain ingests diverse personal content to understand meaning and connect disparate information.
- It solves information chaos by recalling, synthesizing, and building upon previously lost personal insights.
It’s 3 AM. You’re staring at a blinking cursor, trying to recall that brilliant insight you had last Tuesday during a coffee break. You know you wrote it down… somewhere. Was it in that crumpled napkin? A fleeting thought in a messaging app? A line item in one of a dozen different note-taking apps you’ve tried and abandoned? The idea is gone, lost in the digital ether, another casualty of our chaotic information landscape.
I’ve been there. As an educational technology researcher, my life is a constant firehose of academic papers, technical documentation, meeting notes, and half-formed hypotheses. For years, I felt like I was building a library where the books were written in invisible ink. The more I learned, the less I could access. But what if you could build a second brain? Not just a digital filing cabinet, but a true cognitive partner—a system that doesn’t just store your ideas but understands them, connects them, and helps you build upon them.
This is the promise of a Personal AI Brain. And by the end of this masterclass, it’s a promise you will be able to realize. This isn’t science fiction, and it doesn’t require a team of Silicon Valley engineers. In 2026, the tools to build your own AI-powered knowledge system are accessible to everyone. You just need a guide.
This is that guide. We will walk, step-by-step, from the absolute fundamentals to a fully functional prototype. We will demystify the jargon, write the code together, and build a system that will fundamentally change how you interact with your own knowledge. Let’s begin.
Comprehensive Foundations & Concept Primer
Before we write a single line of code, it’s crucial to understand the what and the why. What exactly are we building, and why is it so transformative? Let’s strip away the hype and get to the core principles.
What is a Personal AI Brain? An Analogy for Clarity
Imagine you have a personal librarian. But this isn’t just any librarian. This one has read every single book, article, note, and scribbled idea you’ve ever given them. More importantly, they understand the meaning behind the words.
You don’t have to remember the exact title or author. You can walk up to this librarian and ask, “What were my main thoughts on the ethical implications of decentralized finance from last year?”
The librarian doesn’t just hand you a stack of books. They pause, think, and then say, “Well, based on your notes from the ‘Project Chimera’ meeting, that article you highlighted by Dr. Anya Sharma, and that random 2 AM thought you jotted down about digital scarcity, it seems your core argument is that while DeFi offers financial inclusivity, it lacks a robust framework for user protection, a point you compared to the early, unregulated days of the internet.”
That is a Personal AI Brain.
It’s not just a search engine for your life; it’s a synthesis engine. It’s a system that answers the fundamental question: Can AI remember all my ideas? And the answer is a resounding yes. It ingests your personal knowledge corpus—your notes, articles, transcripts, and ideas—and uses artificial intelligence to create a conversational interface to that knowledge. It’s the ultimate tool for AI-powered note-taking and knowledge management.
Why This is Essential in 2026: Moving Beyond Dumb Storage
For the last two decades, our approach to digital knowledge has been one of “dumb storage.” We have countless folders, nested hierarchies, and tagging systems. We spend more time organizing information than we do using it. This is the digital equivalent of meticulously arranging deck chairs on the Titanic. The sheer volume of information is the iceberg, and our old methods are sinking.
A Personal AI Brain flips the script. The core principle is no longer “Where did I save it?” but “What did I think about it?”
This shift is enabled by a few key technological breakthroughs that have recently become accessible:
- Large Language Models (LLMs): These are the “brains” of the operation, like GPT-4, Gemini, or Llama 3. They are masters of understanding and generating human-like text. They act as our “librarian” who can synthesize information.
- Embedding Models: This is the secret sauce. These specialized AI models convert text into a list of numbers called a “vector.” This vector represents the text’s semantic meaning. Think of it as a unique coordinate on a giant “map of meaning.” The phrase “king” would have a coordinate close to “queen” but far from “banana.”
- Vector Databases: These are specialized databases designed to store and search these numerical vectors at incredible speed. When you ask a question, the system converts your question into a vector and then searches the database for the note vectors with the closest “coordinates.” This is how it finds relevant information even if you don’t use the exact same keywords.
By combining these three components, we create a system that doesn’t rely on keyword matching but on conceptual understanding. This is the foundation of modern AI knowledge management and the digital brain architecture we’re about to build.
The Four Pillars of Your Digital Brain Architecture
Our entire system will be built on a simple, four-step process. Keep this mental model in mind as we move forward:
- Capture: The process of getting your knowledge into the system. For our guide, this will mean simple text or markdown files, but the principle applies to any data source. The goal is to make capturing ideas as frictionless as possible.
- Organize (The AI Way): This is where the magic happens. We don’t manually create folders or tags. We feed our notes to the embedding model, which “reads” them and converts them into vectors. These vectors are then stored in our vector database. The AI does the organizing for us, based on meaning.
- Retrieve: When you ask a question, the system finds the most relevant chunks of your original notes from the vector database. This is the “retrieval” in Retrieval-Augmented Generation (RAG), the technical term for this architecture.
- Synthesize: The retrieved notes, along with your original question, are sent to the LLM. The LLM’s job is not to answer from its general knowledge but to synthesize a specific, contextualized answer based only on the information you provided. This grounds the AI in your reality, preventing it from making things up and ensuring the answers are truly personal.
This is the blueprint. Now, let’s gather our tools and set up the workshop.
Prerequisites & Complete Environment Setup
Every great project starts with a clean workspace and the right tools. In this module, we’ll set up your computer with everything you need. I promise to make this process as painless as possible. We’ll go step-by-step, and I’ll explain what each component does in plain English. No black boxes here.
Your Digital Toolkit: What You’ll Need
Here’s a quick list of the software we’ll be installing. All of it is free and standard for this kind of work.
- Python (Version 3.8+): This is the programming language we’ll use. It’s the lingua franca of AI development due to its simplicity and powerful libraries.
- Visual Studio Code (VS Code): This is our code editor. Think of it as a super-powered version of Notepad. It helps you write code with features like syntax highlighting and error checking.
- A Command-Line Interface (CLI): This is the text-based window you’ll use to run commands. Don’t be intimidated! It’s a powerful and direct way to interact with your computer.
- On Windows, this is PowerShell or Command Prompt.
- On macOS and Linux, this is the Terminal.
- An OpenAI API Key: This is our “pass” to use OpenAI’s powerful embedding and language models. We’ll start with this for simplicity, but the principles apply to other providers like Google’s Gemini or open-source models.
Step 1: Installing Python
If you don’t have Python installed, let’s get it now.
- On Windows:
- Go to the official Python website:
python.org/downloads/. - Click the “Download Python” button (it should detect you’re on Windows).
- Run the installer. Crucially, on the first screen of the installer, check the box that says “Add Python to PATH”. This is a classic beginner mistake to miss. It allows you to run Python from your command line easily.
- Click “Install Now” and follow the prompts.
- On macOS:
- macOS often comes with an older version of Python. It’s best to install a modern version using Homebrew, a package manager for macOS.
- Open your Terminal (you can find it in Applications > Utilities).
- First, install Homebrew by pasting this command and pressing Enter:
bash
/bin/bash -c “$(curl -fsSL https://raw.githubusercontent.com/Homebrew/install/HEAD/install.sh)”
- Once Homebrew is installed, install Python with this simple command:
bash
brew install python3
- Verification: To make sure it’s installed correctly, open your CLI (PowerShell/Terminal) and type:
bash
python –version
or on some systems:
bash
python3 –version
You should see a version number like Python 3.11.5. If you get an error, re-check the installation steps, especially the “Add to PATH” part on Windows.
Step 2: Installing VS Code
This is straightforward. Go to the official VS Code website: code.visualstudio.com. Download the installer for your operating system (Windows, macOS, Linux) and run it. Accept all the default settings.
Once installed, open VS Code. We need one essential extension.
- Click on the Extensions icon on the left-hand sidebar (it looks like four squares).
- Search for “Python”.
- Install the official Python extension from Microsoft. It will provide all the support we need.
Step 3: Creating Your Project Workspace
Organization is key. Let’s create a dedicated folder for our Personal AI Brain project.
- Open your CLI (Terminal or PowerShell).
- Navigate to a place you like to store projects, like your Documents folder. The
cdcommand means “change directory.”
bash
cd Documents
- Create a new directory for our project.
mkdirmeans “make directory.”
bash
mkdir personal-ai-brain
- Move into that new directory:
bash
cd personal-ai-brain
- Now, open this entire folder in VS Code by typing:
bash
code .
The . is a shortcut that means “the current directory.” VS Code should now open with our personal-ai-brain folder in the Explorer panel on the left.
Step 4: Setting Up a Virtual Environment (Your Project’s Sandbox)
This is a critical best practice. A virtual environment is like a clean, isolated container for the specific Python libraries (our “dependencies”) our project needs. This prevents conflicts with other Python projects on your system.
- Inside VS Code, open a new terminal by going to the top menu and selecting
Terminal > New Terminal. This will open a CLI panel at the bottom of VS Code, already in our project directory. - Create the virtual environment with this command:
bash
python -m venv .venv
This tells Python to run its built-in venv module and create a virtual environment in a folder named .venv. You’ll see this new folder appear in your VS Code Explorer.
- Activate the environment. This is like “stepping inside” the sandbox. The command is slightly different for each OS.
- Windows (PowerShell):
powershell
..venvScriptsActivate.ps1
(If you get an error about execution policies, you may need to run Set-ExecutionPolicy -ExecutionPolicy RemoteSigned -Scope Process first and then try again.)
- macOS/Linux:
bash
source .venv/bin/activate
You’ll know it’s active because your command prompt will change to show (.venv) at the beginning of the line.
Step 5: Installing the Python Libraries
With our environment active, we can now install the specific tools we need. We’ll use pip, Python’s package installer.
Run the following command in your activated terminal:
bash
pip install python-dotenv langchain-openai langchain chromadb beautifulsoup4
Let’s quickly break down what we just installed:
python-dotenv: A utility to load our secret API key from a file, keeping it out of our code.langchain-openai: The specific LangChain package for interacting with OpenAI’s models.langchain: The core framework that helps us “chain” together the different components (LLM, retriever, etc.). It’s the glue for our system.chromadb: Our local vector database. This is where the “memory” of our brain will live.beautifulsoup4: A handy library for parsing HTML, which we might use later to scrape articles from the web.
Step 6: Getting and Securing Your API Key
- Go to
platform.openai.comand create an account. - Navigate to the “API keys” section in your account settings.
- Click “Create new secret key.” Give it a name like “PersonalBrainKey”.
- Copy the key immediately. You will not be able to see it again.
- Important: To use the API, you may need to add a payment method and purchase some credits. The cost for our project will be very low (likely less than a dollar), as embedding and querying are cheap, but it’s not free.
Now, let’s store this key securely.
- In VS Code, in your
personal-ai-brainfolder, create a new file named.env. - Inside this
.envfile, add the following line, pasting your secret key after the equals sign without any quotes:
OPENAI_API_KEY=sk-xxxxxxxxxxxxxxxxxxxxxxxxxxxxxxxxxxxxxxxx
- Crucially, we must tell our version control system (like Git) to ignore this file so we don’t accidentally publish our secret key online. Create another new file named
.gitignore. - Inside the
.gitignorefile, add these two lines:
.env
.venv
This tells Git to ignore our secrets file and our virtual environment folder.
Our environment is now fully configured! We have our workshop, our tools, and our raw materials ready. In the next module, we’ll lay out the architectural blueprint for our Personal AI Brain.
Core Implementation Architecture: Your Personal AI Brain Blueprint
Now that our workshop is set up, let’s unroll the blueprints. Before we touch the code, it’s vital to have a crystal-clear mental model of how our system works. Understanding this flow is the difference between blindly copying code and truly knowing how to build and debug your own AI knowledge management system.
We’ll visualize this process as a series of connected “stations” on an assembly line. Your raw notes go in one end, and intelligent answers come out the other. I’ll use a visual card structure to explain each step.
### Visual Card Grid: The Journey of an Idea
Let’s dive a little deeper into the most critical stations.
Station 3: Splitting (Chunking) – Why Size Matters
You might wonder, “Why can’t I just feed my entire 10-page document to the AI?” There are two main reasons.
- Context Window Limits: Every LLM has a “context window,” which is the maximum amount of text it can consider at one time. If your document is too long, it simply won’t fit.
- Relevance & Noise: More importantly, when you search for an answer, you don’t want the AI to retrieve a massive, unwieldy document where only one sentence is relevant. By splitting the document into smaller, focused chunks, we ensure that the search results are highly relevant and contain less “noise.”
Our TextSplitter will do this intelligently. We’ll tell it a chunk_size (e.g., 1000 characters) and a chunk_overlap (e.g., 200 characters). The overlap is a clever trick: it ensures that a sentence or idea that gets cut off at the end of one chunk is fully present at the beginning of the next, preserving context across boundaries.
Station 4: Embedding – The True “AI” in Your Personal AI Brain
This is the most abstract but most important concept. As I mentioned in Module 1, an embedding is a vector of numbers. But what does that mean?
Imagine a huge, multi-dimensional space. The embedding model has been trained on a vast amount of text from the internet. It has learned to place words and sentences in this space based on their context and meaning.
- The vector for “Apple the company” will be in a region near “Microsoft” and “stock market.”
- The vector for “apple the fruit” will be in a completely different region, near “orange” and “pie.”
When we embed a chunk of your notes—say, “My thoughts on effective team leadership involve clear communication and psychological safety”—it gets its own unique coordinate in this space. A chunk about “managing a software project” will be placed nearby, while a chunk containing a recipe for lasagna will be placed very far away.
This is how our AI can find conceptually related ideas, even if they don’t share any keywords. This is the core of our AI note organization strategy.
Station 5 & 7: Storing and Retrieving – The Brain’s Memory
Our vector store, ChromaDB, is the physical memory of our brain. It stores every single vector we create. When you ask a question like, “What have I written about psychological safety?”, the following happens:
- Your question itself is converted into a vector using the same embedding model.
- ChromaDB takes this “question vector” and, in a fraction of a second, calculates its distance to every other vector in the database.
- It returns the top 3 or 4 vectors that are “closest” in the multi-dimensional meaning-space. These are the chunks of your notes that are most semantically relevant to your question.
This process is called similarity search, and it’s the engine of our retrieval system.
Station 8: Synthesis – From Raw Data to Insight
The final step is where the Large Language Model (LLM) shines. The retriever hands the LLM a package containing:
- Your Original Question: “What have I written about psychological safety?”
- The Retrieved Context:
- Chunk 1: “…effective team leadership involve clear communication and psychological safety…”
- Chunk 2: “In the retro for Project Phoenix, the team mentioned that fear of failure was stifling creativity. This is a classic sign of low psychological safety.”
*