Step-by-Step: How to Create an Automated AI Research Workflow on Your Laptop in 2026

Key Takeaways
- Personal laptops can host professional-grade, reproducible AI research workflows by 2026.
- Automated AI research workflows are the most crucial skill for discovery and innovation.
- This workflow transforms chaotic, manual AI research into a streamlined, automated pipeline.
- Version control acts as a 'Master Recipe Book,' tracking every research change.
- Accessible AI labs on laptops democratize serious AI research for beginners.
It was, to put it mildly, chaos.
But what if I told you that by 2026, the ability to create a professional-grade, reproducible, and highly efficient research environment isn’t just for the big labs? What if you could build your very own Automated AI Research Workflow right on your personal laptop? That’s exactly what we’re going to do together in this masterclass. We’re going to transform that chaos into a streamlined, automated pipeline that lets you focus on what truly matters: discovery and innovation. This guide is your step-by-step blueprint, designed for the absolute beginner, to build a personal AI lab that works for you, not against you.
Comprehensive Foundations & Concept Primer
Before we dive into a single line of code or install any software, let’s take a moment to build a rock-solid mental model. What exactly is an automated AI research workflow, and why is it the single most important skill you can develop in this field in 2026?
The Parable of the Chaotic Kitchen: Why We Need a System
Imagine you’re a brilliant chef trying to invent the world’s greatest cookie recipe. Your first attempt is pretty good. You jot down some notes on a napkin: “a bit of flour, some sugar, chocolate chips.” The next day, you try again, adding more brown sugar. It’s even better! But you forgot to write down how much more. A week later, you’re surrounded by a mountain of mixing bowls, stained napkins, and dozens of cookie batches, some burnt, some raw. You taste a cookie from two days ago—it’s perfect! But you have absolutely no idea how you made it. You can’t recreate your own success.
This, my friends, is the default state of most beginner (and even many professional) AI research projects. The “napkins” are our scattered Python scripts and notebooks. The “ingredients” are our datasets and model files, often with confusing names. The “finished cookies” are our trained models, and the “taste tests” are our evaluation metrics. Without a system, we’re just brilliant but chaotic chefs, unable to reliably reproduce our best work.
An Automated AI Research Workflow is the solution. It’s like transforming your chaotic kitchen into a state-of-the-art, automated culinary laboratory.
Think of it as a master system with four key components:
- The Master Recipe Book (Version Control): This book doesn’t just store the final recipe; it tracks every single change you’ve ever made. If you decided to use almond flour instead of all-purpose on Tuesday at 3:15 PM, the book has a perfect record of it. This is what tools like Git do for our code.
- The Smart Pantry (Data & Model Versioning): Your pantry is now intelligent. When you get a new 50-pound bag of flour (our large dataset), you don’t cram it into the recipe book. Instead, you register it with the pantry, which labels it and tracks which recipe used it. If you bake a thousand perfect cookies (our trained model), the pantry stores them safely, linking them back to the exact recipe and ingredients used. This is the magic of tools like DVC (Data Version Control).
- The Automated Assembly Line (Pipeline Orchestration): You no longer mix, bake, and cool by hand. You define the steps once: mix ingredients, portion dough, bake at 350°F for 12 minutes, cool for 5 minutes. Now, you can just press a button, and the assembly line runs the entire process perfectly, every single time. If you get a new type of chocolate chip, the assembly line automatically re-runs the process to create a new batch. This is our AI model development pipeline.
- The Quality Control Logbook (Experiment Tracking): Every batch that comes off the assembly line is automatically tested. Its crispiness, chewiness, and chocolate-to-dough ratio are meticulously recorded in a digital logbook. You can then open this logbook and easily compare Batch #1 (with walnuts) to Batch #5 (with macadamia nuts) to see which one performed better. This is what experiment tracking tools like MLflow provide.
When you put these four pieces together, you get a system where you can say, “Let’s see what happens if I use 10% less sugar.” You make one tiny change to your recipe, press one button, and the entire system whirs to life, producing a new, perfectly documented, and evaluated batch of cookies. That’s the power we’re going to build. It’s not about being less creative; it’s about creating a system that amplifies your creativity by handling all the tedious, repetitive, and error-prone tasks for you.
Why This Is Essential in 2026: The Age of the Local AI Lab
Just a few years ago, the idea of running meaningful AI research locally on a laptop seemed far-fetched. The models were too big, the datasets were colossal, and the computational power required was immense. But the landscape of 2026 is dramatically different.
First, we’re seeing the rise of incredibly powerful and efficient Small Language Models (SLMs) and specialized computer vision models. These models can perform remarkably well on specific tasks without needing a data center’s worth of GPUs. As a curriculum developer, I’m constantly amazed by what can be achieved with models that are less than 7 billion parameters, a size that’s becoming increasingly manageable on high-end consumer hardware.
Second, the tooling for AI research automation has matured beautifully. Open-source projects like DVC and MLflow, which we’ll be using, are robust, well-documented, and designed to work together seamlessly. They bring the power of MLOps (Machine Learning Operations)—a discipline once reserved for large tech companies—down to the individual developer.
Finally, the very nature of research is changing. The ability to iterate quickly, test hypotheses rapidly, and ensure 100% reproducibility is no longer a “nice-to-have.” It’s the barrier to entry. If your research isn’t reproducible, it’s just a rumor. By building a personal AI lab setup on your laptop, you are not just learning to code; you are learning the scientific process for the digital age. You’re ensuring that your greatest “Eureka!” moments can be verified, shared, and built upon by others, and most importantly, by your future self.
This guide answers the fundamental question: How can I automate my AI research? We’ll do it by building a system that is:
- Reproducible: Anyone (including you, six months from now) can replicate your results exactly.
- Versioned: Every component—code, data, and models—is tracked.
- Automated: Tedious steps are chained together into a single command.
- Organized: No more guesswork. You know exactly what produced which result.
Let’s get ready to build your very own automated AI research engine.
Prerequisites & Complete Environment Setup
Alright, theory time is over. Let’s get our hands dirty and start building our Local AI development environment. This module is all about setting up your digital workshop. I’ll guide you through every single step, command by command. There’s no magic here, just a clear, methodical process. If you follow along, you’ll have a professional-grade setup ready to go.
The core question we’re answering here is: What tools are needed for AI workflow automation on a laptop? We’ll install the “big four” we discussed: a code editor, a version control system for code (Git), a version control system for data (DVC), and an experiment tracker (MLflow).
Step 1: The Foundation – Terminal, Python, and VS Code
Everything we do will be orchestrated from the command line, or “terminal.” Don’t let it intimidate you! Think of it as a direct, text-based way to talk to your computer. It’s powerful, precise, and faster than clicking through menus once you get the hang of it.
- For Windows: I recommend using Windows Subsystem for Linux (WSL 2). It gives you a genuine Linux environment right inside Windows, which is the standard for AI development. You can install it by opening PowerShell as an Administrator and running
wsl --install. After a restart, you’ll have an Ubuntu terminal ready to go. - For macOS: You’re in luck! Your built-in Terminal app is a Unix-based environment, perfect for our needs. You can find it in
Applications/Utilities. - For Linux: You’re already home. Just open your favorite terminal emulator.
Installing Python with Miniconda:
While your system might have Python pre-installed, we need a way to manage different project dependencies without them clashing. This is where conda comes in. It lets us create isolated “environments” for each project.
- Download Miniconda: Go to the Miniconda documentation (a resource I trust, much like the foundational web docs from Mozilla Developer Network). Download the installer for your operating system (Python 3.9+).
- Install Miniconda: Open your terminal and navigate to your Downloads folder. Run the installer script. For macOS/Linux, it will be something like:
bash
bash Miniconda3-latest-MacOSX-x86_64.sh
Accept the license terms and default locations. After it finishes, close and reopen your terminal.
- Create and Activate a Project Environment: Let’s create a dedicated environment for our project, which we’ll call
ai-workflow.
bash
conda create –name ai-workflow python=3.10 -y
This command tells conda to create a new environment named ai-workflow with python version 3.10. The -y flag automatically says “yes” to the prompts.
Now, activate it:
bash
conda activate ai-workflow
You’ll see (ai-workflow) appear at the beginning of your terminal prompt. This confirms you’re inside our project’s isolated sandbox. Every package we install from now on will only exist here.
Installing Visual Studio Code (VS Code):
This will be our primary code editor. It’s free, powerful, and has incredible extensions for Python and AI development.
- Download and Install: Visit the official VS Code website and install it for your OS.
- Install Essential Extensions: Open VS Code, go to the Extensions view (the icon with four squares on the left sidebar), and install the following:
- Python (from Microsoft): This is non-negotiable. It provides IntelliSense (smart code completion), linting (error checking), and debugging.
- Jupyter (from Microsoft): Even though we’re focusing on scripts, this is invaluable for quick data exploration.
- DVC (from Iterative): This extension provides a GUI for many of the DVC commands we’ll be using.
Step 2: Setting Up the Project Directory and Version Control with Git
Organization is key. Let’s create a clean folder structure for our project.
- Create the Project Folder: In your terminal, navigate to where you keep your projects (e.g.,
cd ~/Documents/Projects) and create a new directory.
bash
mkdir automated-ai-research
cd automated-ai-research
- Initialize Git: Now, we’ll turn this folder into a Git repository to start tracking our code.
bash
git init
This command creates a hidden .git sub-folder. This is the “brain” of Git, where it will store the entire history of your project’s code. As the folks at Shahrukh Khalid | Technology News & Insights often emphasize, version control isn’t a feature; it’s the foundation of modern software development.
Verification: Run git status. You should see a message like “On branch master” or “On branch main” and “nothing to commit”. This confirms Git is ready.
Step 3: Installing and Initializing Our Automation Tools
With our environment active and our folder initialized, let’s install the stars of the show: DVC and MLflow.
- Install Python Libraries: Since our
ai-workflowconda environment is active, we can usepip, Python’s package installer.
bash
pip install dvc[s3] mlflow scikit-learn pandas
Let’s break this down:
pip install: The command to install Python packages.dvc[s3]: This installs DVC and includes optional dependencies for connecting to Amazon S3 as a remote storage backend. Even if we start with local storage, it’s good practice to have this ready.mlflow: This installs the MLflow experiment tracking library.scikit-learn pandas: These are two of the most fundamental libraries for machine learning and data manipulation in Python. We’ll need them for our example project.
- Initialize DVC: Similar to Git, DVC needs to be initialized within our project.
bash
dvc init
This command creates a .dvc directory and a few configuration files. It also creates a .dvc/config file where we will set up our remote storage. Crucially, it creates a .dvcignore file, which works just like .gitignore, telling DVC which files to ignore.
Verification: Run git status. You’ll see that DVC has created new files. This is a critical concept: DVC’s configuration is tracked by Git. This is how they work together. Add these files to Git’s tracking and make your first “commit” (a snapshot in time).
bash
git add .
git commit -m “Initial commit: Initialize Git and DVC”
- Configure DVC Remote Storage (Starting Locally): DVC needs a place to store your large files (datasets, models). This can be cloud storage like S3, Google Cloud Storage, or even just another folder on your laptop. For a beginner-friendly personal AI lab setup, let’s start with a local directory.
First, create a directory outside your project folder to act as your “cloud” storage.
bash
# From inside your ‘automated-ai-research’ directory
mkdir ../dvc-storage
Now, tell DVC to use this as its remote storage.
bash
dvc remote add -d my-local-storage ../dvc-storage
Let’s dissect this command:
dvc remote add: The command to add a new remote storage location.-d: This flag sets this remote as thedefault.my-local-storage: A name we’re giving to this remote.../dvc-storage: The path to the storage directory we just created.
Run git status again. You’ll see that the .dvc/config file has been modified. This is DVC recording the remote storage location. Commit this change!
bash
git add .dvc/config
git commit -m “Configure DVC local remote storage”
You’ve done it! Your environment is fully configured. You have an isolated Python environment, a Git repository for your code, and a DVC system ready to track your data and models. In the next module, we’ll map out the architecture of how these pieces will talk to each other to create our automated AI research workflow.
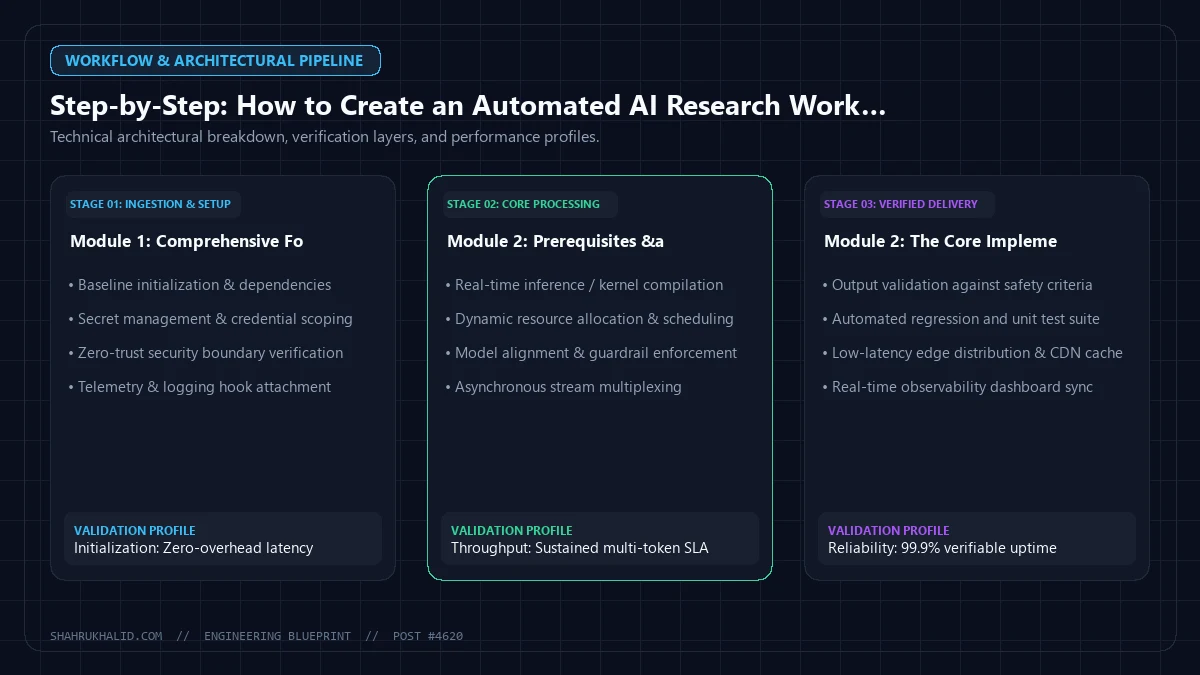
The Core Implementation Architecture of Your Automated AI Research Workflow
Now that our workshop is set up, let’s draw the blueprint. How will all these tools—Git, DVC, MLflow—actually work together? Understanding this flow is crucial. It’s the difference between just using tools and truly orchestrating them. We’re moving from “what” to “how.”
I want you to visualize this process not as a list of commands, but as a series of interconnected stages, like stations on an assembly line. Each stage has a specific job, takes a specific input, and produces a specific output that the next stage uses.
Visualizing the Pipeline: A Grid of Responsibilities
Let’s imagine our project laid out on a table. We have different types of files and different tools to manage them. Here’s how they relate:
This separation of concerns is the core principle of a robust Machine learning workflow. Git handles what it’s good at (text), and DVC handles what it’s good at (large, binary files). MLflow acts as the universal scribe, documenting everything.
The Step-by-Step Flow of a Single Automated Run
Let’s walk through a complete, end-to-end run of our automated pipeline. This is the journey from an idea (“What if I try a different algorithm?”) to a result.
The Trigger: A Change
It all starts with you, the researcher. You decide to change something. For instance, you want to test if using 200 trees in your Random Forest model is better than 100. You open a single configuration file, let’s call it params.yaml, and change one line:
yaml
# In params.yaml
train:
n_estimators: 100 # Change this to 200
max_depth: 10
You save the file and commit this change to Git: git commit -am "Experiment: increase n_estimators to 200". This is your “intent” signal.
The Command: dvc repro
Now for the magic. You go to your terminal and type a single command:
bash
dvc repro
repro is short for “reproduce.” This command tells DVC to look at your pipeline definition file (which we’ll build in the next module, called dvc.yaml) and figure out what needs to be re-run based on your change.
The Automated Cascade: How DVC Orchestrates the Pipeline
Here’s what dvc repro does under the hood, step-by-step:
- Stage 1: Data Preprocessing
- DVC Checks: “Has the raw data changed? Has the data processing script (
preprocess.py) changed?” - Decision: In our case, no. The raw data and the script are the same.
- Action: DVC sees it has already run this stage before and the output (the processed data) is cached. It instantly skips this stage, saving a huge amount of time. This is called caching and it’s a superpower.
- Stage 2: Model Training
- DVC Checks: “Has the training script (
train.py) changed? Has the processed data (input to this stage) changed? Have the training parameters (params.yaml) changed?” - Decision: Yes! DVC detects that
params.yamlhas a new Git commit hash. The dependency has changed. - Action: DVC executes the command for the training stage. This runs your
train.pyscript. - Inside
train.py, you’ve written code to load the processed data. - You’ve also written code to use MLflow, which starts tracking a new experiment. It logs the parameter
n_estimators: 200. - The script trains the new model.
- The script saves the trained model file (e.g.,
model.pkl). - MLflow logs the training time and other details.
- Stage 3: Model Evaluation
- DVC Checks: “Has the evaluation script (
evaluate.py) changed? Has the new model (model.pkl, the input to this stage) changed?” - Decision: Yes! The training stage just produced a new
model.pkl. - Action: DVC executes the command for the evaluation stage. This runs your
evaluate.pyscript. - Inside
evaluate.py, your code loads the newmodel.pkl. - It runs the model against a test dataset.
- It calculates metrics like accuracy and F1-score.
- It uses MLflow to log these metrics (
accuracy: 0.915) to the same experiment run that the training stage started. - It might also save these metrics to a text file (e.g.,
metrics.json).
The Result: A Complete, Auditable Record
After the dvc repro command finishes, you have a complete, end-to-end record of your experiment:
- Git has a commit that shows the exact parameter change you made.
- DVC is now tracking the new
model.pklandmetrics.jsonfiles, linking them to the Git commit that produced them. - MLflow has a new entry in its UI. You can open it in your browser and see the parameters, the resulting metrics, the model file itself, and more.
Now, you can open the MLflow UI, compare this new run (with 200 estimators) side-by-side with your old run (with 100 estimators), and make an informed decision about whether the change was an improvement. If you want to go back to the old version, you can use git checkout to revert your params.yaml file, run dvc checkout to sync your data and models, and you’re instantly back in your previous state.
This is the core architecture of a truly Automated AI Research Workflow. It’s a closed-loop system that connects your ideas (Git commits) to your actions (DVC pipeline) and your results (MLflow tracking). In the next module, we’ll write the actual code to bring this blueprint to life.
Hands-on Code & Practical Implementation
This is the module where it all comes together. We’re going to write the code, define the configuration, and execute the workflow we just designed. I’ll provide fully functional, heavily commented code that you can adapt for your own projects. We’ll build a simple text classification model to predict whether a news headline is about “Business” or “Science & Technology”. This is a classic problem and serves as a perfect, understandable example.
Our goal is to create a project that you can run from start to finish with a single command: dvc repro.
Step 1: Getting the Data and Adding it to DVC
First, we need data. We’ll use a simplified version of the “AG News” dataset. For simplicity, I’ve prepared a small CSV file for you.
- Create a
datadirectory:
bash
mkdir data
- Download the data: Create a file named
data/news_headlines.csvand paste the following content into it. In a real project, this could be a massive file you download.
csv
category,text
Business,”Wall St. Bears Claw Back Into the Black (Reuters)”
Sci/Tech,”Carlyle Looks Toward Commercial Aerospace (Reuters)”
Business,”Oil and Economy Cloud Stocks’ Outlook (Reuters)”
Sci/Tech,”What Is the Difference Between a Terabyte and a Terapod?”
Business,”Market Ends Week Up, But Down For The Month (Reuters)”
Sci/Tech,”The Race to Build a Quantum Computer That Can Change the World”
Business,”Fed’s Charles Plosser sees high bar for more QE”
Sci/Tech,”Nvidia’s New GPUs: A Leap in Gaming and AI Performance”
Business,”US trade deficit narrows less than expected”
Sci/Tech,”NASA’s Artemis I Mission: The First Step in a New Era of Lunar Exploration”
- Track the data with DVC: Now, let’s tell DVC to manage this file.
bash
dvc add data/news_headlines.csv
This command does two things:
- It copies
data/news_headlines.csvinto DVC’s internal cache. - It creates a small pointer file named
data/news_headlines.csv.dvc. This file contains information (like an MD5 hash)