5 Easy Steps to Build an AI Study Buddy on Your Laptop in 2026

Platform: Shahrukh Khalid | Technology News & Insights
Imagine this: it’s 3 AM, the night before your final exam. You’re staring at a mountain of lecture notes, textbooks, and research papers, feeling completely overwhelmed. What if you could just… ask the mountain a question? What if you had a tireless, infinitely patient study partner right on your laptop, one that has read everything you have, understands it, and can explain it back to you in any way you ask? In this masterclass, we’re not just going to imagine it; we’re going to build it. Together, we’ll walk through five core steps to create your very own personalized AI Study Buddy, a project that was science fiction a few years ago but is now, in 2026, wonderfully within your grasp.
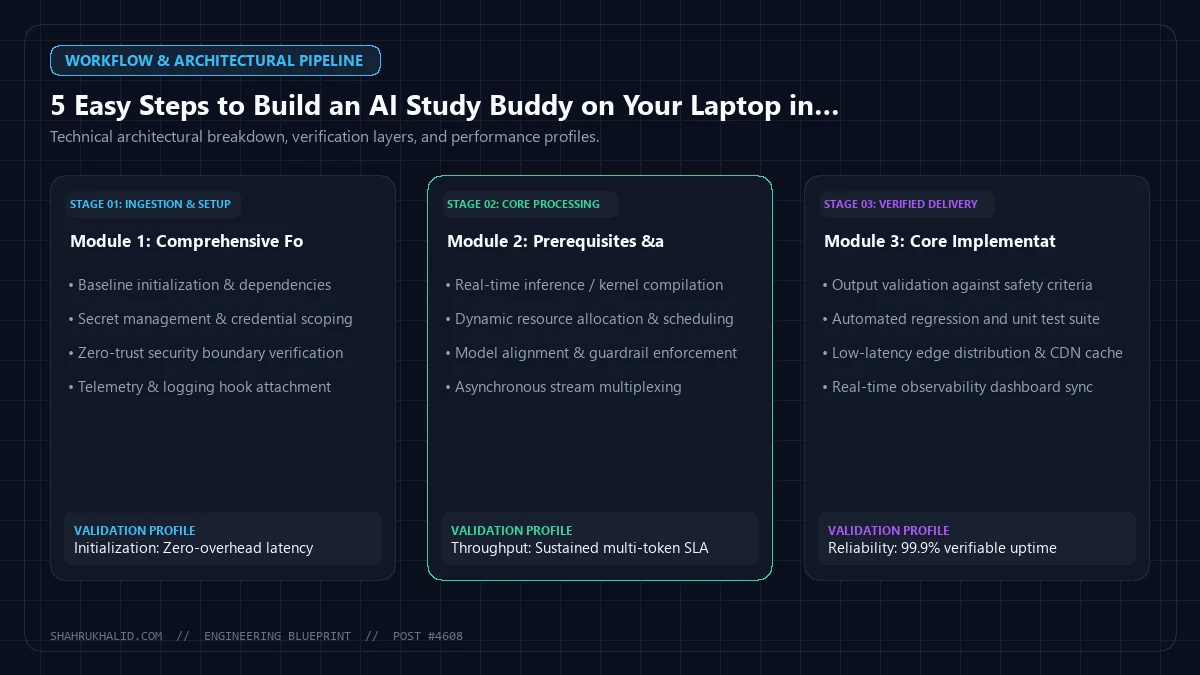
Comprehensive Foundations & Concept Primer
Why This Matters in 2026: The End of ‘Information Overload’
Back in the early 2020s, the big challenge in learning was access to information. We celebrated the internet as a library of Alexandria at our fingertips. But by 2026, we’ve realized that having every book in the world isn’t helpful if you don’t know which page to turn to. The problem is no longer access; it’s synthesis. We’re drowning in data—PDFs, video lectures, articles, podcasts—and the real skill is connecting the dots.
This is where your personal AI Study Buddy comes in. It’s not another search engine. It’s a synthesis engine. It doesn’t just find information; it understands it in the context of your curriculum. This shift from information retrieval to knowledge synthesis is the single most significant change in educational technology this decade, and you’re about to build your own.
Core Concepts Without the Jargon: The Librarian Analogy
Let’s imagine you’re in a massive, chaotic library. This library is your laptop’s “Downloads” folder, filled with your course materials. Building an AI Study Buddy involves hiring three magical employees to manage this library for you.
- The Intern (Document Loader & Chunker): Your first employee’s job is to take every book, paper, and scroll (your PDFs, text files, etc.) and break them down into manageable, bite-sized index cards. A 300-page textbook is too much to read at once, but a single paragraph on an index card is perfect. This process is called chunking.
- The Super-Librarian (Vector Embeddings & Vector Store): This isn’t any ordinary librarian. She doesn’t organize books by author or title. Instead, she reads every single index card and arranges them in a vast, multi-dimensional space based on their meaning. Cards about “economic inflation in the Roman Empire” are placed near cards about “currency debasement,” even if they don’t share the exact same words. This magical organization system is a Vector Store, and the process of understanding meaning is called creating Embeddings. Think of it as a conceptual map instead of an alphabetical index.
- The Grand Sage (The Large Language Model – LLM): This is the wise expert you talk to. When you ask a question like, “How did monetary policy affect the fall of Rome?”, the Sage doesn’t have to read the entire library. Instead, she first asks the Super-Librarian: “Quick, give me all the index cards related to Roman money and decline.” The Librarian instantly retrieves the most relevant cards. The Sage then reads these few, highly relevant cards and uses her vast general knowledge to synthesize a perfect, custom-written answer for you. This two-step process—retrieving relevant information first, then generating an answer—is called Retrieval-Augmented Generation (RAG).
That’s it. That’s the entire architecture. RAG is the secret sauce that makes your study buddy personal. Without it, an AI like ChatGPT can tell you about the fall of Rome in general terms. With RAG, it can tell you what your professor said about it in Lecture 4, referencing a specific chart from your textbook. This is the difference between a generic tool and a personal tutor.
As we build, remember these three roles. Every piece of code we write will serve one of these magical employees. This conceptual clarity, as emphasized in the pedagogical guides on Shahrukh Khalid’s platform, is the key to mastering any new technology.
Prerequisites & Complete Environment Setup
Your Digital Workbench: What You’ll Need
Before we can start building, we need to set up our workshop. Don’t worry, this is a one-time process, and I’ll guide you through every single click and command. Our goal is to create a clean, isolated space on your computer where our project can live without interfering with anything else.
- A Modern Laptop (Windows, macOS, or Linux): Any computer from the last 5-6 years will be more than sufficient. You don’t need a supercomputer.
- An Internet Connection: We’ll be downloading some tools and connecting to an AI model’s API.
- A Cup of Coffee or Tea: This is a marathon, not a sprint. Let’s make it enjoyable!
Step-by-Step Installation Guide
We’re going to install three key things: Python (the programming language), VS Code (our code editor), and a set of specific Python libraries (our tools). Follow these steps precisely.
1. Installing Python (Version 3.9+)
Python is the language of AI. It’s readable, powerful, and has a massive community. By 2026, it’s more dominant than ever.
- Go to the official Python website: python.org/downloads/.
- Download the latest stable version for your operating system (e.g., Windows installer, macOS installer).
- Crucial Step for Windows Users: When you run the installer, make sure to check the box that says “Add Python to PATH“. This will save you a lot of headaches later.
- Follow the installation prompts until it’s finished.
- Verification: Open your command line tool (Terminal on macOS/Linux, or PowerShell/Command Prompt on Windows) and type
python --versionorpython3 --version. You should see a version number likePython 3.11.4. If you do, congratulations!
2. Installing Visual Studio Code (VS Code)
VS Code is our text editor. Think of it as Microsoft Word for code—it helps with syntax highlighting, organization, and running our program.
- Go to the official VS Code website: code.visualstudio.com/.
- Download and install the version for your operating system. The standard installation is perfect.
- Once installed, open VS Code. Go to the “Extensions” tab on the left (it looks like four squares). Search for and install the official “Python” extension from Microsoft. This will supercharge your Python development experience.
3. Creating Your Project Directory & Virtual Environment
This is the most critical step for maintaining a clean project. A virtual environment is like a self-contained bubble for our project’s tools (libraries).
- Create a new folder for our project. Let’s call it
ai-study-buddy. You can do this on your Desktop or in your Documents folder. - Open VS Code, then go to
File > Open Folder...and select theai-study-buddyfolder. - Now, let’s create the virtual environment. In VS Code, go to
View > Terminal(orTerminal > New Terminal). This opens a command line right inside your editor. - In the terminal, type the following command:
python3 -m venv .venv
This tells Python to create a virtual environment named.venvinside our project folder. You’ll see a new.venvfolder appear. - Activate the environment. This is like “stepping inside” the bubble.
- On macOS/Linux:
source .venv/bin/activate - On Windows (PowerShell):
.venvScriptsActivate.ps1 - On Windows (Command Prompt):
.venvScriptsactivate.bat
You’ll know it worked because you’ll see
(.venv)appear at the beginning of your terminal prompt. - On macOS/Linux:
4. Installing the Python Libraries
With our environment active, we can now install the specific tools our “magical employees” need. These are Python packages we’ll download using pip, Python’s package installer.
In your activated terminal, run this command:
pip install streamlit google-generativeai python-dotenv pypdf2 chromadb
Let’s quickly break down what we just installed:
streamlit: An amazing library for creating simple, beautiful web app interfaces with just Python. This is for our UI.google-generativeai: The official Python SDK to talk to Google’s powerful AI models, like Gemini. This is for our “Grand Sage.”python-dotenv: A utility to manage secret keys (like our API key) safely.pypdf2: A library to read and extract text from PDF files. This is for our “Intern.”chromadb: An easy-to-use, open-source vector store that runs right on your laptop. This is for our “Super-Librarian.”
Finally, let’s create a record of our tools. In the terminal, run:
pip freeze > requirements.txt
This creates a file named requirements.txt that lists all the libraries we installed. It’s a best practice for sharing your project with others.
Your environment is now perfectly set up. You have your language, your editor, and all the specialized tools ready to go. In the next module, we’ll design the blueprint for how they all fit together.
Core Implementation Architecture
The Blueprint: A Visual Flow of Information
Before a single line of code is written, great builders have a blueprint. For our AI Study Buddy, our blueprint isn’t about concrete and steel; it’s about the flow of data. Understanding this flow is more important than memorizing any specific command. As we learned from the foundational guides at MDN Web Docs, a clear architectural model is the key to a robust application.

Let’s visualize our application as a series of connected “cards” on a diagram. This is the RAG (Retrieval-Augmented Generation) process we discussed in Module 1, now mapped to our specific tools.
Visual Card Grid: The Study Buddy’s Brain
Tool: Streamlit
Function: This is what you, the user, see and interact with. It has two main jobs:
- An “Upload” button to accept your study documents (PDFs).
- A “Chat Input” box where you can ask your questions.
Flow: It sends the uploaded files and user questions to the Backend Orchestrator.
Tool: Our main Python script (
app.py)Function: This is the “traffic cop” or the central nervous system of our application. It coordinates everything.
- Receives files from the UI.
- Tells the “Intern” (our PDF processor) to read and chunk the files.
- Hands these chunks to the “Super-Librarian” (ChromaDB) to be vectorized and stored.
- When a question comes in, it directs the query to the right components.
Flow: It’s the central hub connecting all other cards.
Tool: ChromaDB
Function: This is the “personal memory” of your study buddy. It doesn’t store the text itself in a searchable way, but the meaning of the text (as vectors).
- Stores the vectorized chunks of your uploaded documents.
- When given a query vector (the meaning of your question), it performs a “similarity search” to find the most conceptually related document chunks.
Flow: Receives chunks from the Orchestrator to store. Returns relevant chunks to the Orchestrator when queried.
Tool: Google AI (Gemini Model)
Function: This is the “Grand Sage.” It’s a powerful, general-purpose AI that is excellent at understanding language and generating human-like text.
- It does NOT know about your specific PDFs.
- Its job is to receive a prompt from our Orchestrator and generate a high-quality answer based only on the information given in that prompt.
Flow: Receives the user’s question PLUS the relevant context from the Vector Store. It sends back a final, synthesized answer.
The Step-by-Step User Journey (The RAG Workflow)
Let’s trace a single question through this system to make it crystal clear.
- Setup Phase (One-time per document set):
- You: Click “Upload” on the Streamlit UI (Card 1) and select
Chapter_5_Economics.pdf. - Orchestrator (Card 2): Receives the PDF. It uses
PyPDF2to extract all the text. It then breaks this text into small, overlapping chunks (e.g., 500 characters each). - Orchestrator (Card 2): For each chunk, it asks the Google AI model (specifically, an embedding model) to turn it into a vector (a list of numbers representing its meaning).
- Orchestrator (Card 2): It hands these vectors and their corresponding text chunks to ChromaDB (Card 3), which stores them efficiently. Your study buddy has now “read” and “understood” your chapter.
- You: Click “Upload” on the Streamlit UI (Card 1) and select
- Query Phase (Happens every time you ask a question):
- You: Type into the Streamlit chat box (Card 1): “Explain the concept of ‘elasticity’ as mentioned in this chapter.”
- Orchestrator (Card 2): Receives the question. It first sends the question to the Google AI embedding model to get its vector representation (its “meaning”).
- Orchestrator (Card 2): It takes this question vector and queries ChromaDB (Card 3), asking, “Find me the top 3 text chunks that are most similar to this vector.”
- ChromaDB (Card 3): Performs a similarity search and returns the 3 chunks from
Chapter_5_Economics.pdfthat are most relevant to “elasticity.” - Orchestrator (Card 2): Now it constructs a detailed prompt for the main Gemini LLM (Card 4). This prompt looks something like this:
“You are a helpful study assistant. Based on the following context, answer the user’s question.
Context:
[Text of chunk 1 about elasticity…]
[Text of chunk 2 about price elasticity of demand…]
[Text of chunk 3 with an example of elasticity…]User’s Question: Explain the concept of ‘elasticity’ as mentioned in this chapter.”
- Gemini LLM (Card 4): Reads this entire prompt, synthesizes the information from the provided context, and generates a clear, concise answer.
- Orchestrator (Card 2): Receives the final answer and displays it back to you in the Streamlit UI (Card 1).
This architecture is beautiful because it’s modular. The LLM (Card 4) doesn’t need to be retrained. The Vector Store (Card 3) can be swapped out. The UI (Card 1) can be redesigned. But the logical flow of RAG remains the same. This is the robust, practical architecture that powers so many of the generative AI applications you see in 2026.
Hands-on Code & Practical Implementation
Setting the Stage: API Keys and File Structure
Alright, it’s time to bring our blueprint to life. This is where the magic happens. First, we need to handle our secret API key. We never want to paste keys directly into our code.
1. Get Your Google AI API Key
Google provides access to its powerful Gemini models through the Google AI for Developers platform. As of 2026, getting a free-tier key for development is straightforward.
- Navigate to the Google AI for Developers website.
- Sign in with your Google account and navigate to the “API key” section.
- Generate a new API key. It will be a long string of random characters.
- Copy this key. Keep it secret, keep it safe!
2. Create Your Project Files
In your ai-study-buddy folder in VS Code, create two new files:
.env: This file will store our secret key. The leading dot makes it a hidden file in some systems.
Content for .env:
GOOGLE_API_KEY="PASTE_YOUR_API_KEY_HERE"app.py: This will be our main Python script, the Orchestrator from our blueprint.
Your folder structure should now look like this:
├── .venv/
├── .env
├── app.py
└── requirements.txt
The Complete Code: app.py
Below is the complete, fully-commented code for our AI Study Buddy. We will paste this into our app.py file. I’ll break down what each section does right after. This code is designed to be production-ready for a personal project, combining clarity and functionality.
python
# Author: Zara Shah, for Shahrukh Khalid | Technology News & Insights
import streamlit as st
import google.generativeai as genai
import os
import PyPDF2 as pdf
from dotenv import load_dotenv
import chromadb
# Load environment variables from .env file
load_dotenv()
# Configure the Google AI API key
genai.configure(api_key=os.getenv(“GOOGLE_API_KEY”))
# — CORE FUNCTIONS —
def get_gemini_response(input_text, pdf_context, prompt):
“””
Generates a response from the Gemini model based on input, context, and a prompt.
“””
model = genai.GenerativeModel(‘gemini-pro’)
# The final prompt combines the user’s question, the retrieved context, and the instructional prompt
final_prompt = prompt.format(input=input_text, context=pdf_context)
response = model.generate_content(final_prompt)
return response.text
def get_text_from_pdf(uploaded_files):
“””
Extracts text from a list of uploaded PDF files.
“””
text = “”
for file in uploaded_files:
# PyPDF2 needs a file-like object
reader = pdf.PdfReader(file)
for page in reader.pages:
text += page.extract_text()
return text
def chunk_text(text, chunk_size=1000, chunk_overlap=200):
“””
Splits a long text into smaller, overlapping chunks.
“””
if not text:
return []
chunks = []
start = 0
while start < len(text):
end = start + chunk_size
chunks.append(text[start:end])
start += chunk_size – chunk_overlap
return chunks
def create_and_store_embeddings(chunks):
"""
Takes text chunks, creates embeddings, and stores them in ChromaDB.
Returns the ChromaDB collection object.