Your 2026 Zero Trust Playbook: Hardening Apps & Databases, Step-by-Step
Key Takeaways
- Project Architecture & What We Are Building
- Prerequisites, Tooling & Environment Verification
- Phase 1: Project Initialization & Baseline Setup
- Phase 2: Core Implementation & Step-by-Step Build
The digital landscape of 2026 demands a fundamental shift in how we approach security. The traditional perimeter defense has long been obsolete, leaving organizations vulnerable to sophisticated threats that operate inside the network. This is where Zero Trust hardening becomes not just a best practice, but an absolute imperative. As we navigate an increasingly complex world of distributed systems, ephemeral workloads, and ubiquitous data, adopting a robust Zero Trust architecture is the only sustainable path to protecting our applications and databases. This guide will walk you through building a practical Zero Trust playbook for 2026, focusing on concrete steps to fortify your critical assets.
Project Architecture & What We Are Building
When we talk about Zero Trust, we’re fundamentally shifting from a world where we assume everything inside our network is safe to a world where we assume nothing is inherently trustworthy, regardless of its location. It’s the “never trust, always verify” mantra applied rigorously to every interaction, every user, every device, and every application. For 2026, this means moving beyond simple network segmentation to granular, identity-centric controls that protect every layer of your application stack. Our goal today is to build a tangible, hands-on example of a modern application architecture, then systematically apply Zero Trust hardening principles to it. This isn’t just about theory; it’s about getting your hands dirty with real configurations that you can adapt for your production environments.
We’ll construct a simplified, yet representative, microservice-style application. Imagine a backend service that processes user requests and persists data to a database. To interact with this service, clients will go through an API Gateway. This common pattern provides us with excellent points of control to implement our Zero Trust principles.
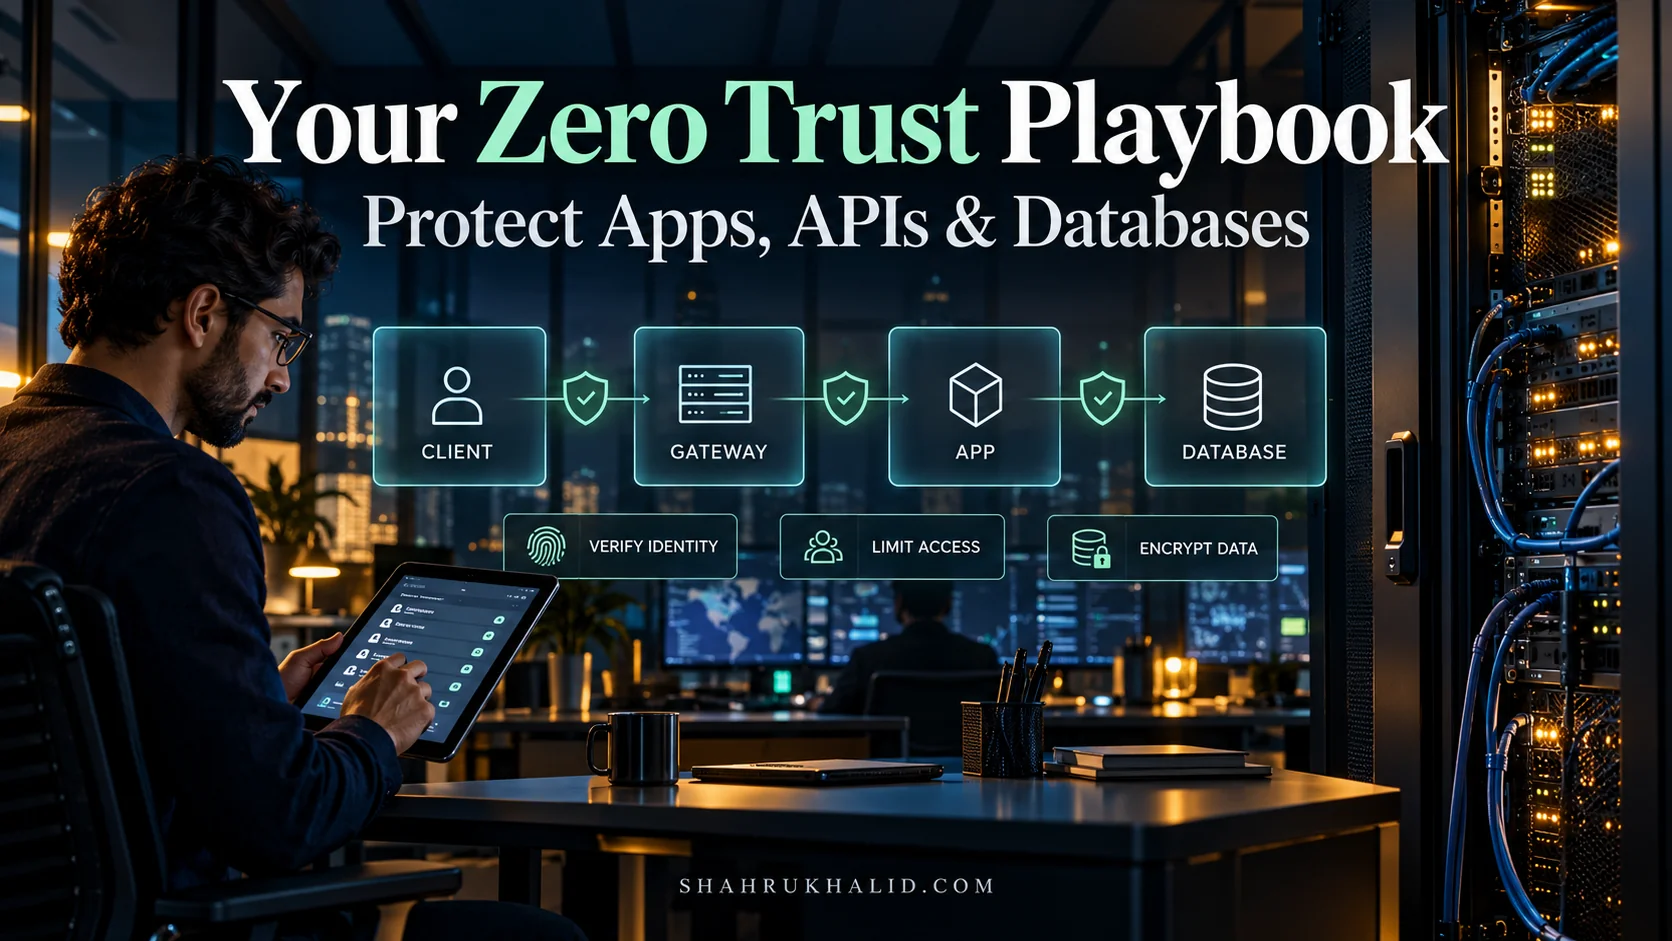
Here’s a conceptual overview of the architecture we’ll be building:
- Client Application/User: This is the entity initiating requests. It could be a web browser, a mobile app, or another backend service.
- API Gateway (Nginx): This acts as the entry point to our backend services. It’s responsible for routing, load balancing, and crucially, enforcing initial security policies like Mutual TLS (mTLS) and potentially rate limiting. In a Zero Trust architecture, the gateway is a critical policy enforcement point, ensuring that only authenticated and authorized requests even reach our internal services.
- Backend Application (Node.js/Express): This is our core business logic service. It will receive requests from the API Gateway, process them, and interact with the database. For Zero Trust, this service itself needs to be hardened, ensuring it only accepts requests from trusted sources (our gateway), and only makes trusted connections to its downstream dependencies (our database).
- Database (PostgreSQL): This is where our critical data resides. It’s the ultimate target for many attacks, so applying database security best practices under Zero Trust is paramount. This means least privilege access, encrypted connections, and robust authentication.
The expected outcomes of this hands-on exercise are multifold:
- Understanding Zero Trust Architecture: You’ll gain a clear mental model of how Zero Trust principles translate into practical architectural decisions. We’ll break down the “why” behind each hardening step.
- Application Security Hardening: You will learn to configure an API Gateway and a backend application to enforce strong identity and access controls, including mTLS. This is a crucial step in preventing unauthorized access to your services, even if an attacker manages to breach an outer layer.
- Database Security Best Practices: We’ll implement secure connections, restrict user privileges, and explore data protection strategies for your PostgreSQL instance, ensuring that your most sensitive data is shielded from compromise.
- Microsegmentation Security: By leveraging Docker’s networking capabilities, we’ll demonstrate how to isolate services from each other, limiting the blast radius of any potential breach. This fine-grained segmentation is a cornerstone of Zero Trust implementation, preventing lateral movement within your infrastructure.
- Practical Implementation Skills: Beyond theory, you’ll gain hands-on experience with tools like Docker, OpenSSL, Nginx, and Node.js, configuring them for a Zero Trust environment. This foundational clarity will enable you to adapt these principles to more complex real-world production systems.
Think of it like this: instead of a single, thick castle wall around your entire kingdom, Zero Trust builds individual, fortified guard posts around every single valuable asset within your kingdom. Each guard post (our API Gateway, our Node.js app, our PostgreSQL database) has its own strict rules of engagement, verifying every request and every interaction, no matter where it originates. This dramatically reduces the attack surface and enhances your overall data protection strategies. By 2026, this level of granular control and continuous verification will be non-negotiable for any organization serious about cybersecurity.
Prerequisites, Tooling & Environment Verification
Before we dive into the exciting part of building and hardening our Zero Trust application, we need to ensure our development environment is properly set up. Think of this as preparing your workshop – having the right tools, calibrated and ready to go, is half the battle. We’ll be using a set of widely adopted, robust tools that are essential for modern application development and security.
Our primary tools for this playbook will be:
- Docker: This is a platform that allows us to package applications and their dependencies into standardized units called containers. Containers ensure that our application runs consistently across different environments, from your local machine to production servers. For our Zero Trust hardening, Docker will be instrumental in achieving microsegmentation by allowing us to define isolated networks for our services.
- Docker Compose: This tool helps us define and run multi-container Docker applications. Instead of running each service (our API Gateway, Node.js app, database) individually with complex commands, Docker Compose lets us describe our entire application stack in a single YAML file. It simplifies the orchestration of our services, making our setup reproducible and manageable.
- OpenSSL: This is a powerful, open-source command-line tool and library for cryptographic functions. We’ll use OpenSSL extensively to generate the digital certificates and private keys necessary for implementing Mutual TLS (mTLS). mTLS is a cornerstone of Zero Trust, ensuring that both the client and server verify each other’s identity before establishing a secure connection.
- `curl`: A versatile command-line tool for making HTTP requests. We’ll use `curl` to test our application’s endpoints, especially to verify that our mTLS configurations are working correctly and that unauthorized requests are rejected. It’s our primary instrument for end-to-end validation.
- `jq`: A lightweight and flexible command-line JSON processor. When our application returns JSON responses, `jq` will help us parse and extract specific data, making our testing and verification steps much cleaner and more efficient.
Now, let’s verify that you have these tools installed and are running the correct versions. It’s crucial for consistency and to avoid unexpected issues.
First, ensure you have Docker Desktop (which includes Docker Engine and Docker Compose) installed. You can download it from the official Docker website. Once installed, open your terminal or command prompt and run the following commands to verify the installations:
# Verify Docker Engine
docker --version

# Expected output (version numbers may vary, but should be recent, e.g., 24.0.x or higher)
# Docker version 24.0.7, build afdd53b

# Verify Docker Compose
docker compose version

# Expected output (version numbers may vary, but should be recent, e.g., 2.20.x or higher)
# Docker Compose version v2.23.3-desktop.2
If you encounter any errors or significantly older versions, please refer to the official Docker documentation for installation and update instructions. A working Docker environment is absolutely foundational for this playbook.
Next, let’s check for OpenSSL. This is often pre-installed on Linux and macOS systems. For Windows, you might need to install it separately (e.g., via Chocolatey or by downloading binaries from the official OpenSSL website).
# Verify OpenSSL
openssl version

# Expected output (version numbers may vary, e.g., 3.0.x or higher)
# OpenSSL 3.0.12 24 Oct 2023 (Library: OpenSSL 3.0.12 24 Oct 2023)
If OpenSSL is not found, please install it for your operating system. We’ll be using it extensively for certificate generation, which is a core component of our Zero Trust hardening strategy.
Finally, let’s verify `curl` and `jq`. `curl` is almost universally available, but `jq` might need a separate installation, especially on Windows.
# Verify curl
curl --version

# Expected output (version numbers may vary)
# curl 8.4.0 (x86_64-pc-linux-gnu) libcurl/8.4.0 OpenSSL/3.0.12 zlib/1.2.13 brotli/1.1.0 zstd/1.5.5 libidn2/2.3.4 libpsl/0.21.2 (+libidn2/2.3.4) libssh2/1.11.0 nghttp2/1.55.1 librtmp/2.3
# Release-Date: 2023-10-11
# ...

# Verify jq
jq --version

# Expected output (version numbers may vary)
# jq-1.6
If `jq` is missing, you can typically install it via your system’s package manager (e.g., `sudo apt-get install jq` on Debian/Ubuntu, `brew install jq` on macOS, or `choco install jq` on Windows).
Environment Setup: Directory Layout
To keep our project organized, let’s create a dedicated directory structure. This makes it easy to follow along and manage our configuration files, certificates, and application code.
mkdir zero-trust-playbook
cd zero-trust-playbook
# Create directories for our services and certificates
mkdir -p app/src
mkdir -p nginx/conf
mkdir -p certs
mkdir -p db/data
# Verify the structure
tree . # (If 'tree' command is not available, 'ls -R' will work)
# Expected output:
# .
# ├── app
# │ └── src
# ├── certs
# ├── db
# │ └── data
# └── nginx
# └── conf
This structure clearly separates our application code (`app/src`), Nginx configurations (`nginx/conf`), all generated certificates (`certs`), and our database persistent data (`db/data`). This organization is a small but important step towards a clean, production-grade Zero Trust implementation, making future maintenance and auditing much simpler. With our tools verified and our project structure in place, we’re now ready to start building our Zero Trust architecture from the ground up.
Phase 1: Project Initialization & Baseline Setup
Now that our environment is ready, let’s lay the foundation for our application. In this phase, we’ll get our core services – the Node.js backend application and the PostgreSQL database – up and running in Docker containers, orchestrated by Docker Compose. We’ll start with a basic, unhardened setup, which serves as our baseline. This allows us to understand how the components interact before we introduce the complexities of Zero Trust hardening. Our goal here is to establish a functional, albeit insecure, application that we can then systematically secure in the subsequent phases.
First, let’s create the necessary files for our Node.js application.
1. Create the Node.js Application
Inside the `app/src` directory, create a file named `server.js` with the following content. This is a very simple Express.js application that connects to a PostgreSQL database and exposes a single endpoint.
const express = require('express');
const { Pool } = require('pg');
const app = express();
const port = 3000;
// Database connection pool setup
// We're getting these from environment variables, a good practice for configuration.
const pool = new Pool({
user: process.env.DB_USER,
host: process.env.DB_HOST,
database: process.env.DB_NAME,
password: process.env.DB_PASSWORD,
port: process.env.DB_PORT,
});
// Test database connection on startup
pool.connect((err, client, release) => {
if (err) {
return console.error('Error acquiring client', err.stack);
}
client.query('SELECT NOW()', (err, result) => {
release(); // Release the client back to the pool
if (err) {
return console.error('Error executing query', err.stack);
}
console.log('Database connection successful at:', result.rows[0].now);
});
});
app.get('/', (req, res) => {
res.send('Hello from the unhardened Node.js backend!');
});
app.get('/data', async (req, res) => {
try {
// A simple query to fetch some data from the database
const result = await pool.query('SELECT id, name FROM users ORDER BY id ASC');
res.json(result.rows);
} catch (err) {
console.error('Error fetching data:', err.stack);
res.status(500).send('Error fetching data');
}
});
app.listen(port, () => {
console.log(`Node.js app listening at http://localhost:${port}`);
});
This `server.js` file sets up a basic Express server. It attempts to connect to a PostgreSQL database using credentials and host information pulled from environment variables (`process.env.DB_USER`, etc.). This is a standard and recommended practice for managing sensitive configuration in production. The `/` endpoint is a simple health check, and `/data` will eventually fetch data from our database.
Next, we need a `package.json` file to define our application’s dependencies. Create `app/package.json`:
{
"name": "zero-trust-backend",
"version": "1.0.0",
"description": "A simple Node.js backend for Zero Trust playbook",
"main": "src/server.js",
"scripts": {
"start": "node src/server.js"
},
"dependencies": {
"express": "^4.19.2",
"pg": "^8.11.3"
}
}
This file declares `express` (our web framework) and `pg` (the PostgreSQL client library) as dependencies.
Finally, we need a `Dockerfile` to tell Docker how to build an image for our Node.js application. Create `app/Dockerfile`:
# app/Dockerfile
# Use an official Node.js runtime as the base image
FROM node:20-alpine

# Set the working directory inside the container
WORKDIR /app

# Copy package.json and package-lock.json (if exists) to the working directory
# We do this separately to leverage Docker's layer caching.
# If package.json doesn't change, these layers are reused, speeding up builds.
COPY package*.json ./

# Install application dependencies
RUN npm install

# Copy the rest of the application code
COPY src ./src

# Expose the port the app runs on
EXPOSE 3000

# Define the command to run the application
CMD [ "npm", "start" ]
This `Dockerfile` is quite standard: it starts from a Node.js base image, installs dependencies, copies our application code, exposes port 3000, and defines the command to start the server.
2. Create the Database Initialization Script
For our PostgreSQL database, we want to ensure it starts with a basic schema and some initial data. Create `db/init.sql`:
-- db/init.sql
-- Create a table for users
CREATE TABLE IF NOT EXISTS users (
    id SERIAL PRIMARY KEY,
    name VARCHAR(100) NOT NULL,
    email VARCHAR(100) UNIQUE NOT NULL,
    created_at TIMESTAMP WITH TIME ZONE DEFAULT CURRENT_TIMESTAMP
);

-- Insert some sample data if the table is empty
INSERT INTO users (name, email) VALUES
    ('Alice Smith', 'alice@example.com'),
    ('Bob Johnson', 'bob@example.com')
ON CONFLICT (email) DO NOTHING;

-- Create a specific user for our application, with a strong password
-- This user will be used by our Node.js app to connect to the database.
-- In Zero Trust, this is a step towards least privilege.
DO
$$
BEGIN
    IF NOT EXISTS (SELECT FROM pg_catalog.pg_user WHERE usename = 'appuser') THEN
        CREATE USER appuser WITH PASSWORD 'supersecretapppassword';
    END IF;
END
$$;

-- Grant privileges to the appuser on our specific database and table
GRANT CONNECT ON DATABASE mydatabase TO appuser;
GRANT SELECT, INSERT, UPDATE, DELETE ON users TO appuser;
GRANT USAGE, SELECT ON SEQUENCE users_id_seq TO appuser; -- For SERIAL primary key
This SQL script creates a `users` table, inserts some sample data, and crucially, creates a dedicated `appuser` with a strong password and grants it only the necessary permissions (`SELECT`, `INSERT`, `UPDATE`, `DELETE`) on the `users` table within the `mydatabase`. This is a foundational step in database security best practices, adhering to the principle of least privilege – the user only gets what it needs, nothing more.
3. Configure Docker Compose
Now, let’s tie everything together with `docker-compose.yml` in the root `zero-trust-playbook` directory.
# docker-compose.yml
version: '3.8'

services:
  # PostgreSQL Database Service
  db:
    image: postgres:15-alpine
    # Restart the container if it stops for any reason
    restart: always
    environment:
      # Database root user credentials (for initialization)
      POSTGRES_USER: admin
      POSTGRES_PASSWORD: adminpassword
      # The database our app will connect to
      POSTGRES_DB: mydatabase
    ports:
      # Expose port 5432 for direct access (TEMPORARY for baseline, will be restricted)
      - "5432:5432"
    volumes:
      # Persist database data to a named volume
      - db_data:/var/lib/postgresql/data
      # Mount our initialization script to run when the container starts
      - ./db/init.sql:/docker-entrypoint-initdb.d/init.sql
    healthcheck:
      test: ["CMD-SHELL", "pg_isready -U admin -d mydatabase"]
      interval: 5s
      timeout: 5s
      retries: 5

  # Node.js Backend Application Service
  app:
    build: ./app
    restart: always
    environment:
      # Database connection details for the appuser
      DB_USER: appuser
      DB_PASSWORD: supersecretapppassword
      DB_HOST: db # Service name within Docker Compose network
      DB_NAME: mydatabase
      DB_PORT: 5432
    ports:
      # Expose port 3000 for direct access (TEMPORARY for baseline, will be restricted by Nginx)
      - "3000:3000"
    depends_on:
      # Ensure the database is healthy before starting the app
      db:
        condition: service_healthy
    # Connect to the default bridge network (TEMPORARY, will be microsegmented)
    networks:
      - default

volumes:
  # Define the named volume for database persistence
  db_data:

networks:
  # Define the default bridge network explicitly (optional, but good for clarity)
  default:
    driver: bridge
This `docker-compose.yml` defines two services: `db` (PostgreSQL) and `app` (our Node.js backend).
- The `db` service uses the `postgres:15-alpine` image, sets up environment variables for initial database configuration, exposes port 5432 (for now), mounts a persistent volume for data, and crucially, mounts our `init.sql` script to automatically set up the database and `appuser`. A `healthcheck` ensures the database is ready before the app tries to connect.
- The `app` service builds its image from our `app/Dockerfile`, sets environment variables for database connection (using `db` as the hostname, which Docker Compose resolves to the database container’s IP), and exposes port 3000. It `depends_on` the database, ensuring the database is healthy before the app starts.
4. Initial Validation
Now, let’s bring up our baseline services and perform initial validation.
# From the root 'zero-trust-playbook' directory
docker compose up --build -d- `docker compose up`: Starts the services defined in `docker-compose.yml`.
- `–build`: Forces Docker Compose to rebuild the `app` image, ensuring our latest code is included.
- `-d`: Runs the containers in detached mode (in the background).
Wait a few moments for the containers to start and the database to initialize. You can check their status:
docker compose ps

# Expected output (similar to):
# NAME                COMMAND                  SERVICE             STATUS              PORTS
# zero-trust-playbook-app-1     "docker-entrypoint.s…"   app                 running             0.0.0.0:3000->3000/tcp
# zero-trust-playbook-db-1      "docker-entrypoint.s…"   db                  running (healthy)   0.0.0.0:5432->5432/tcp
You should see both `app` and `db` services in a `running` state, with `db` also showing `healthy`.
Now, let’s test our application directly:
# Test the root endpoint
curl http://localhost:3000/

# Expected output:
# Hello from the unhardened Node.js backend!

# Test the data endpoint
curl http://localhost:3000/data | jq .

# Expected output (assuming database initialized correctly):
# [
#   {
#     "id": 1,
#     "name": "Alice Smith"
#   },
#   {
#     "id": 2,
#     "name": "Bob Johnson"
#   }
# ]
Congratulations! You now have a fully functional, albeit insecure, application stack running. This serves as our baseline. In the next phases, we will systematically apply Zero Trust hardening techniques, transforming this basic setup into a robust, secure system ready for your 2026 playbook. This initial phase provides the foundational clarity and working implementation we need to start implementing advanced security controls.
Phase 2: Core Implementation & Step-by-Step Build
With our baseline application running, it’s time to roll up our sleeves and implement the core Zero Trust hardening measures. This phase is about introducing identity, microsegmentation, and secure communication channels. We’ll focus on Mutual TLS (mTLS) between our API Gateway and the backend application, enforcing least privilege for database access, and isolating our services using Docker networks. This is where we truly begin to build a Zero Trust architecture, moving from “trust implicitly” to “verify explicitly.”
**1.